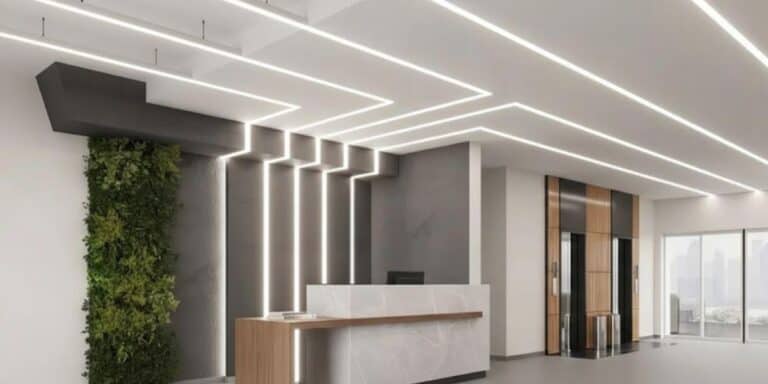
LED-Drei-Proof-Leuchten - auch bekannt als wasserdichte LED-Leuchten, dampfdichte Lichter, staubdichte LED-Leuchten oder Lattenlicht - werden in anspruchsvollen Umgebungen wie Fabriken, Lagerhäusern, Parkhäusern und U-Bahn-Stationen weit verbreitet. Ihr Name „tri-proof“ bezieht sich auf Schutz vor Wasser, Staub und Korrosion und ist damit eine zuverlässige Wahl für Industrie- und Gewerbebeleuchtung. Selbst die langlebigste Fixture kann jedoch fehlschlagen, wenn sie nicht richtig installiert ist. Unsachgemäße Montage, lose Verkabelung oder schlechte wasserdichte Abdichtung können zu Sicherheitsrisiken, geringerer Lichteffizienz und kostspieliger Wartung führen. Deshalb ist es entscheidend, einer klaren LED-Tri-Proof-Licht-Installationsanleitung zu folgen. In diesem Artikel werden wir Schritt-für-Schritt-Anleitungen und Tipps zur Fehlerbehebung durchgehen, die Ihnen helfen, ein sicheres, langlebiges und energieeffizientes Beleuchtungssystem zu erreichen.

Vorbereitung vor der Installation
1. Umweltprüfung
Vor der Installation einer LED-Tri-Proof-Licht, die Umgebung sorgfältig prüfen. Stellen Sie sicher, dass die Oberfläche stabil, trocken und frei von übermäßigem Staub oder Öl ist. Überprüfen Sie die Feuchtigkeit und die Temperatur, um zu bestätigen, dass sie den Spezifikationen der Leuchte entsprechen, was dazu beiträgt, die wasserdichte und staubdichte Leistung aufrechtzuerhalten.
2. Material und Werkzeuge Vorbereitung
Sammeln Sie alle erforderlichen Gegenstände, bevor Sie beginnen. Dazu gehören die LED-Drei-Proof-Leuchte, Befestigungswinkel, Schrauben, wasserdichte Steckverbinder und Endkappen. Wesentliche Werkzeuge sind häufig ein Bohrer, Schraubendreher, Zange und Isolierband. Alles bereit zu haben, sorgt für einen reibungslosen und effizienten Installationsprozess.

3. Sicherheitsvorkehrungen
Schalten Sie immer die Hauptstromversorgung ab, bevor Sie die Verkabelung verkabeln. Verwenden Sie isolierte Werkzeuge und tragen Sie Schutzhandschuhe, um Unfälle zu vermeiden. Überprüfen Sie, ob alle elektrischen Anschlüsse den lokalen Normen entsprechen. Die Priorisierung der Sicherheit in der Vorbereitungsphase garantiert eine zuverlässige und langlebige LED-Tri-Proof-Lichtinstallation.
Schritt-für-Schritt-Montagemethoden
Aufputzmontage
- Messen Sie die Länge des LED-Tri-Proof-Lichts und markieren Sie die Bohrpositionen an der Decke oder Wand.
- Bohren Sie die Löcher an den markierten Punkten und stellen Sie sicher, dass die Tiefe mit den Expansionsstopfen übereinstimmt.
- Stecken Sie die Dehnstopfen in die Bohrungen.
- Befestigen Sie die Metallbefestigungshalterungen mit Schrauben und ziehen Sie sie fest, um Bewegungen zu vermeiden.
- Richten Sie die Leuchte an den installierten Halterungen aus.
- Drücken Sie die Befestigungsvorrichtung vorsichtig in die Halterungen, bis sie sicher einrastet.
- Schließen Sie das wasserdichte Netzkabel gemäß dem Schaltplan an.
- Überprüfen Sie die Stabilität und Ausrichtung erneut, bevor Sie zum nächsten Schritt übergehen.
Angehaltene Installation
- Markieren Sie zwei Aufhängepunkte an der Decke, um sicherzustellen, dass sie der Länge der Leuchte entsprechen.
- Bohren Sie Löcher und setzen Sie die Dehnstopfen an den markierten Stellen ein.
- Die Aufhängehaken einschrauben oder Stahldrahtanker fest einbauen.
- Passen Sie die Länge der Hängeketten oder Stahlseile an die gewünschte Einbauhöhe an.
- Befestigen Sie beide Enden des Aufhängungssets an den Befestigungsclips der Befestigung.
- Sichern Sie das Licht, um ein Schwanken oder ein ungleichmäßiges Gleichgewicht zu verhindern.
- Testen Sie die Stabilität, indem Sie die Befestigung vor dem Einschalten vorsichtig ziehen.
- Verbinden Sie die wasserdichte Verkabelung sorgfältig und stellen Sie sicher, dass die Dichtungsringe richtig festgezogen sind.

Tipps zur Installation
Halten Sie die Leuchte während der Installation, um eine gleichmäßige Beleuchtung zu gewährleisten.
Vermeiden Sie zu fest anziehende Schrauben oder Halterungen, um eine Beschädigung des Gehäuses zu vermeiden.
Stellen Sie die Armaturen nicht direkt unter starken Wasserstrahlen, wenn sie nicht mit IP66 oder höher bewertet wurden.
Vergewissern Sie sich immer, dass alle Stecker und Dichtungen vollständig verriegelt sind, um den wasserdichten Schutz zu gewährleisten.
| Installationstyp | Schlüsselschritte | Typische Anwendung |
| stumpf | Bohren → Halterungen fixieren → Licht einrasten → Verdrahtung anschließen | Parkhäuser, Flure |
| ausgesetzt | Bohren → Haken einbauen → Ketten einstellen → Befestigung aufhängen → Verdrahtung anschließen | Lager, Fabriken, Hallen |
Verdrahtung & wasserdichte Anschlüsse
Verdrahtungsmethoden
Bei der Installation einer LED-Tri-Proof-Leuchte kann die Verkabelung je nach Projektanforderungen über einen Single-End-Eingang oder einen Doppel-End-Eingang erfolgen. Der Single-End-Eingang ist in kleineren Installationen üblich, während der Doppel-End-Eingang für längere Läufe oder Anschlüsse von Daisy-Chain geeignet ist. Überprüfen Sie immer die Spannungsversorgung der Leuchte, ob AC220V, AC277V oder höhere Industriestandards wie AC347V oder AC480V, um nicht übereinstimmende Probleme mit der Stromversorgung zu vermeiden.
Wasserdichte Verbindungen
Ein Schlüsselfaktor für die Aufrechterhaltung von IP65- oder IP66-Schutzen liegt in den Anschlüssen. Verwenden Sie hochwertige wasserdichte Kabelverschraubungen und stellen Sie sicher, dass die Dichtringe richtig angezogen werden. Das Anbringen von Isolierband oder Silikonring um schutzbedürftige Bereiche kann einen sekundären Schutz bieten. Eine ordnungsgemäße Erdung ist ebenfalls erforderlich, um die elektrische Sicherheit und Stabilität zu gewährleisten.
Gemeinsame Verdrahtungsprobleme
Lose Verbindungen sind die häufigste Ursache für Ausfälle wie Flackern, Kurzschlüsse oder sogar Wassereintritt. Um diese Probleme zu vermeiden, überprüfen Sie immer, ob die Drähte auf die richtige Länge abisoliert, vollständig eingesetzt und sicher befestigt werden. Die besondere Sorgfalt in dieser Phase garantiert eine zuverlässige und langlebige LED-Tri-Proof-Lichtinstallation.

Prüfen und Testen & Fehlerbehebung
Überprüfung
Führen Sie vor dem Einschalten eine sorgfältige Inspektion durch, um eine sichere Installation zu gewährleisten. Stellen Sie sicher, dass alle elektrischen Kabel fest angeschlossen sind und dass die Isolierung ordnungsgemäß angelegt ist, um Kurzschlüsse zu vermeiden. Prüfen Sie, ob die LED-Tri-Proof-Leuchte fest an Halterungen oder Aufhängungssätzen ohne lose Befestigungen befestigt ist. Bei hängenden Installationen überprüfen, ob die Aufhängehöhe gleichmäßig ist, um eine gleichmäßige Beleuchtung zu erhalten. Stellen Sie schließlich sicher, dass die Abdeckung des PC-Diffusors vollständig einrastet, um eine wasserdichte und staubdichte Leistung zu gewährleisten.
Prüfung
Schalten Sie nach der Inspektion die Stromversorgung ein, um die Vorrichtung zu testen. Bestätigen Sie, dass das LED-Tri-Proof-Licht sofort einschaltet und eine gleichbleibende Helligkeit liefert. Achten Sie genau auf Flackern, Dimmen oder ungewöhnliche Geräusche des Fahrers. Dieser Schritt stellt sicher, dass sowohl elektrische als auch mechanische Verbindungen korrekt sind, bevor die Leuchten in den täglichen Gebrauch gebracht werden.
Fehlerbehebung
Wenn während des Tests Probleme auftreten, sollten Sie die folgenden häufigen Fälle beachten:
Licht nicht einschalten → Prüfen Sie, ob die Verkabelung richtig angeschlossen ist oder ob die Stromversorgung defekt ist.
Flackern Problem → Überprüfen Sie, ob der Fahrer keinen Kontakt zur LED-Platine hat, oder bestätigen Sie, dass die Ausgangsspannung des Fahrers den Anforderungen des LED-Moduls entspricht.
Kondenswasser oder Feuchtigkeit innen → Stellen Sie sicher, dass die Diffusorabdeckung fest verriegelt ist und dass die Kabeleinführung vollständig mit wasserdichten Steckern verschlossen ist.
Durch die ordnungsgemäße Überprüfung, Prüfung und Fehlerbehebung wird die Sicherheit und Lebensdauer Ihrer LED-Tri-Proof-Lichtinstallation maximiert.


Abschluss
Richtige Installation, sorgfältige Verkabelung und gründliche Prüfung sind die Schlüssel, um sicherzustellen, dass LED-Dreifachsleuchten in anspruchsvollen Umgebungen zuverlässige Leistung bieten. Durch die Befolgung der empfohlenen Schritte und das Anwenden von Methoden zur Fehlerbehebung können Benutzer häufige Probleme wie Flackern, Stromausfall oder Wassereintritt vermeiden. Ein gut installiertes System erhöht nicht nur die Sicherheit, sondern reduziert auch die langfristigen Wartungskosten.
Bei Signlited wird jedes von uns produzierte tri-sichere Licht strengen Inspektionen und Tests unterzogen, um sicherzustellen, dass keine Stromausfälle oder Wasserdichtigkeitsprobleme auftreten. Unsere Produkte sind auf Flexibilität ausgelegt – sie unterstützen Daisy-Chain-Anschlüsse für Großprojekte und können auch mit Notstromversorgungslösungen für zusätzliche Sicherheit kombiniert werden. Ob Sie langlebige Einrichtungen für Fabriken, Lagerhäuser oder Parkhäuser benötigen, Signlited bietet professionelle, zuverlässige und anpassbare LED-TRIP-Proof-Beleuchtung, die Ihren Projektanforderungen gerecht wird. Wenn Sie Ihre private Tri-Proof-Leuchte haben, können Sie sich auch individuell anpassen LED-Linearmodul Kontaktieren Sie uns noch heute für die Massenversorgung und den maßgeschneiderten technischen Support.
Verwandte Artikel