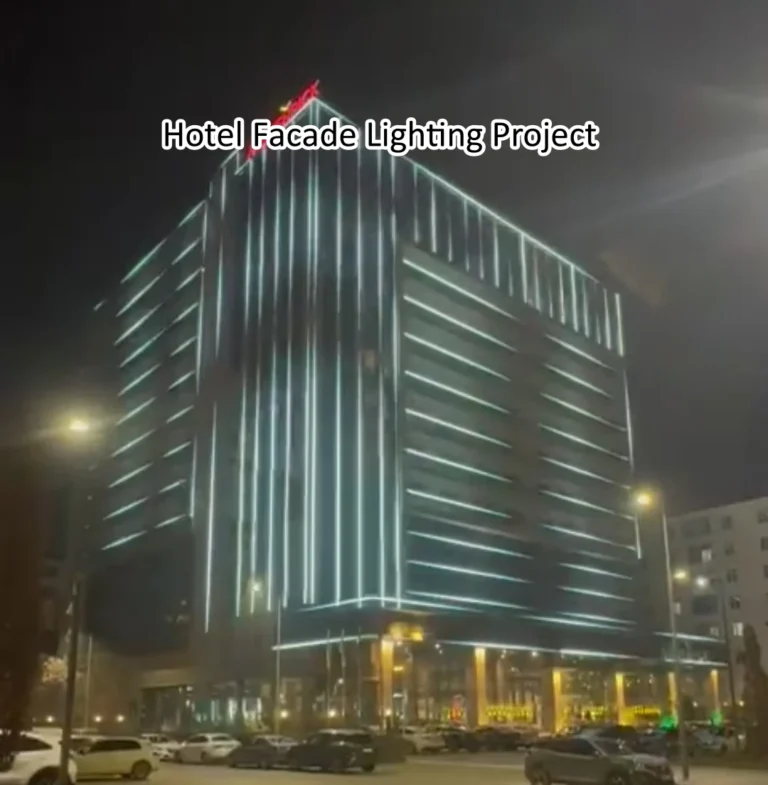
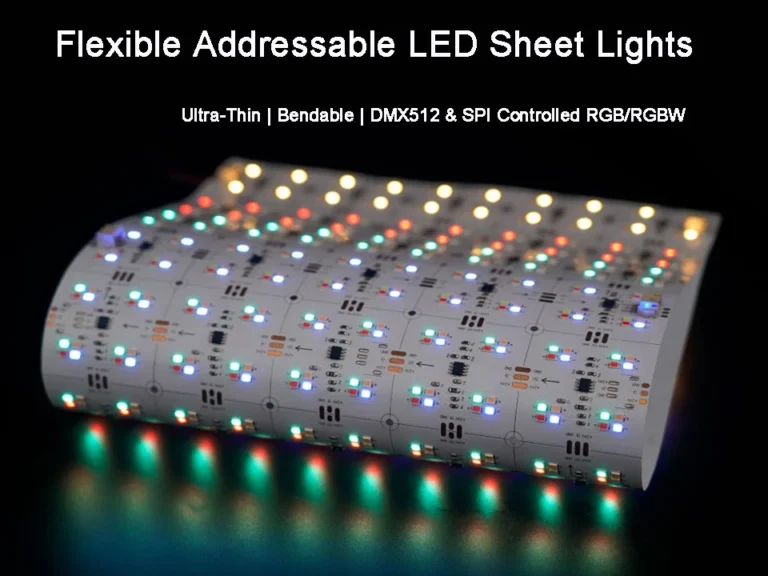
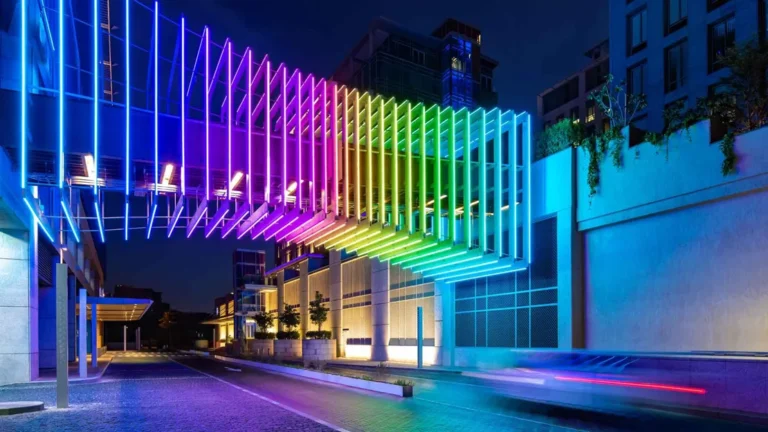
近年、柔軟な DMX512 ネオン LED ストリップは、創造的な建築およびファサード照明の基礎となっています。 従来の LED ストリップとは異なり、これらの製品は、シリコン ネオン ハウジングの柔軟性と DMX512 デジタル制御の精度を組み合わせ、ピクセル レベルの動的効果、滑らかな勾配、無限の設計の可能性を実現します。 ただし、この洗練された機能により、設置と試運転がより要求が厳しくなります。 配線やアドレス指定中に小さなミスが発生すると、信号の損失、色の歪み、または同期化されない効果が生じる可能性があります。
このガイドは、DMX512 ネオン LED ストリップ プロジェクトを実施する請負業者および照明専門家向けの、準備から最終的な受諾までの包括的なロードマップを提供します。
インストール前の準備: 「ビルドする前に計画を立てる」
DMX512 照明プロジェクトは、最初のストリップが取り付けられるずっと前から始まります。
デザイン図面をよく理解する
サイトに入る前に、照明デザイン、配線図、アニメーションのプレビューを確認してください。 ストリップのグループ化、コントローラーの位置、配電点を特定します。 このメンタル「マップ」により、現場での作業は予測可能で効率的になります。

材料検査は重要です
LED ストリップ: モデル、長さ、仕様を設計に照らして検証します。 テスト セグメントを常にカットしてオンサイトでパワーアップして、ピクセルの死、色の一貫性、明るさをチェックします。 欠陥を早期に検出することで、費用のかかる再作業を防ぎます。
電源: 容量を慎重に計算してください。 推奨ルールは次のとおりです。総ストリップ パワー 1.5 × 合計 PSU 容量。 この安全マージンにより、長期安定性が保証されます。
付属品: クリップ、エンド キャップ、防水接着剤、コネクタ、信号ケーブルは完全である必要があります。 アクセサリが欠落しているため、インストールが遅れ、信頼性
インストール: 「詳細が結果を定義する」
柔軟なネオン ストリップは耐久性がありますが、不適切な取り付けにより、寿命が短くなる可能性があります。
表面処理
設置面をアルコールできれいにし、完全に乾かしてから接着剤の裏地を塗ります。 屋外または天井のプロジェクトでは、接着剤だけでは不十分です。専用のクリップを使用して、固定する二重固定を行います。 時間が経つにつれて、接着剤は熱、ほこり、重力に影響を受けます。
曲げと切断
ストリップは水平に曲げることができますが、垂直方向のねじれや鋭い曲がりは厳しく禁じられています。 最小曲げ半径は通常 5 cm 以上です。
切断は、指定されたはさみマーク ポイントでのみ行う必要があります。 他の場所でカットすると、セグメント全体が使用できなくなります。


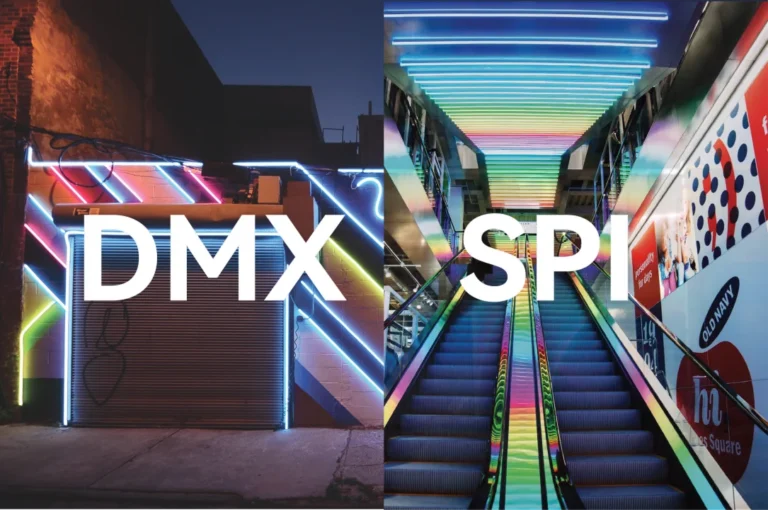
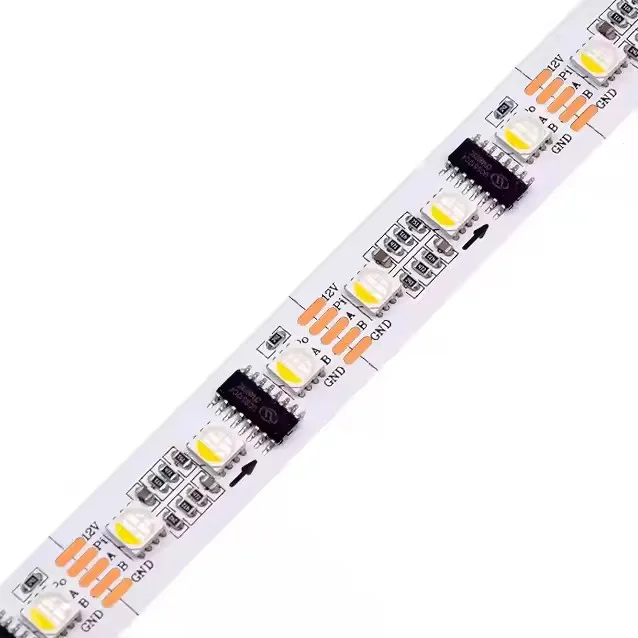
電源および信号配線: 「DMX512 システムのコア」
DMX512 ネオン ストリップは、従来のストリップよりも配線品質に敏感です。
電源戦略
マルチポイントの電力注入アプローチを採用します。 長時間の実行では、一方の端だけから電源を入れると、電圧降下により明るさが低下し、遠端で色がシフトします。 代わりに、PSU から直接 10 ~ 15 メートルごとに電源を注入します。
信号配線規格
常に 120 Ω インピーダンスのシールド付きツイストペア DMX ケーブルを使用してください。 ネットワーク ケーブルは適していません。シールドと適切なインピーダンスがなく、干渉しやすいです。
DMX 信号ケーブルと高電圧 (220V) の電力線の間で少なくとも 30 cm 間隔を空けてください。 並列ルーティングにより、電磁干渉のリスクが高まり

DMX アドレス指定と終了
アドレス設定: すべてのストリップ セグメントには、一意の開始アドレスが必要です。 次の式に基づいて、DIP スイッチまたはソフトウェア構成を使用します。
開始アドレス = (N – 1) × チャネル数 + 1
終端抵抗: 各 DMX ラインの最後のフィクスチャに 120 Ω の抵抗を取り付けます。 これがないと、反射によってちらつき、信号の不安定性、またはランダムな動作が発生します。 この小さなコンポーネントは、システムの安定性の「ガーディアン」です。
試運転とテスト: 「ビジョンを照らす」
配線が完了すると、慎重に試運転することで、インストールが設計意図に一致するようになります。
電源投入手順
一度にシステム全体にエネルギーを与えることは絶対にしないでください。 代わりに、セグメントごとにテストします。 コントローラと PSU から始めて、徐々にストリップを接続して、各セクションが正しく機能することを確認します。 このアプローチは、問題を迅速に解決します。
ソフトウェア構成
制御ソフトウェア (例: Madrix、Resolume、Arkaos) で、正しいユニバース、出力ポート、およびチャネル マッピング (ストリップ タイプに応じて RGB または RGBW) を設定します。 各セグメントの DMX アドレスがデザインと一致していることを確認します。

効果検証
純粋な静的色 (赤、緑、青、白) を使用して、均一性を確認し、デッド ピクセルを削除します。
同期の問題をチェックするために、チェイス、グラデーション、ストロボなどの動的効果を実行します。 遅延またはジッターは、信号の整合性の問題を示します。
最後に、ライブの結果を元のデザイン アニメーションと比較して、クライアントのビジョンを完全に実現します。
ベスト プラクティスとプロフェッショ
実務経験から、4 つの黄金律は、信頼できる DMX512 ネオンのインストールを要約しています。
十分な電力を供給し、ローカルに給電する – 十分な PSU 容量を使用して、複数のポイントで電力を注入します。
信号の整合性を保護する – シールド付き DMX ケーブルを使用し、終端抵抗を取り付けます。
論理的にアドレスを指定し、整然とテスト – アドレスを慎重に割り当てて確認し、セグメントごとにセグメント化します。
安全に取り付け、要素から保護します。クリップ、防水、および熱管理は、屋外の耐久性に不可欠です。
さらに:
シリコン ハウジングの熱膨張を考慮して、長時間の長さで伸縮継手が常に考慮されます。
インストール中に電源ケーブルと信号ケーブルの両方にラベルを付ける - この小さなステップで、後でのトラブルシューティングにかかる時間を節約できます。
試運転中はすぐに交換できるよう、予備の電源装置とコネクターを現場に保管してください。
結論
柔軟な DMX512 ネオン LED ストリップの魅力は、静的アーキテクチャをダイナミックな光のキャンバスに変換する能力にあります。 しかし、この機能には複雑さが伴います。 照明の専門家は、適切な配電、堅牢な信号配線、慎重なアドレッシング、安全な設置の原則を尊重することで、最も野心的な設計ビジョンに合った完璧な結果をもたらすことができます。
ファサードの照明、テーマのエンターテインメント、または街のランドマークでは、ライトがどれだけ明るく輝くかだけでなく、毎晩のシームレスなパフォーマンスによっても、成功は測定されます。 徹底的な準備、細心の注意を払った実行、および規律あるテストにより、DMX512 ネオン プロジェクトは、潜在的な落とし穴から照明付きの傑作に移行できます。

次のプロジェクトのために SignLiteLED と提携
SignLiteLed では、高品質の DMX512 フレキシブル ネオン ストリップと完全な制御ソリューションを専門としています。 15 年以上の経験、グローバル認定資格、強力なエンジニアリング チームにより、信頼できる製品だけでなく、複雑な設置のための専門技術サポートも提供します。 エンジニアリング請負業者、ディストリビューター、照明デザイナーのいずれであっても、プロジェクトのニーズに合わせたカスタム ソリューションを提供できます。
関連記事