2011年からの看板とLEDストリップ照明工場

2011年からの看板とLEDストリップ照明工場

LED トライプルーフ ライトの取り付けガイド: ステップバイステップ

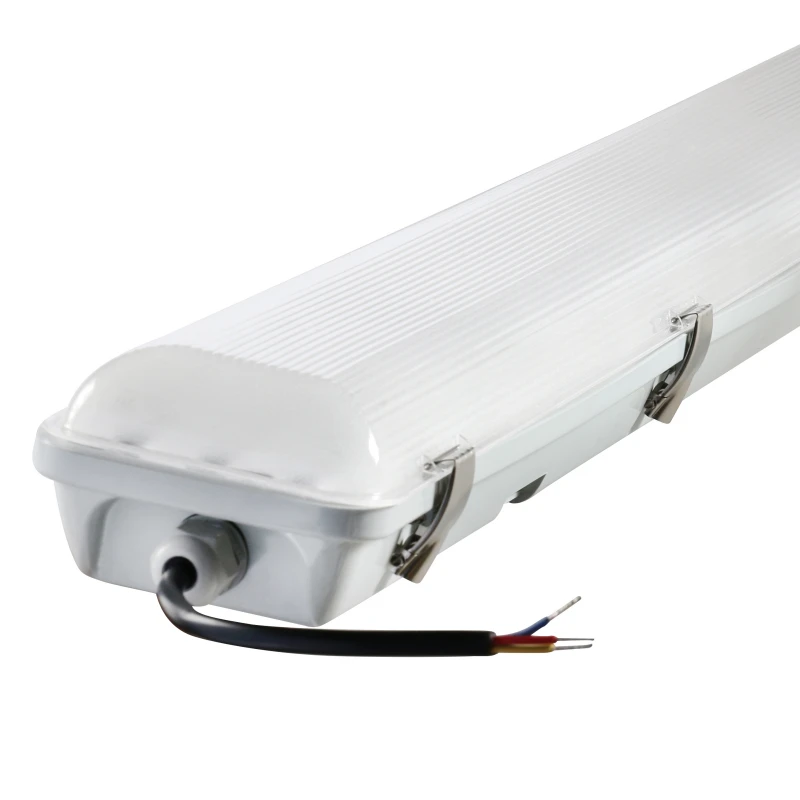
LED Tri-Proof Lights—also known as waterproof LED fixtures, vapor-tight lights, dustproof LED lights, or batten light—are widely used in demanding environments such as factories, warehouses, parking garages, and subway stations. Their name “tri-proof” refers to protection against water, dust, and corrosion, making them a reliable choice for industrial and commercial lighting. However, even the most durable fixture can fail if it is not installed correctly. Improper mounting, loose wiring, or poor waterproof sealing may lead to safety hazards, reduced light efficiency, and costly maintenance. That is why following a clear LED Tri-Proof Light installation guide is crucial. In this article, we will walk through step-by-step installation instructions and troubleshooting tips, helping you achieve a safe, long-lasting, and energy-efficient lighting system.

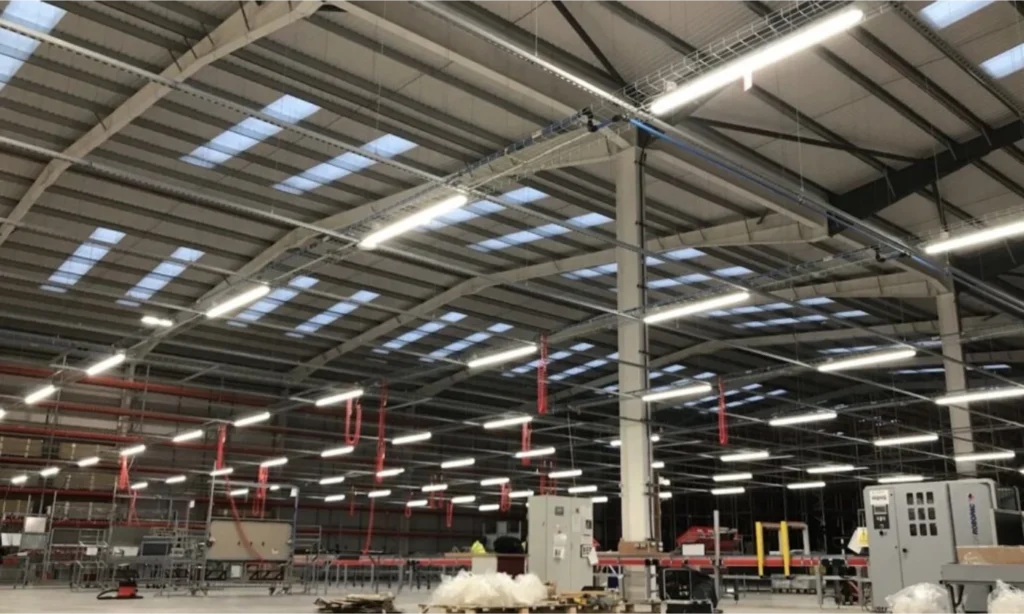
tri proof light workshop

Preparation Before Installation

1. Environment Check

Before installing an LED Tri-Proof Light, carefully inspect the environment. Ensure the surface is stable, dry, and free from excessive dust or oil. Check humidity and temperature levels to confirm they meet the fixture’s specifications, which helps maintain its waterproof and dustproof performance.

2. Materials and Tools Preparation

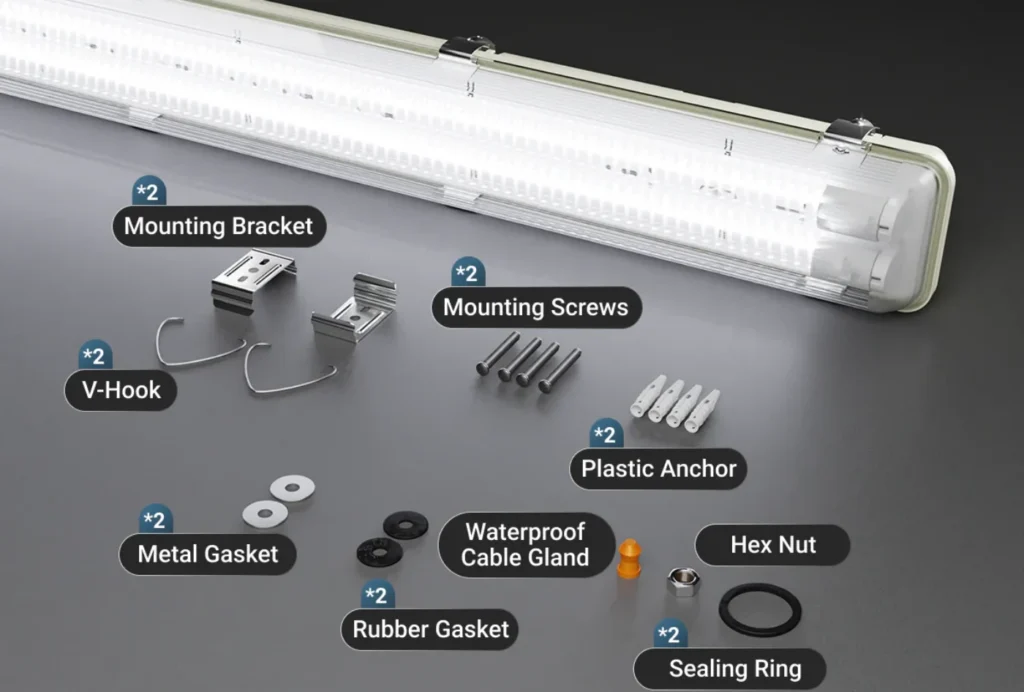
Gather all required items before starting. This includes the LED tri-proof light fixture, mounting brackets, screws, waterproof connectors, and end caps. Essential tools often include a drill, screwdriver, pliers, and insulation tape. Having everything ready ensures a smooth and efficient installation process.

tri proof light components for installation

3.安全上の注意

Always cut off the main power supply before wiring. Use insulated tools and wear protective gloves to prevent accidents. Double-check that all electrical connections comply with local standards. Prioritizing safety at the preparation stage guarantees a reliable and long-lasting LED Tri-Proof Light installation.

Step-by-Step Mounting Methods

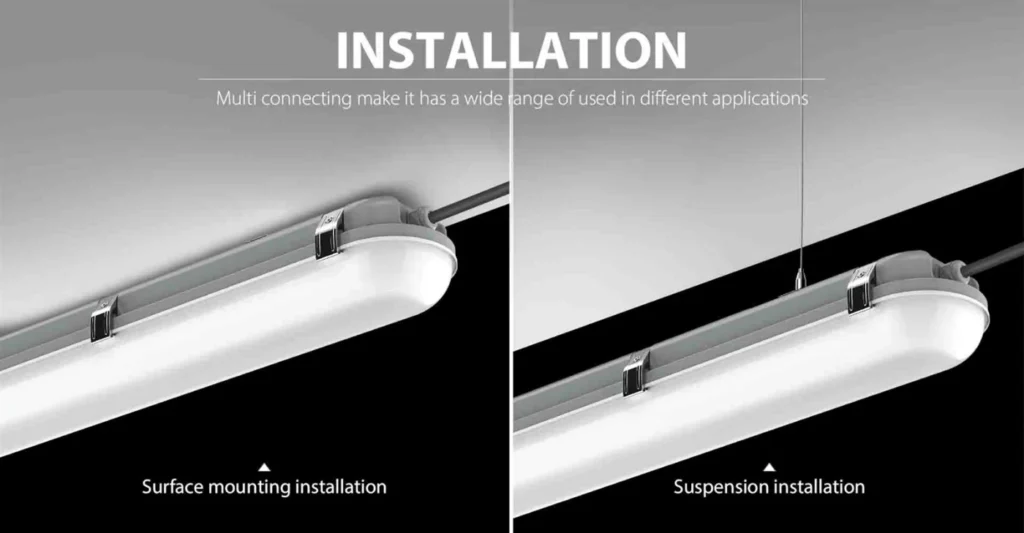
Surface-Mounted Installation

  1. Measure the length of the LED Tri-Proof Light and mark the drilling positions on the ceiling or wall.
  2. Drill the holes at the marked points, making sure the depth matches the expansion plugs.
  3. Insert expansion plugs into the drilled holes.
  4. Fix the metal mounting brackets with screws, tightening them firmly to avoid movement.
  5. Align the light fixture with the installed brackets.
  6. Gently press the fixture into the brackets until it clicks securely in place.
  7. Connect the waterproof power cable according to the wiring diagram.
  8. Recheck the stability and alignment before moving to the next step.

Suspended Installation

  1. Mark two suspension points on the ceiling, ensuring they match the fixture’s length.
  2. Drill holes and insert expansion plugs at the marked positions.
  3. Screw in the suspension hooks or install steel wire anchors firmly.
  4. Adjust the length of the hanging chains or steel cables to the desired installation height.
  5. Attach both ends of the suspension kit to the fixture’s mounting clips.
  6. Secure the light to prevent swaying or uneven balance.
  7. Test the stability by gently pulling the fixture before powering on.
  8. Connect the waterproof wiring carefully, making sure the sealing rings are properly tightened.
tri proof light installation methods 1

インストールのヒント

Keep the fixture level during installation to ensure even lighting.

Avoid overtightening screws or brackets to prevent damage to the housing.

Do not place fixtures directly under strong water jets unless rated IP66 or higher.

Always confirm that all connectors and seals are fully locked to maintain waterproof protection.

インストールの種類Key Steps代表的なアプリケーション
表面実装Drill → Fix brackets → Snap in light → Connect wiringParking garages, corridors
サスペンドDrill → Install hooks → Adjust chains → Hang fixture → Connect wiringWarehouses, factories, halls

Wiring & Waterproof Connections

Wiring Methods

When installing an LED Tri-Proof Light, wiring can be done through single-end input or double-end input depending on project requirements. Single-end input is common in smaller installations, while double-end input is suitable for longer runs or daisy-chain connections. Always verify the fixture’s voltage rating, whether AC220V, AC277V, or higher industrial standards such as AC347V or AC480V, to avoid mismatched power supply issues.

Waterproof Connections

A key factor in maintaining IP65 or IP66 protection lies in the connectors. Use high-quality waterproof cable glands and ensure that sealing rings are correctly tightened. Applying insulation tape or a silicone ring around vulnerable areas can provide secondary protection. Proper grounding is also necessary to ensure electrical safety and stability.

Common Wiring Concerns

Loose connections are the most common cause of failures such as flickering, short circuits, or even water ingress. To prevent these issues, always double-check that wires are stripped to the right length, inserted fully, and securely fastened. Taking extra care at this stage guarantees a reliable and long-lasting LED Tri-Proof Light installation.

YouTube ビデオ

Checking and Testing & Troubleshooting

Checking

Before powering on, conduct a careful inspection to ensure a safe and secure installation. Confirm that all electrical wires are connected firmly and that insulation is properly applied to prevent short circuits. Check that the LED Tri-Proof Light has been fixed tightly onto brackets or suspension kits, with no loose fittings. For suspended installations, verify that the hanging height is even to maintain uniform lighting. Finally, make sure the PC diffuser cover is fully locked into place to guarantee waterproof and dustproof performance.

Testing

After inspection, switch on the power to test the fixture. Confirm that the LED Tri-Proof Light turns on immediately and delivers consistent brightness. Observe closely for any flickering, dimming, or unusual sounds from the driver. This step ensures that both electrical and mechanical connections are correct before the lights are put into daily use.

トラブルシューティング

If issues occur during testing, consider the following common cases:

Light not turning on → Check if wiring is connected properly or if the power supply is faulty.

Flickering issue → Inspect whether the driver has poor contact with the LED board, or confirm that the driver’s output voltage matches the LED module requirements.

Condensation or moisture inside → Ensure that the diffuser cover is tightly locked and that the cable entry is fully sealed with waterproof connectors.

Proper checking, testing, and troubleshooting will maximize the safety and lifespan of your LED Tri-Proof Light installation.

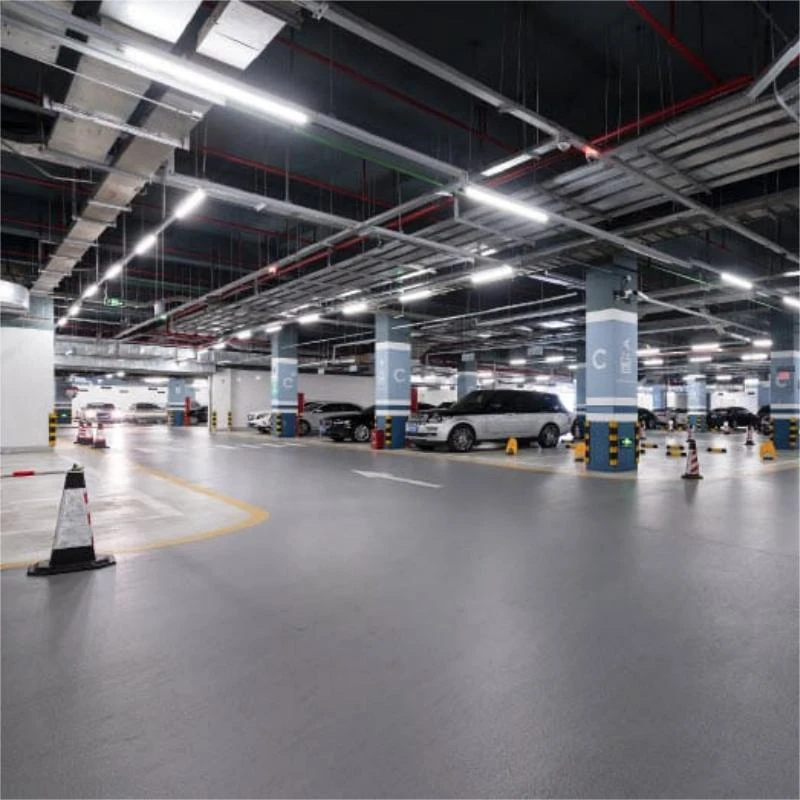
tri proof light in parking lot
tri proof light

結論

Proper installation, careful wiring, and thorough testing are the keys to ensuring that LED Tri-Proof Lights deliver reliable performance in demanding environments. By following the recommended steps and applying troubleshooting methods when needed, users can avoid common issues such as flickering, power failure, or water ingress. A well-installed system not only enhances safety but also reduces long-term maintenance costs.

At SignliteLED, every tri-proof light we produce undergoes strict inspection and testing to ensure there are no power failures or waterproofing problems. Our products are designed with flexibility in mind — they support daisy-chain connections for large-scale projects and can also be paired with emergency power supply solutions for added safety. Whether you need durable fixtures for factories, warehouses, or parking garages, SignliteLED provides professional, reliable, and customizable LED Tri-Proof Lighting to meet your project requirements. If you have your private tri-proof light fixture, you can also get customized LED リニア モジュール from us, Contact us today for bulk supply and tailored technical support.

LED 照明用のトライアック調光の完全ガイドLED 照明用のトライアック調光の完全ガイド
LED 照明用のトライアック調光の完全ガイド
現代の照明プロジェクトでは、調光は空間的な雰囲気とエネルギー効率を高めるための重要な要素になっています。 デジタル調光プロトコル (DALI、0-10V、スマート ワイヤレス コントロールなど) が増えていますが、トライアック調光は依然として世界で最も一般的で広く使用されている方法です。 もともと設計された...
LED集魚灯LED集魚灯
フィッシングボート フィッシュアトラクト スポットライト 購入ガイド 2025
- 深海の商業及び産業魚の捕獲のためのシアン、緑および青の高い発電穂軸によって導かれるライト /800/1000/1200 ワット 沖合および近海漁船用に設計された、当社の表面実装型COB LEDフィッシュライトは、イカ、イワシ、その他の光触性種を誘引するための強力な照明を提供します。800W、1000W、1200Wのオプションがあり、...
スラットウォール用LEDストリップライトスラットウォール用LEDストリップライト
スラットウォール用LEDストリップライト
近年、LEDライトストリップは、特にウッドスラットウォールパネルと一緒に使用された場合、現代のインテリアデザインに不可欠な要素となっています。スラットウォールパネルは、様々な環境において音質を向上させる能力で広く認知されています。LEDライト・ストリップと組み合わせることで、視覚と聴覚の両方が向上します。
SMD LEDストリップ完全ガイドSMD LEDストリップ完全ガイド
SMD LEDストリップ完全ガイド
SMD LEDストリップは、その柔軟性、エネルギー効率、多様な用途により、照明へのアプローチ方法に革命をもたらしています。住宅スペースの環境照明から、商業看板や屋外環境の明るくカラフルな演出まで、SMD LEDストリップは汎用性が高く、高度なカスタマイズが可能です。この記事では、ストリップの定義とその応用例について解説する。
2024 トップ 15 LED ストリップ ライト メーカー中国2024 トップ 15 LED ストリップ ライト メーカー中国
2024 トップ 15 LED ストリップ ライト メーカー中国
LEDライトストリップは非常に人気があり、多様性に富んでいるため、2030年までにLED光源全体の87%が世界中で使用されると予想されている。現在の数字では、60%以上の商業スペースにLED照明が設置されている。LEDライトストリップは、その多様性により、ますます人気が高まっている。
LED射出成形モジュールの品質を左右する要因とは?LED射出成形モジュールの品質を左右する要因とは?
LED射出成形モジュールの品質に影響を与える要因は何ですか?
LED射出成形モジュールはハイエンド製品であり、溶接、保管、配置などの生産プロセスにおいて、独自の仕様と要求がある。これらの仕様と要求を一緒に見てみよう。 まず、自動配置とリフローはんだ付けの注意事項 1.リフローはんだ付けは2回までとしてください。 2.順序...

共有:

フェイスブック
ツイッター
ピンタレスト
リンクトイン
購読する
通知する
ゲスト
0 コメント
最古
最新 最も投票された
インラインフィードバック
すべてのコメントを表示

SignliteLEDブログを検索

カテゴリー

トップへ

今すぐ見積もりを取る