Daisy chain grow lights are an efficient lighting solution for indoor farming, allowing multiple lights to be connected using a single power source. This setup simplifies installation, reduces outlet usage, and keeps grow rooms organized. Whether you’re a commercial grower or managing a large indoor setup, daisy chaining can save time and energy while maintaining optimal light coverage. In this article, we’ll explain what daisy chain grow lights are, how they work, and why they’re ideal for scalable growing systems.
What Is a Daisy Chain Grow Light?
A daisy chain grow light refers to an LED grow light that allows multiple units to be connected together using power input and output ports. Instead of plugging each light into a separate wall socket, growers can link several lights in series
— just like a chain — using a single power outlet. This is especially useful in large-scale grow rooms, vertical farms, or grow tents where multiple lights are needed. Daisy chain functionality reduces cable clutter, simplifies installation, and enables a cleaner, more organized growing environment. Most daisy chain grow lights come with a built-in outlet or power port that supports easy expansion, depending on wattage and electrical safety limits.

Why Daisy Chain Function Matters in Indoor Farming
In indoor farming and commercial cultivation, efficiency and scalability are key. Daisy chain grow lights help streamline large lighting setups by minimizing the number of wall sockets and power strips needed. This not only reduces installation time but also lowers the risk of electrical overload or tangled wires. For growers managing racks or multi-level shelves, daisy chaining allows for uniform light distribution across plants while keeping the power system simple and centralized. It’s particularly beneficial in vertical farming systems, cloning setups, and seedling propagation, where consistent lighting and neat wiring are crucial. In short, the daisy chain feature improves both workflow and grow room safety.
How Many Grow Lights Can You Daisy Chain Together?
The number of grow lights that can be daisy chained depends on two main factors: the wiring method and the power rating of each light.
Individual Power Supply per Light (Connected in Parallel & AC Input):
When each grow light has its own built-in power supply (typically high-voltage AC), it can support more connections. Lower-wattage lights draw less current, making the setup safer and more scalable. For example, an 18W T8 grow light with an integrated driver can often be daisy chained in a series of 50 or more units without issue.
Shared Power Supply Setup (Connected in Parallel or in series & DC Input):
If multiple grow lights share a single external power supply, the total wattage of the lights must not exceed the rated output of the driver. For instance, a 400W driver can support eight 50W grow lights or four 100W units. In this case, the number of lights you can chain is directly limited by the driver capacity.
Follow Specifications and Safety Standards:
Always check the product datasheet or consult the manufacturer before installation. Pay attention to certifications like UL or CE, and ensure the system doesn’t pose risks of overheating, tripped breakers, or fire hazards. A well-designed daisy chain setup balances performance with electrical safety.


Daisy Chain vs Traditional Setup: Which Is Better?
When setting up grow lights, you typically have two options: a daisy chain setup or a traditional individual plug-in system.
Daisy Chain Setup allows multiple lights to be linked together using one power source, which greatly reduces the number of wall sockets needed. This method is ideal for commercial growers or vertical farms where many lights need to operate simultaneously in a tight space. It simplifies cable management, shortens installation time, and keeps the grow space clean and efficient.
Traditional Setup, on the other hand, requires each grow light to be plugged into its own socket or power bar. While this may be acceptable for small-scale hobby growers or single-light systems, it quickly becomes inefficient and cluttered in larger operations. Managing dozens of separate power cords increases the chance of overloads, tangles, and confusion.
Conclusie:
For professional growers and large-scale indoor farming, the daisy chain setup is clearly the better choice. It offers cleaner wiring, easier expansion, and improved safety when installed correctly.
What to Consider When Buying Daisy Chain LED Grow Lights
When selecting daisy chain LED grow lights for professional or commercial use, it’s essential to move beyond surface-level specifications. A well-informed purchasing decision requires a thorough understanding of electrical safety, long-term performance stability, compatibility with grow systems, and regulatory compliance. Here are the critical factors to evaluate:
1. Electrical Load and Power Matching
One of the most overlooked risks in daisy chaining is exceeding the safe electrical load for a circuit or a fixture. Each grow light adds to the cumulative current drawn from the initial power source. For example, linking ten 50W lights results in a 500W total load—if your power line or internal circuit is not rated for that, overheating or tripping becomes a real hazard.
Key considerations:
Determine the input current (Amps) of each fixture at your local voltage (e.g., 120V/230V).
Check the max current rating of your AC outlet, daisy chain port, or external driver.
Consider startup inrush current, which can momentarily exceed rated operating current.
2. Driver Architecture: Internal vs External
There are two primary configurations:
Integrated driver lights (e.g., T8 grow lights): Each unit is powered independently by AC input, making them scalable and allowing more units to be daisy chained—sometimes 40–50 lights depending on wattage and line capacity.
Driver-shared systems: Multiple DC-powered fixtures connect to one centralized driver. In this case, the number of lights is strictly limited by the driver’s wattage and current output. For example, a 400W driver could power 8 x 50W bars, but only 4 x 100W modules.
Advanced buyers should ask:
Is the driver constant current or constant voltage?
What is the line loss tolerance when multiple fixtures are connected over long cable runs?
Is voltage drop across connections within acceptable range?
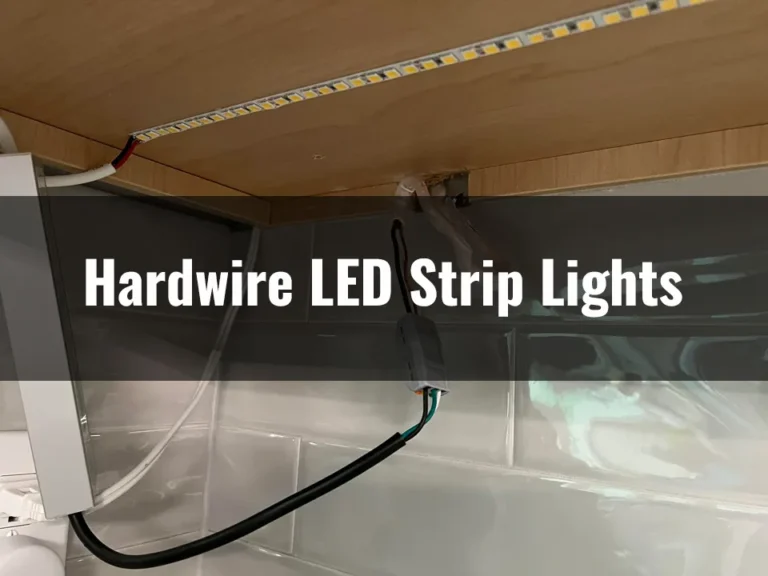
3. Connector System and Wiring Safety
Not all daisy chain connectors are made equal. A poorly designed port can become a bottleneck for heat, or loosen over time due to vibrations or thermal expansion. For commercial usage, prioritize:
Secure locking connectors (e.g., twist-lock, waterproof plugs) over standard barrel or figure-8 port
Heat-resistant wiring insulation, especially when lights are used in high-temperature greenhouse environments
Cable gauge sizing appropriate for the total chain current (e.g., 18AWG vs 14AWG)
You may also want detachable vs fixed power cables for modularity.

4. Thermal Management at Scale
Daisy chained systems generate cumulative heat. While a single fixture may stay within safe operating temperatures, multiple lights connected in series can raise the ambient heat significantly, especially in confined grow rooms.
What to check:
Is the housing designed with effective passive heat sinks (e.g., extruded aluminum fins)?
Are temperature sensors or over-temperature shutdown mechanisms built in?
Can the layout allow for sufficient airflow across all connected units?
Poor thermal planning shortens LED lifespan and degrades spectral consistency.
5. Safety Certifications and Fire Protection
In large installations, meeting local and international safety standards is not optional—it’s mandatory. Always check for:
UL/ETL (North America): Electrical and fire safety
CE/RoHS (Europe): EMC compliance and hazardous material restrictions
IP ratings: For moisture or dust-prone environments
Also ensure the power cables, connectors, and drivers meet the same safety standards—not just the LED strip itself.
6. Expandability and Smart Integration
Forward-thinking buyers should plan for system scalability and automation. Ask these questions:
Can the system support dimming protocols (e.g., 0–10V, PWM, or DALI)?
Is the daisy chain port data-capable (for timing or spectrum adjustment)?
Are third-party controllers or smart agricultural systems compatible?
Does the system offer fail-safe design, where one faulty unit doesn’t disrupt the rest?

How to Install Daisy Chain Grow Lights: Step-by-Step Guide for Safe and Efficient Setup
Proper installation of daisy chain grow lights is critical—not only for optimal light distribution but also for electrical safety and long-term reliability. Below is a step-by-step guide designed for commercial growers, facility managers, or lighting integrators who are setting up multiple lights in a professional environment.
Step 1: Evaluate Your Power Infrastructure
Before any hardware is connected, assess your facility’s electrical layout:
Determine the voltage and current limits of your circuit (typically 120V or 240V).
Use a dedicated circuit breaker for the grow lights whenever possible.
Confirm total load: Add up the wattage of all lights to be connected and ensure it’s within 80% of your circuit’s rated capacity (National Electrical Code recommends not exceeding 80%).
Example: For a 15A, 120V circuit (1800W max), aim for no more than 1440W total load.
Step 2: Understand the Connection Scheme
There are two primary daisy chain topologies:
AC Daisy Chain (High Voltage):
Each fixture contains its own internal driver and plugs into the next via built-in AC ports. Suitable for T-series tubes, bar lights, or integrated panel lights.
DC Daisy Chain (Driver-Based):
Multiple DC fixtures are powered by a central driver. All units must match the voltage and current specs. Wiring is usually done in parallel, not true series.
Always refer to the manufacturer’s connection diagram. Never assume compatibility between brands or across product lines.
Step 3: Connect Lights in Proper Sequence
Turn off the main power before making any connections.
Start with the first unit nearest the power source.
Use manufacturer-supplied jumper cables or interconnect wires. Avoid third-party cables unless verified for current and heat tolerance.
Connect the output port of the first fixture to the input port of the next, continuing in sequence
Secure all connectors firmly. If using locking connectors, ensure they “click” or seal completely to avoid arc or signal interruption.
Tip: Do not loop the chain back to the power source—daisy chains should be linear, not circular.

Step 4: Manage Cables and Spacing
Mount lights according to your crop’s PPFD requirements and spacing plan. Typically, 12″–24″ apart for seedlings, or 18″–36″ for flowering crops.
Organize wires using clips or trunking to avoid heat buildup and tripping hazards.
Maintain minimum clearance between fixtures to ensure airflow and prevent hot spots.
Step 5: Test the System Incrementally
Once connected, turn on the system in stages, especially if it includes dozens of fixtures.
Check for:
Uneven lighting or flickering
Excess heat at connection points
Tripped breakers or humming sounds (signs of overloading)
Use an infrared thermometer or thermal camera for large installs to inspect potential hotspots.
Step 6: Implement Controls and Redundancy
Add timers or smart controllers to automate light cycles and reduce human error.
For commercial facilities, integrate with HVAC or building automation systems to synchronize temperature, humidity, and lighting.
Consider backup drivers or emergency cutoffs for high-value installations to reduce downtime risk.
Step 7: Document the Layout
For future maintenance and safety audits:
Record total wattage per chain, number of lights, and breaker assignments.
Label each daisy chain group clearly.
Take photos or create a schematic of the installation, especially for large-scale setups.
Applications and Project Case: How Daisy Chain Grow Lights Deliver Real-World Value
Daisy chain grow light systems are widely adopted in a variety of indoor farming applications where efficient wiring, uniform lighting, and scalable control are essential. Below are two common use cases, followed by a real-life project delivered by Signlite to a U.S. client using aeroponic tower farming.
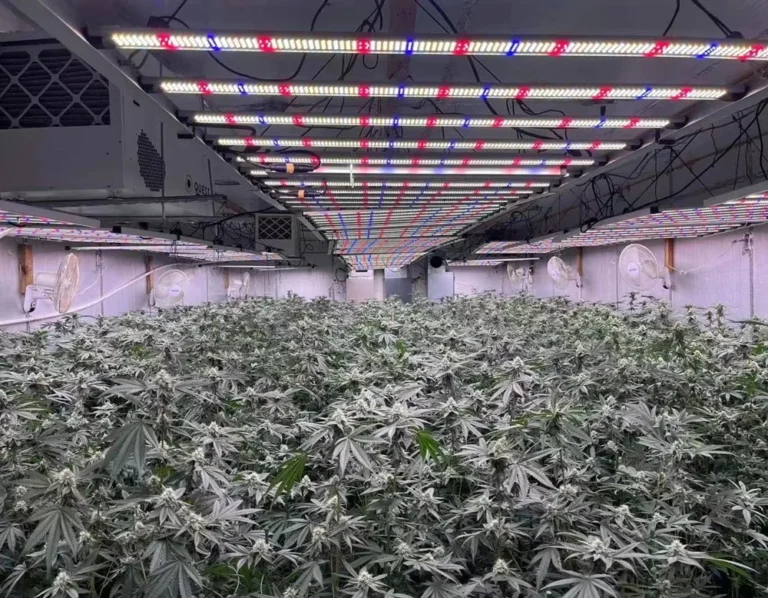
1. Vertical Farming Racks with Multi-Layer Crops
In vertical farming setups, particularly those using hydroponic or aeroponic methods, crops are stacked across multiple layers. Each layer requires uniform light coverage, and space for wiring is limited. Daisy chain grow lights allow growers to connect dozens of lights with minimal cabling and just a few drivers, streamlining both installation and maintenance.
Growers often use 0–10V dimming or centralized digital controllers to adjust light intensity across all layers—ideal for optimizing photosynthetic response at different plant growth stages. In such settings, daisy chaining not only reduces hardware costs but also improves energy efficiency and light consistency.
2. Modular Grow Tent Systems for Research or Seedling Production
In R&D greenhouses, tissue culture labs, and small-scale seedling nurseries, modular grow tents are used to create controlled environments. These often require flexible lighting layouts, especially when switching between plant varieties or photoperiods.
Daisy chain functionality enables researchers to reconfigure lights without changing the power source, while dimmable features help simulate different seasonal conditions. This makes daisy chain systems ideal for experiments or operations requiring high flexibility, reliability, and low maintenance.
Project Case: Aeroponic Lettuce Farming in the U.S. with Signlite's T8 Daisy Chain Lighting System
One of our recent clients in the United States specializes in growing lettuce using aeroponic towers. Their challenge was to mount grow lights in four directions around each tower, with strict performance and budget requirements:
Target PPE: ≥ 2.8 μmol/J
PPFD: ≥ 250 μmol/m²/s at 30 cm distance
Dimming Function: Required
Budget per fixture: Under USD 7
After evaluating multiple vendors, the client chose Signlite due to our ability to meet both technical performance and budget constraints. Our proposed solution:
Lighting Setup: 8 x 1.2-meter T8 LED grow lights
Power System: All 8 lights powered by a shared 300W external driver
Control Box: Integrated with both a knob dimmer and an RJ12 port
The knob dimmer allows standalone manual dimming of the entire light group.
The RJ14 port provides compatibility with external master controllers, enabling unified dimming via a smart farming system.
This design allowed the client to:
Achieve targeted PPFD and PPE levels, ensuring optimal lettuce growth;
Maintain a clean, modular wiring layout for the 4-direction tower design;
Keep the per-fixture cost below USD 7, staying well within budget.
The client was highly satisfied with the result, especially the balance between photobiological performance and electrical efficiency. The system has been successfully deployed and is now under continuous operation with excellent plant health and power stability.
Where to Buy Daisy Chain Grow Lights in Bulk
If you’re looking for a reliable manufacturer of daisy chain LED grow lights for vertical farming, greenhouse cultivation, or aeroponic systems, Signlite is your trusted partner.
With over 15 years of experience in LED lighting production, Signlite specializes in customized grow lighting solutions for commercial and industrial-scale projects. We offer a wide range of LED-kweeklampen—including high power foldable, daisy chain T8 and linear fixtures—designed to meet strict performance requirements such as high PPE, PPFD, dimmability, energy efficiency and specific spectrum.
All our products are engineered and assembled in-house, ensuring consistent quality control and fast lead times. From OEM customization to complete lighting system design with drivers, control boxes, and daisy chain compatibility, we support global clients in the U.S., Europe, Southeast Asia, and beyond.
Ready to optimize your grow light system?
Get in touch with the Signlite team today to discuss your daisy chain grow light needs or request a free quotation for your next project.
Gerelateerde berichten