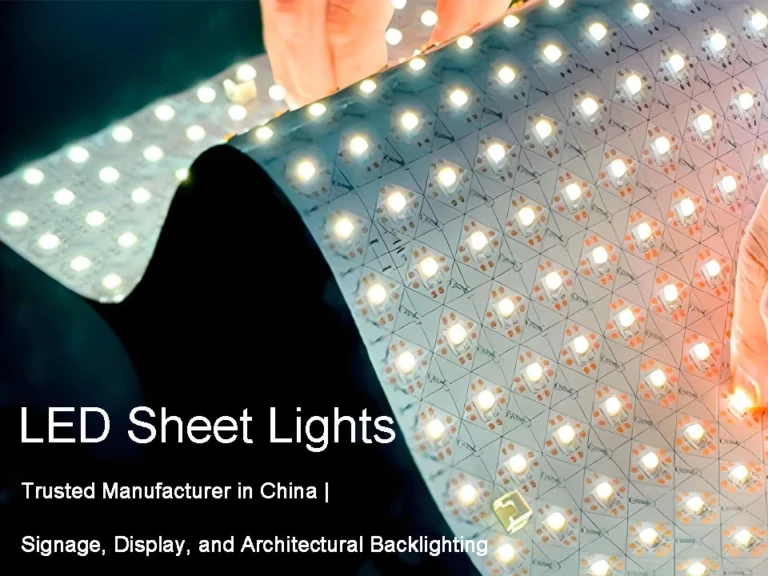
Em projetos de iluminação comercial e arquitetônica, as luzes de LED estão substituindo gradualmente as faixas e as faixas de luz tradicionais como a solução preferida para publicidade em caixas de luz, vitrines, tetos internos e iluminação decorativa. Eles oferecem designs ultrafinas, corte flexível e distribuição de luz uniforme, ao mesmo tempo em que permitem o emenda sem costura para criar uma iluminação contínua de grande área adaptada aos requisitos espaciais.
luzes de folha de led Fornece uma solução eficiente e flexível para iluminação e decoração. No entanto, muitos usuários ainda encontram desafios durante a instalação. Seguindo esses pontos-chave, você pode garantir um desempenho ideal:
- Corte ao longo das marcações designadas;
- Selecione uma fonte de alimentação compatível com margem suficiente;
- Escolha métodos de conexão adequados para garantir a fiação segura;
- Realize inspeções regulares e solucione problemas comuns.
Ao cortar, instalar e configurar corretamente suas folhas de luz LED, você pode obter uma iluminação ideal e garantir uma operação estável e a longo prazo.
Este guia abrangente orienta o uso adequado de folhas de LED, desde o corte e instalação até a configuração de energia e depuração. Seja você um usuário iniciante ou um instalador trabalhando em um projeto, este artigo fornece técnicas práticas para evitar erros comuns e obter um desempenho de iluminação confiável e duradouro.
Leitura relacionada:
Luzes de folha de LED—guia completo para projetos e compradores
Projetos de iluminação de fundo arquitetônica com luzes de folha de LED
Ferramentas e materiais de que você precisa
Uma instalação bem-sucedida começa com uma preparação completa. Portanto, é crucial ter as ferramentas e acessórios certos antes de cortar e instalar luzes de folha de LED. As ferramentas corretas não apenas aumentam a eficiência da instalação, mas também evitam danos causados por manuseio inadequado.
Abaixo estão os materiais e ferramentas comuns que você pode precisar:
Ferramentas básicas
- Tesoura: para corte preciso ao longo de linhas marcadas.
- ferro de solda e fio de solda: Usado para solda profissional para garantir conexões elétricas seguras (se forem necessárias conexões de fiação).
- Chave de fenda e decapantes de arame: para apertar as conexões de energia e juntas de arame.

Auxílios de instalação
- Solução de limpeza: para limpar as superfícies de instalação.
- Tiras de pressão transparentes ou clipes de montagem: Comumente usado em instalações de lightbox e teto para evitar que as folhas de luz se desprendam.

componentes elétricos
- LED cofensiva emoltage ptorre sAuxiliar (Classe 2): Garante a segurança do circuito; deve ser classificado para DC12V ou DC24V.
- Conectores sem solda: Adequado para usuários não profissionais, permitindo a montagem rápida do painel.
- Divisores e cabos de extensão: Adequado para layouts complexos e projetos multimódulos.

Componentes de controle (opcional)
- dimmer led: Ajusta o brilho para folhas de luz monocromáticas.
- Controlador RGB/RGBW: Permite mudanças de cor e efeitos de iluminação programáveis.
- DMX512/Módulo de controle inteligente: Adequado para projetos de alto padrão, como hotéis, palcos e iluminação arquitetônica.

Recomendações de pré-instalação
- Certifique-se de que todos os itens de instalação necessários estejam preparados e todos os componentes sejam compatíveis.
- Não exceda o número máximo de folhas de LED em série, pois isso pode causar queda de tensão e efeitos adversos.
- Para projetos, realize um teste de instalação simulado antes da configuração final para identificar os problemas de compatibilidade antecipadamente e evite o retrabalho.
Como cortar com segurança as luzes da folha de LED
Como pode um corte de luz LED com segurança? Primeiro, localize as linhas de corte na folha de LED. Consulte o guia de ponto de corte do fabricante para evitar o corte dos circuitos LED ou chips.
Confirme os pontos de corte

Nem todas as áreas podem ser cortadas arbitrariamente. A maioria das luzes de folha de LED apresenta pontos de corte fixos projetados na fábrica (linhas de corte), normalmente marcadas com linhas pontilhadas ou pequenas tesouras na superfície do painel de luz. Esses pontos podem ser verticais, horizontais ou em ângulos de 45°.
Esses pontos de corte servem como locais de separação de circuitos seguros. Apenas cortar ao longo desses pontos designados garante que a folha de luz mantenha a condutividade e a iluminação elétrica adequadas. Corte fora desses pontos pode danificar o circuito, causando falha parcial ou até mesmo riscos de curto-circuito.
etapas de corte

Após determinar o local de corte, siga estas etapas:
1. desconexão de energia: Antes de qualquer corte, certifique-se de que a fonte de energia esteja completamente desconectada para evitar operações com fios.
2. Posicionamento e medição: Usando uma régua e um marcador, marque os pontos de corte de acordo com as dimensões reais da instalação.
3. Use ferramentas: Empregue uma tesoura afiada para fazer um corte limpo ao longo da linha marcada. Evite força excessiva para evitar danos à placa de circuito.
4. Inspecione o corte: Após o corte, examine cuidadosamente as almofadas de cobre na borda de corte para integridade - certifique-se de que elas estejam intactas sem rachaduras ou levantamento. Isso mantém a condutividade adequada durante as conexões subsequentes.
Precauções de corte
Vários detalhes críticos exigem atenção especial durante o corte:
- Nunca exceda a linha de corte: Fazê-lo pode danificar o circuito ou inutilizar toda a folha de luz.
- Evite dobrar excessivamente: Enquanto as folhas de LED são flexíveis, a dobra excessiva perto das bordas cortadas pode causar a fratura na camada condutora.
- Manter as bordas de corte limpo: Apare as arestas ou folhas de cobre soltas imediatamente após o corte para garantir conexões confiáveis.
- Reserve pontos de conexão extras: Durante a instalação, é aconselhável deixar um ou dois pontos de corte extras durante o corte para facilitar as conexões do controlador e da energia.
Por meio de um corte adequado, você pode ajustar com flexibilidade o tamanho das luzes de LED para combinar com as dimensões reais do espaço, criando efeitos de iluminação que atendem precisamente aos requisitos do projeto, mantendo a segurança e a estabilidade elétrica.
Fonte de alimentação e configuração
Em projetos de engenharia ou comerciais de grande escala, o fornecimento de energia e a configuração do sistema para folhas de LED vão além da funcionalidade simples de plug-and-play. Eles envolvem custos de gerenciamento de eficiência energética, confiabilidade e manutenção. O planejamento adequado da fonte de alimentação evita o brilho desigual causado por quedas de tensão e reduz o risco de substituições frequentes posteriormente.
Seleção de fonte de alimentação

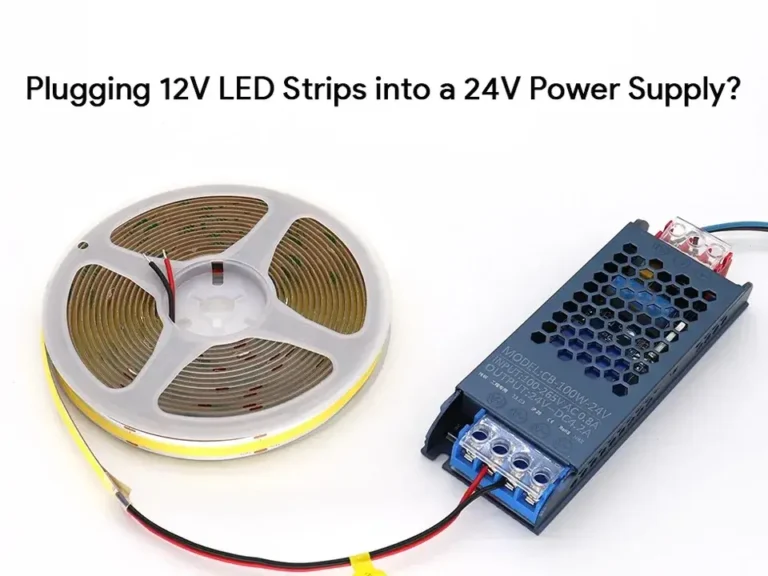
As luzes de folha de LED normalmente vêm em versões CC de baixa tensão de 12 ou 24 V. quando Selecionando uma fonte de alimentação, assegure-se de compatibilidade com a tensão. A tensão excessiva pode queimar a folha de luz, enquanto a tensão insuficiente causa uma iluminação fraca ou falha no sistema de iluminação.
Além disso, a capacidade da fonte de alimentação deve ser calculada com base na potência total das folhas de luz. Geralmente, é recomendado selecionar uma fonte de alimentação com classificação pelo menos 20% maior que a potência real para garantir a estabilidade operacional a longo prazo. Por exemplo, se a potência total das folhas de luz LED for 80W, a fonte de alimentação deve ser classificada em pelo menos 100W.
Além disso, a funcionalidade de escurecimento é outro fator crítico durante a aquisição. Para projetos que exigem um controle diversificado de ambiente ou economia de energia, selecione folhas de luz LED, fontes de alimentação e controladores que suportem 0-10V, PWM, DALI ou DMX. Os compradores comerciais devem discutir proativamente as interfaces do fornecimento de energia e a compatibilidade de escurecimento com os fornecedores para evitar futuras complicações da integração.
Conectando o controlador
Se a folha de LED exigir iluminação monocromática, basta conectar a fonte de alimentação aos terminais positivos e negativos da folha. No entanto, as folhas de LED RGB ou RGBW exigem um Controlador LED.
- controlador de escurecimento do led: Adequado para folhas de LED mono que requerem ajuste de brilho, permitindo escurecimento contínuo por meio de botões ou controle remoto.

- Controlador RGB/RGBW: Projetado para folhas de LED multicoloridos, suporte a mudanças de cor, gradientes, efeitos de flash e integração com plataformas de controle inteligente via DMX, Bluetooth ou Wi-Fi.

Ao conectar, primeiro verifique o alinhamento da polaridade entre os terminais de saída da fonte de alimentação, as placas da placa de circuito e os terminais de entrada do controlador para evitar a polaridade reversa.
Comissionamento e testes
Após concluir todas as conexões de energia e controlador, prossiga para o comissionamento:
1. Inicialização inicial: Ative brevemente a energia para verificar a iluminação adequada da folha de luz.
2. Teste de brilho: Inspecione a uniformidade do brilho em diferentes áreas, verificando os padrões de luz frontal/escurecidas causados pela queda de tensão.
3. Teste de funcionalidade: Para controladores RGB, teste individualmente os modos de vermelho, verde, azul e mixagem de cores para garantir que todos os canais de saída funcionem corretamente.
4. Inspeção de segurança: Finalmente, toque na superfície da fonte de alimentação e da folha de luz para confirmar que nenhum calor excessivo está presente. Se ocorrer superaquecimento, verifique a compatibilidade da fonte de alimentação e as condições de dissipação de calor.
Com configurações adequadas de energia e configurações do sistema de controle, as luzes LED não apenas fornecem iluminação estável, mas também produzem diversos efeitos de iluminação adaptados a várias aplicações comerciais e residenciais.
Processo de instalação de luzes de folha de LED
Para usuários individuais, o domínio das técnicas básicas de corte e instalação de folhas de luz LED permite uma decoração sem esforço ou atualizações do armário de exibição. Para projetos de engenharia e iluminação comercial, deve-se dar maior ênfase à correspondência de fontes de alimentação, métodos de conexão e condições de dissipação de calor para garantir um brilho uniforme e confiabilidade a longo prazo em aplicações de grande porte.
Etapa 1: concluir uma instalação de mock-up
Antes de cortar ou afixar a folha de luz LED, é recomendável realizar uma instalação de maquete. Conecte temporariamente a folha de luz à fonte de alimentação e ao dimmer e ligue-a brevemente para verificar a iluminação adequada.
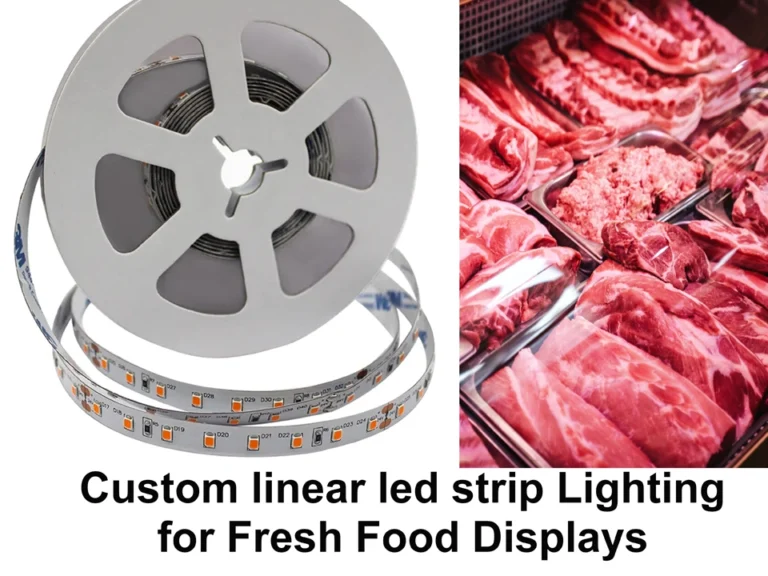
Esta etapa ajuda a verificar a compatibilidade entre a fonte de alimentação, o controlador e a folha de luz, ao mesmo tempo em que confirma o brilho e a temperatura da cor com as expectativas do projeto. Por exemplo, as vitrines de varejo podem exigir temperaturas de cor mais quentes para melhorar a textura do produto, enquanto as caixas de luz publicitária geralmente usam luz branca fria para clareza da imagem.

Etapa 2: solução de problemas, se necessário
Se o painel de luz não acender após a ligação, não prossiga com a instalação. Primeiro, solucione o problema:
- Verifique se a fonte de alimentação está conectada corretamente e fornecendo tensão estável;
- Confirme se os conectores ou métodos de solda corretos são usados;
- Verifique se as polaridades positivas e negativas estão correspondidas corretamente.
Resolver problemas potenciais antes da instalação impede o retrabalho mais tarde, economizando significativamente o tempo de construção e os custos.

Etapa 3: desconecte a energia no disjuntor
Antes de cortar ou instalar, certifique-se sempre de que o disjuntor esteja desligado. Isso evita riscos de choque elétrico e garante condições de trabalho seguras. Isso é particularmente crítico em projetos comerciais e edifícios públicos, onde muitas vezes existem fontes de energia e fiação complexa – qualquer operação ao vivo apresenta riscos significativos.

Etapa 4: corte as folhas de LED conforme necessário
Meça e marque o comprimento ou forma exigida com base nas dimensões do espaço de instalação. Use uma tesoura afiada para cortar apenas nos pontos de corte pré-marcados do fabricante.
Nota: Os pontos de corte da folha de luz LED podem ser verticais, horizontais ou até diagonais. Sempre corte ao longo das linhas marcadas para evitar danos ao circuito.

Passo 5: unindo folhas de LED
Estão disponíveis dois métodos de conexão:
Conectores de LED sem solda
Este produto normalmente inclui conectores de alimentação e conectores de jumper. Basta conectá-los aos terminais de solda para completar a conexão, ideal para uma instalação rápida e uso não profissional.
Para conectar várias folhas de LED em série, basta inserir conectores sem solda adicionais nos soquetes entre as folhas.
fios soldados
Para aplicações de uso prolongado ou de alta potência, a soldagem é recomendada. Solda os fios diretamente nas almofadas de luz da folha, garantindo uma polaridade consistente entre a fonte de energia e as folhas de luz, bem como entre as folhas de luz.

Etapa 6: reteste a configuração da folha
Antes da instalação final, ligue todo o sistema novamente para verificar se todas as folhas de luz acendem adequadamente. Especialmente em projetos com várias folhas interconectadas, inspecione cada segmento para obter a funcionalidade adequada para evitar a descoberta de falhas localizadas após a instalação.

Passo 7: Preparação da superfície
Antes de instalar as luzes de LED, prepare a superfície de montagem. Seja aderente às partes inferiores do gabinete, vitrines ou substratos de teto, certifique-se de que as superfícies estejam secas, planas e livres de poeira ou graxa.
Superfícies irregulares ou partículas de poeira comprometem a colagem adesiva, levando ao desprendimento ou elevação da luz da folha. Para projetos de longo prazo, pré-limpe as superfícies e limpe as áreas de instalação com lenços umedecidos com álcool.
Substratos comuns em projetos incluem painéis de metal, vidro, acrílico ou PVC. Certifique-se de que esses materiais estejam completamente limpos e completamente secos.

Passo 8: Cole a folha de luz na superfície
Durante a instalação, não retire todo o suporte adesivo de uma só vez. Em vez disso, remova alguns centímetros de cada vez enquanto pressiona suavemente a folha de luz no lugar para garantir uma adesão segura no local de destino.
Este método evita bolhas de ar causadas por ar retidos e permite pequenos ajustes de posição durante a instalação, garantindo uma aparência geral reta e esteticamente agradável.

Etapa 9: Complete todas as conexões
Após proteger as luzes da folha, execute a fiação final. Conecte a fonte de alimentação, o dimmer, o controlador e outros componentes ao sistema de acordo com o diagrama de fiação do fabricante, garantindo a polaridade correta.
Para instalações complexas, considere usar divisores ou blocos de terminais para simplificar a fiação e aumentar a conveniência de manutenção futura.

Etapa 10: Ligue no disjuntor
Somente após a confirmação de toda a fiação e instalação estarem concluídas, ligue a energia no disjuntor. Neste ponto, todas as folhas de LED devem iluminar e operar de forma estável. Se forem necessárias funções de escurecimento ou mudança de cor, teste todos os recursos do controlador para garantir que estejam alinhados com as especificações do projeto.

Dicas de segurança e manutenção
- Durante a fiação, distinga claramente os terminais positivos e negativos para evitar a conexão reversa.
- Ao conectar várias folhas de luz, assegure-se de capacidade de fonte de alimentação suficiente para evitar sobrecarga.
- Após a instalação, inspecione periodicamente as folhas de luz quanto a afrouxamento, desprendimento ou superaquecimento.
- Em ambientes úmidos ou aplicações externas, use luzes de LED à prova d'água e certifique-se de que todas as conexões de fiação estejam devidamente seladas.
Por meio de uma preparação adequada da superfície, dos métodos de instalação adequados e das práticas de fiação segura, as folhas de LED podem operar de forma confiável em várias aplicações, mantendo um excelente desempenho visual.
solução de problemas
Mesmo quando manuseados adequadamente durante o corte, a instalação e o uso, as luzes de folha de LED podem ocasionalmente encontrar problemas. Se a folha de luz funcionar mal, evite pressa para substituí-la, muitos problemas podem ser resolvidos por meio de uma solução de problemas simples. Abaixo estão as falhas comuns e suas soluções correspondentes:
1. A folha clara permanece completamente escura
Causas possíveis:
- Fonte de alimentação não conectada corretamente ou especificações de tensão incompatíveis;
- Capacidade insuficiente de fornecimento de energia para acionar a luz inteira da folha;
- Polaridade invertida ou conexões de fiação soltas.
Soluções:
Primeiro, certifique-se de que o plugue e a porta estão conectados de forma segura. Em seguida, verifique se a tensão corresponde às especificações da luz da folha. Se a fonte de alimentação estiver confirmada funcional, verifique novamente a polaridade da fiação. Para conectores sem solda, certifique-se de que estão totalmente encaixados.
2. Área parcial não iluminando
Causas possíveis:
- O corte foi realizado fora dos pontos de corte designados, causando interrupção do circuito;
- Contato deficiente em um segmento de pastilhas de solda ou conector não totalmente encaixado.
Soluções:
Verifique se a posição de corte estava correta. Se o corte incorreto causou a quebra do circuito, ele não poderá ser reparado e a folha de luz deve ser substituída. Para contatos ruins, resoldar ou ajustar a posição do conector.
3. Luz piscante/pisca
Causas possíveis:
- Capacidade insuficiente da fonte de alimentação ou fonte de alimentação de baixa qualidade;
- Problemas de compatibilidade do controlador;
- Conexões de fiação instáveis.
Soluções:
Substitua por uma fonte de alimentação LED de alta qualidade e qualidade e verifique a integridade da fiação. Se estiver usando um controlador RGB, confirme se ele suporta o desenho atual e a contagem de canais da folha de luz.
4. Superaquecimento de folhas de luz
Causas possíveis:
- Operação estendida de carga total com fonte de alimentação incompatível e potência de luz de folha;
- Dissipação de calor ruim no ambiente de instalação.
Soluções:
Permita espaço de ventilação adequado ao redor das luzes da folha ou use extrusões de alumínio para dissipação de calor. Verifique simultaneamente se a fonte de alimentação está subdimensionada e operando sob sobrecarga.
5. Inconsistência de cor (comum nas luzes da folha RGB)
Causas possíveis:
- saída anormal do sinal do controlador;
- contato ruim em um canal de cor específico;
- Queda de tensão causando desvio de cor em extremidades distantes.
Soluções:
Inspecione as portas de saída do controlador e as conexões de fiação para ver se há estanqueidade. Quando necessário, incorpore os amplificadores de sinal ou distribua o fornecimento de energia em fiação de longa distância para garantir a consistência da cor nas extremidades remotas.
Ao solucionar esses problemas comuns, a maioria das falhas de instalação pode ser resolvida rapidamente sem a necessidade de substituição completa das luzes da folha ou das fontes de alimentação, economizando custos e encurtando os cronogramas do projeto.
Conclusão
Como uma nova geração de produtos de iluminação, as luzes de LED ganharam ampla adoção em vários campos, incluindo caixas de luz de publicidade, displays de varejo e decoração de hotel e escritórios - graças ao seu design ultrafino, iluminação uniforme, corte personalizável e instalação flexível.
Na implementação do projeto, o sucesso depende não apenas do produto em si, mas também do planejamento científico da fonte de alimentação, de métodos de instalação confiáveis e comissionamento e manutenção profissional. A preparação adequada preliminar reduz a complexidade da instalação, melhora os efeitos da iluminação e garante uma operação estável e confiável de longo prazo das folhas de luz.
Se está à procura de luzes de folha de led que combinam garantia de qualidade com personalização flexível, o contato Signliteled. Oferecemos produtos de iluminação de folhas compatíveis com UL/ETL/CE, personalização OEM/ODM e soluções de alimentação e controle. Para compras em larga escala, equilibramos o custo-benefício com as garantias de tempo de entrega, capacitando seus projetos comerciais e de engenharia para obter um desempenho superior de iluminação.
Postagens relacionadas