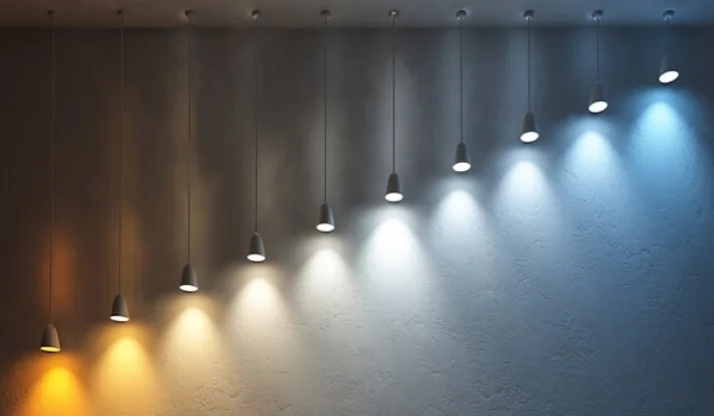
As luzes LED são amplamente utilizadas na decoração de casa, espaços comerciais, projetos de hotéis e iluminação de vitrine devido à sua fácil instalação, forte ambiente e alta flexibilidade. No entanto, quando você precisar substituir a fiação, mude o layout da iluminação ou mude, como remover com segurança as luzes de LED sem danificar a parede ou a tinta se tornar um problema muito prático.
Ao entender as técnicas corretas e adotar uma abordagem cautelosa, você pode remover as luzes de LED sem deixar danos, mantendo assim o apelo estético e a integridade da parede ou da superfície da pintura.
Este artigo fornece um guia abrangente para a remoção de luzes de tiras de LED, combinando ampla experiência prática e dicas para ajudá-lo a enfrentar facilmente os desafios de remoção em diferentes materiais de parede e métodos de instalação.
Por que é RLED em movimento Sviagem Luzs PRone para Damador Wtudo?
O adesivo usado para proteger as tiras de luz LED é altamente durável, o que facilita a instalação, mas pode representar um risco significativo durante a remoção. Além disso, se o adesivo causa o descascamento da tinta depende em grande parte da condição da tinta, do material da superfície e da duração do uso da tira de luz LED. A tinta envelhecida, descascada ou aplicada em superfícies mal preparadas é mais suscetível a danos.


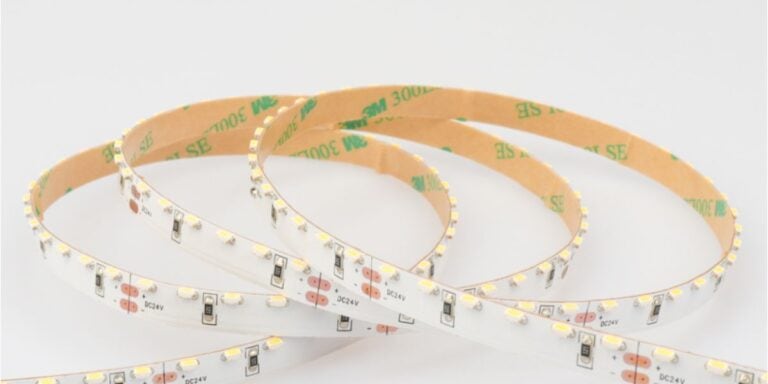
A maioria das tiras de luz LED usa fita dupla face forte (como fita 3M) na parte de trás para uma adesão segura, mas esse método também apresenta riscos:
- O adesivo é altamente pegajoso e retirá-lo pode remover camadas de tinta de parede.
- Com o tempo, o adesivo pode “envelhecer e endurecer”, tornando mais difícil a remoção.
- Em certos materiais, como papel de parede ou placa de gesso, uma vez rasgado, pode ser impossível consertar.
Especialmente em locais como aluguel de apartamentos, locais de exposições ou quartos de hotel onde a proteção da parede é uma prioridade, como remover as faixas de luz LED sem deixar marcas.
Preparação e ferramentas para remover luzes de tiras de LED
Antes de iniciar o processo de remoção, é essencial estar bem preparado para garantir que todo o processo ocorra da melhor maneira possível e sem danos.
Primeiro, inspecione cuidadosamente a área onde o Fitas de LED estão instalados. Avalie o estado da tinta e a superfície à qual as luzes da tira estão presas. Verifique se há sinais de desgaste, descascamento de tinta ou outros danos que podem ser exacerbados pelo processo de remoção. Esta avaliação inicial irá ajudá-lo a determinar os melhores métodos e técnicas para minimizar o risco de danos adicionais.
Em seguida, para remover com segurança e eficiência a luz LED Strip sem danificar a parede ou tinta abaixo, é essencial selecionar ferramentas e materiais adequados que sejam eficazes e suaves. As seguintes ferramentas são recomendadas:
| ferramenta | Objetivo |
| secador de cabelo (ou pistola de calor) | Aquecer para suavizar o suporte adesivo e reduzir a viscosidade |
| Raspador de plástico/cartão de crédito antigo | Auxiliar a erguer a tira de luz, evitando arranhar a parede |
| Álcool médico (ou removedor de adesivo especializado) | Remova marcas adesivas residuais |
| Tecido não tecido ou toalha macia | Limpe a parede para evitar arranhões |
| luvas | Evite cortes ou adesivos de grudar nas mãos |

Além disso, certifique-se de que a faixa de luz LED esteja desligada e todas as fontes de alimentação estejam desconectadas. Isso não apenas evita possíveis danos à tira de luz durante a remoção, mas também garante sua segurança.
Finalmente, para obter melhores resultados, é recomendável usar um adesivo projetado especificamente para remover suavemente as superfícies da tinta. Certifique-se de testar primeiro em uma pequena área imperceptível para garantir que não danifique a tinta.
Dica: Evite usar raspadores de metal ou chaves de fenda, pois eles podem arranhar a parede ou a própria faixa de luz.
Passos de remoção de luz de tira de LED (guia ilustrado detalhado)
removendo Fitas de LED De uma parede sem danificar a tinta pode parecer desafiador, mas com atenção cuidadosa e uma abordagem passo a passo, o processo pode ser concluído de forma suave e eficiente. Para proteger suas paredes ou superfícies pintadas, siga este guia detalhado para aprender como remover as luzes de LED das paredes sem causar danos.
Passo 1: Desligue a energia para garantir a segurança
Mais uma vez, se a faixa de LED é alimentada por USB, plugue DC ou conectado à rede elétrica fonte de alimentação, certifique-se de desligar a energia antes da remoção para evitar curtos-circuitos ou operações acidentais.

Passo 2: Remova cuidadosamente e levante um lado
Se a tira de LED estiver fixada com adesivos ou clipes removíveis, primeiro remova todos os clipes ou suportes. Em seguida, use um raspador de plástico ou seus dedos para levantar delicadamente um canto. Evite puxar com muita força, pois isso pode danificar a tinta. Prossiga devagar, manuseie com cuidado e paciência é fundamental.

Passo 3: Pré-aqueça a tira leve para suavizar o suporte adesivo
Use um secador de cabelo com fogo médio-baixo, mantendo-o a aproximadamente 8 a 10 cm da parede. Aqueça lentamente a faixa de luz ao longo de seu comprimento. Aqueça aproximadamente 20 a 30 cm de cada vez, evitando aquecimento prolongado em uma área para evitar queimar a tinta ou danificar a placa da tira de luz.
O aquecimento suaviza o adesivo, facilitando o descascamento sem danificar a parede ou a tinta. Esta etapa é crucial para remover a faixa de luz LED sem descolar a parede ou a tinta, então aqueça de forma lenta e paciente.

Passo 4: Levante a faixa de luz suavemente de uma das extremidades
Enquanto o adesivo ainda estiver macio, comece a retirar a tira de luz LED de uma extremidade. Use um raspador de plástico ou seus dedos para descascá-lo lentamente na direção da faixa de luz, mantendo um ângulo de 30 a 45 graus. Durante a remoção, a faixa de luz deve permanecer firmemente contra a parede, com movimentos lentos, suaves e uniformes. Se uma seção parece particularmente presa, não a force; em vez disso, aqueça-a por alguns segundos antes de continuar. Mover cuidadosamente a faixa de luz LED reduz a pressão na pintura da parede, evitando que ela rasgue ou rache.

Etapa 5: limpar marcas adesivas residuais
Na maioria dos casos, a remoção da faixa de luz LED deixa algumas marcas adesivas pretas ou transparentes na parede. Os métodos de tratamento recomendados são os seguintes:
- Use um pano não tecido mergulhado em álcool, água morna ou uma pequena quantidade de removedor de adesivo.
- Se estiver usando um removedor de adesivo, teste-o primeiro em uma pequena área para evitar danificar a tinta.
- Limpe suavemente os movimentos circulares várias vezes; não raspe vigorosamente.
- Por fim, enxágue bem com água limpa e seque.
Nota: Se a parede for pintada com tinta látex, primeiro teste uma pequena área no canto para garantir que o álcool não danifique a superfície da tinta.

Passo 6: Atualizar e tai uP (se necessário)
Após a remoção do adesivo, inspecione a parede. Se houver diferenças de desgaste ou de cor, use tinta correspondente para retocar a área. A aplicação de uma pequena quantidade de tinta pode restaurar a aparência da parede, fazendo com que pareça nova após a remoção da faixa de luz LED.
vulgar mse deve a avazio vgalinha rLED em movimento lluz sviagens
Para remover adequadamente as tiras de luz LED, você precisa de paciência e das técnicas certas. Aqui estão alguns erros comuns que você pode cometer e suas consequências:
- descascando muito rápido: Se você descascar a tira leve muito rapidamente, resíduos teimosos podem permanecer na parede. Também pode raspar a tinta ou até danificar a superfície da parede.
- superaquecimento: O princípio da remoção do adesivo é usar o calor para suavizar e soltá-lo. No entanto, o superaquecimento pode fazer com que a tinta da parede suavize, levando à descoloração.
- Use produtos químicos cáusticos com cautela: Embora você possa usar removedores de adesivo para remover tiras de luz das paredes, certifique-se de usar produtos suaves, como álcool ou água morna. Caso contrário, os produtos químicos em removedores especializados podem danificar as paredes e representar um risco à saúde.
- Falha ao limpar após a remoção: O adesivo residual pode fazer com que a parede pareça suja e complicar o trabalho de renovação. Portanto, é essencial limpar a parede com uma toalha e água após a remoção para garantir uma superfície lisa.
Recomendações para remover tiras de luz LED de diferentes superfícies de parede
Ao remover Fitas de luz LED, o tipo de superfície da parede afetará diretamente o método de remoção e a dificuldade envolvida. Abaixo está uma análise das características de vários tipos de paredes comuns e recomendações para remoção:
Paredes pintadas de látex
As superfícies de tinta látex são relativamente frágeis e retirá-la pode facilmente fazer com que a camada de tinta se desprenda ou descatee. Recomenda-se usar um secador de cabelo em uma configuração média-baixa para aquecer lentamente a faixa de luz ao longo de sua direção, suavizando o adesivo antes de descascá-lo cuidadosamente.
Evite aplicar força excessiva durante a remoção; é melhor usar um raspador de plástico para auxiliar o processo, em vez de puxar diretamente com as mãos. Marcas adesivas residuais podem ser limpas suavemente com um pano umedecido em uma pequena quantidade de álcool médico, mas teste uma pequena área primeiro para garantir que não dissolva a tinta. É necessário um cuidado extra para superfícies de parede especiais, como tinta artística de alta qualidade ou tinta fosca.
de madeira Wtudo
As paredes de madeira normalmente têm uma superfície dura que é menos propensa a danos causados pelo descascamento, mas o resíduo adesivo pode permanecer nas fendas de grãos de madeira. Recomenda-se primeiro aquecer a tira leve e descascá-la lentamente, depois usar um pano macio umedecido com álcool ou óleo essencial de limão para limpar suavemente qualquer resíduo.
Se a madeira não for tratada e sem pintura, evite usar agentes de limpeza fortes para evitar descoloração ou absorção de produtos químicos. Se a superfície de madeira tiver um revestimento de tinta ou acabamento em folheado, verifique também se ela reage com o removedor de adesivo.
Para paredes de ripas de madeira, no entanto, a remoção das tiras de LED é muito mais fácil, pois elas são instaladas entre as ripas. Se você deseja saber mais sobre iluminação LED para paredes de ripas de madeira, leia nosso blog: Um guia para a iluminação LED para paredes de painéis de madeira.
metal SUrfaces
As paredes de metal (como aço inoxidável, painéis de alumínio ou metal pintado) têm superfícies lisas e densas que são resistentes a danos. Na maioria dos casos, as tiras de luz LED podem ser retiradas diretamente.
Mesmo que haja resíduos adesivos menores, eles podem ser facilmente removidos com álcool ou limpador de vidro. Se houver marcas de oxidação ou impressões digitais, você também pode realizar a limpeza e o polimento da superfície para restaurar a cor original do metal. Usar um secador de cabelo pode tornar o processo mais suave.
papel de parede SUrfaces
O papel de parede é muito frágil e as tiras de luz LED com fortes propriedades adesivas são muito propensas a rasgar o papel de parede ou descascar a tinta junto com o papel durante a remoção. É altamente recomendável evitar diretamente aderência da faixa de luz à superfície do papel de parede, especialmente papel de parede à base de papel, papel de parede de espuma ou papel de parede não tecido.
Se for necessária a instalação, deve ser colocado um filme transparente PET ou uma almofada adesiva removível de dupla face entre o papel de parede e a faixa de luz. Se a faixa de luz já tiver sido aderida, recomenda-se removê-la lentamente, enrolando-a com uma pistola de ar quente e dedos de baixa temperatura, sem usar raspadores ou removedores de adesivo para evitar danificar o papel.
vidro/telhas
Vidro e azulejos estão entre os tipos de parede mais fáceis de limpar. Suas superfícies lisas e densas não absorvem produtos químicos, permitindo que as tiras de luz LED sejam removidas diretamente. Mesmo que o resíduo adesivo permaneça, ele pode ser limpo com limpador de vidro, álcool ou um pano úmido. Recomenda-se usar um raspador de plástico para levantar suavemente as bordas para reduzir a tensão nas mãos.
Nota: Se o vidro tiver uma película para janelas, determine se o filme também será retirado para evitar danos acidentais. Para as telhas, verifique se o pó se acumula nas juntas e limpe-os após a remoção.
Sugestões:
- Antes de remover as tiras de luz, identifique o material específico da tinta ou revestimento da parede. Se não tiver certeza, faça um teste de pequena escala em uma área escondida.
- Para espaços comerciais ou de construção baseados em projetos, é recomendável planejar com antecedência a estratégia de iluminação e remoção da faixa de iluminação e escolher métodos de montagem mais fáceis de substituir, como instalações de canal de encaixe, magnético ou de alumínio.
- Para materiais sensíveis, como papel de parede, tinta artística ou painéis decorativos de alta qualidade, evite usar tiras de iluminação de alta aderência durante a instalação inicial ou aplique uma camada de fita protetora antes da instalação.
pode LED Sviagem Lserá Reusado Adepois REmoval?
Muitos usuários costumam se perguntar após a remoção das luzes de LED: essas luzes ainda podem ser usadas?
a resposta é: Se o processo de remoção for feito corretamente e as luzes de tira de LED não mostrarem deformação, quebra ou danos óbvios ao circuito, eles podem ser reutilizados.
No entanto, para garantir que as tiras funcionem corretamente, sejam reinstaladas com segurança e tenham uma boa vida útil, observe os seguintes pontos:
1. Inspecione os circuitos e as juntas de solda da tira
Se a tira for puxada com muita força durante a remoção, podem surgir os seguintes problemas:
- LEDs não acendem ou seções não recebem energia
- Solda fraca ou juntas soldas soltas
- Soltar a interface de potência ou fraturas de placas de cobre
É recomendável usar uma fonte de alimentação de 12 V ou 24 V DC para conectar a faixa de luz removida para um teste de iluminação. Se qualquer seção não acender ou piscar, isso indica danos ao circuito, exigindo recuo ou substituição. para Tiras de luz SPI ou DMX, se o cabo de dados estiver danificado durante a remoção, ele não poderá funcionar normalmente para programação ou sincronização posteriormente.

2. Tratamento de suporte adesivo: reaplicar ou usar o canal de alumínio de montagem
O suporte adesivo original geralmente se deforma, contamina ou perde suas propriedades adesivas durante a remoção. Se for desejada a reutilização, os seguintes tratamentos devem ser realizados:
- Reaplicar usando fita dupla face de classe industrial, como 3M 9448A, 468MP ou VHB.
- Alternativamente, use fita adesiva de espuma para melhor adesão, adequada para superfícies ligeiramente ásperas.
- Se a faixa de luz foi originalmente encapsulada em silicone (por exemplo, tiras de luz de neon), use clipes, tiras de pressão ou canais de alumínio para fixação.
- Evite usar diretamente o adesivo hot melt ou cola comum, pois isso pode afetar a manutenção futura e danificar a base da tira de luz.
Para projetos de iluminação profissional ou espaços comerciais, é recomendável instalar a faixa de luz em um canal de led de perfil de alumínio, que não só permite o reutilização, mas também oferece excelente dissipação de calor, prolongando a vida útil dos chips LED.

3. Evite reinstalar em áreas de alta temperatura ou úmidos
Embora as luzes de tiras de LED tenham um certo grau de resistência às intempéries, se reutilizadas, devem ser evitados os seguintes ambientes adversos:
- Ambientes de alta temperatura (por exemplo, fogões próximos, luz solar direta sobre vidro, etc.): Isso pode causar envelhecimento adesiva e superaquecimento do chip LED e esgotamento.
- Ambientes de alta umidade (por exemplo, banheiros, espaços não fechados ao ar livre): Se a luz original da tira não for à prova d'água, é altamente provável que a reutilização seja causada por entrada de água e curtos-circuitos.
- Superfícies cobertas de poeira ou graxa: O suporte adesivo pode não aderir com segurança e descascar.
Se for necessária a instalação nesses cenários, é recomendável substituir a faixa de luz LED por uma de IP65 ou superior para impermeabilização e usar canais leves à prova d'água ou tratamento de vedante.
4. Replaneje os pontos de corte e conexão
Durante a remoção, a faixa de luz pode precisar ser cortada devido ao tamanho ou aos requisitos de ângulo. Ao reinstalar:
- Corte ao longo das linhas de corte marcadas; não corte arbitrariamente nas áreas de fiação.
- Use conectores rápidos de LED apropriados ou resolde novamente os pontos de conexão.
- Se estender o cabo, use cabos de alimentação DC que atendam às especificações e garanta a consistência da polaridade.
No geral, as luzes de tiras de LED têm um certo grau de reutilização, mas isso depende da estrutura intacta, do circuito funcionando normalmente, de uma re-adesão ou da segurança adequadas e da adequação do ambiente de uso.
Para empreiteiros, eletricistas e equipes de renovação, as luzes de LED removidas podem ser usadas como tiras sobressalentes, iluminação de exibição temporária ou para testes de amostra, maximizando assim seu valor. No entanto, para projetos críticos ou soluções de iluminação que exigem uma operação estável a longo prazo, é recomendável priorizar o uso de novas luzes LED para garantir desempenho e qualidade estética.
Instalação Tecnicas para Avazio Wtodos Damador (Sutilizável para Future Remotiva)
Muitos usuários, ao instalar as faixas de luz LED pela primeira vez, geralmente prendem as tiras diretamente nas paredes, tetos ou armários. Embora isso possa parecer conveniente a curto prazo, pode levar a problemas como descascamento de tinta, danos no papel de parede e resíduos adesivos difíceis de remover quando chega a hora de alterar o layout da iluminação, manter a fiação ou remover as tiras durante uma mudança ou reforma.
Portanto, a adoção de medidas “removíveis” ou “amigáveis à parede” durante a instalação não apenas reduz os custos futuros de manutenção, mas também aumenta a limpeza geral e o profissionalismo da fiação. Abaixo estão várias técnicas comuns e recomendadas:
I. Use métodos de montagem “sem adesivos” (recomendado para usuários de engenharia ou situações que exijam desmontagem e remontagem frequentes)
1. Clipes de instalação de tiras de LED

- Escopo do aplicativo: Tiras de luz rígidas, tiras de luz largas ou grossas (por exemplo, tiras à base de alumínio 5050/2835, PCB flexível com mangas de silicone)
- Caraterísticas: clipes de plástico ou metal podem ser presos à base com parafusos, permitindo fácil inserção e remoção do corpo da tira de luz.
- Vantagens: Não é necessário adesivo, facilitando a manutenção, substituição e religação futura
- Recomendações de instalação: Instale um clipe a cada 30 a 50 cm; aumente a densidade em áreas curvas para evitar a deformação.
2. Trilhas de perfil de alumínio (cachos leves)

- Âmbito de aplicação: Todos os tipos de tiras de LED, especialmente projetos que exigem dissipação de calor, proteção contra poeira e instalação estética
- Caraterísticas: Incorpore a tira de luz ao perfil de alumínio, combinada com um difusor e tampas para formar uma estrutura completa
- Vantagens: Condutividade térmica superior e desempenho de dissipação de calor, prolongando a vida útil das tiras de luz; aumenta o refinamento estético, adequado para espaços comerciais/escritórios; pode ser instalado em várias superfícies usando parafusos, forte adesão magnética ou adesivo removível dupla face, com fácil desmontagem para manutenção futura
- Notas adicionais: Recomenda-se o uso de alumínio com tratamento de superfície anodizado para maior resistência à corrosão e durabilidade.
3. Instalação magnética

- Âmbito de aplicação: paredes de metal, armários de metal, suportes para exposições, quadros de luz, etc.
- Caraterísticas: A faixa de luz é pré-instalada com ímãs na parte de trás (ou pode ser usado com perfis magnéticos de alumínio), eliminando a necessidade de qualquer adesivo.
- Vantagens: Fácil de instalar e remover sem ferramentas, sem marcas nas paredes; pode ser ajustado e redirecionado a qualquer momento para fiação flexível.
- Dicas de uso: Se a parede não for metal, aplique pré-aplicar uma placa de base magnética para obter um efeito semelhante.
II. Montagem em “Materiais Auxiliares Substituíveis” (adequado para espaços residenciais e de aluguel)
Se você não pode usar clipes, canais de alumínio ou estruturas magnéticas, mas ainda assim deseja manter a conveniência das tiras de luz com adesivo, você pode adicionar uma “camada de tampão” entre a parede e a tira de luz para proteger a parede.
1. Aplique primeiro a fita adesiva e, em seguida, prenda a faixa de luz.
Fita adesiva à base de papel, amplamente utilizada para máscaras de tinta, com adesão moderada sem danificar as paredes. Durante a instalação, primeiro aplique uma camada de fita adesiva de tamanho adequado ao longo do caminho de roteamento da faixa de luz na parede. Em seguida, prenda a faixa de luz LED na fita adesiva, obtendo “adesão indireta”.
- Vantagens: Ao remover a tira de luz no futuro, basta retirar a fita adesiva, deixando a tinta da parede intacta.
- notas: Adequado para uso a curto prazo (3–6 meses), pois a fita adesiva pode se degradar por longos períodos.
2. Use fita protetora em PVC transparente.
A fita de PVC é resistente ao calor, à prova de umidade e à luz, tornando-a adequada para áreas de alta umidade ou alta temperatura. Semelhante em princípio à fita adesiva, mas mais adequado para cenários que exigem maior adesão.
- Método de aplicação: aplique a fita de PVC primeiro, depois a tira de luz e remova as duas juntas posteriormente.
- Especialmente eficaz para aplicações como armários de espelho de banheiro, armações de vidro e painéis traseiros para armários de exibição.
III. Evite aderências diretas aos seguintes materiais
Para garantir a remoção, evite aderir diretamente a faixa de luz às seguintes superfícies:
- Superfícies de papel de parede (propenso a rasgar)
- Paredes de tintas artísticas/artisticas (aderência de superfície ruim, propensa a descascar)
- Madeira exposta ou paredes de cimento nu (aderência ruim ou absorção excessiva de adesivos)
Áreas superaquecidas ou úmidas (adesivo pode envelhecer e descascar)
Se for necessária uma instalação nessas superfícies, use uma camada adesiva neutra ou removível e teste com antecedência.
IV. Considere a “removibilidade” do estágio de planejamento do projeto
Se você é um designer de iluminação, empreiteiro de reforma ou gerente de projeto, é recomendável:
- Planeje os métodos de remoção para tiras de luz, controladores e fontes de energia durante o diagrama de fiação do projeto ou o estágio de seleção do produto.
- Selecione as estruturas de produtos que suportam a manutenção secundária
- Esclareça se o cliente tem necessidades de renovação ou futuras de renovação e reserve flexibilidade antecipadamente
Resumo: Métodos de instalação adequados = sem danos na parede posterior + reutilização + capacidade de manutenção forte do projeto.
Comparado com a “aplicação adesivo único”, a utilização de métodos como conectores de encaixe, acessórios magnéticos, perfis de alumínio ou camadas adesivas auxiliares pode reduzir significativamente o risco de danos na parede, melhorar a qualidade geral da instalação e aumentar a flexibilidade. Seja para usuários residenciais ou integradores de engenharia, vale a pena priorizar esses métodos.
Resumo: Domine as técnicas, fácil remoção sem deixar rastro
A remoção de luzes de tiras de LED não é difícil. A chave está em três etapas: assistência à pistola de calor, descascamento lento e limpeza suave. Contanto que você domine o método correto, você pode atingir o objetivo de “Remoção limpa, sem danos à parede e tiras de luz reutilizáveis”.
Para usuários de longo prazo, integradores de engenharia ou usuários de espaços de aluguel, é recomendável considerar o “pós-remoção” no início do projeto. A seleção da estrutura de luz LED e do método de instalação apropriados melhorará significativamente a eficiência de manutenção pós-instalação e economizará recursos e recursos humanos.
Se você estiver procurando por luzes LED que sejam fáceis de remover, tenham um suporte adesivo suave e compatíveis com vários métodos de instalação, por favor Contato Signlited. Oferecemos uma economia de custo, diversificada Soluções de luz de tiras de LED Para clientes de engenharia e integradores de iluminação, com suporte para suporte adesivo personalizado, conectores de encaixe, canais de alumínio e outras opções de montagem para garantir uma instalação sem preocupações sempre.
Postagens relacionadas