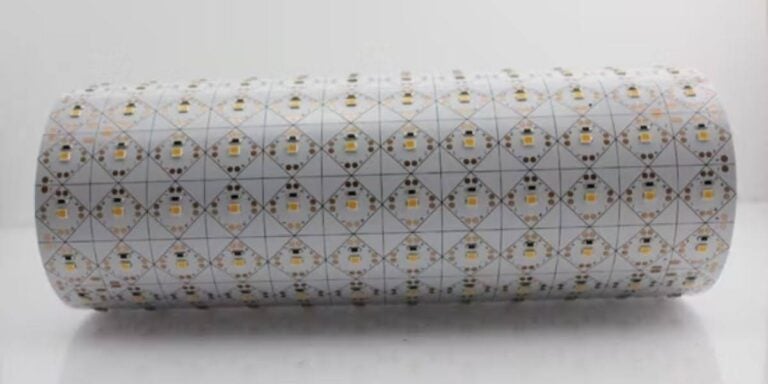
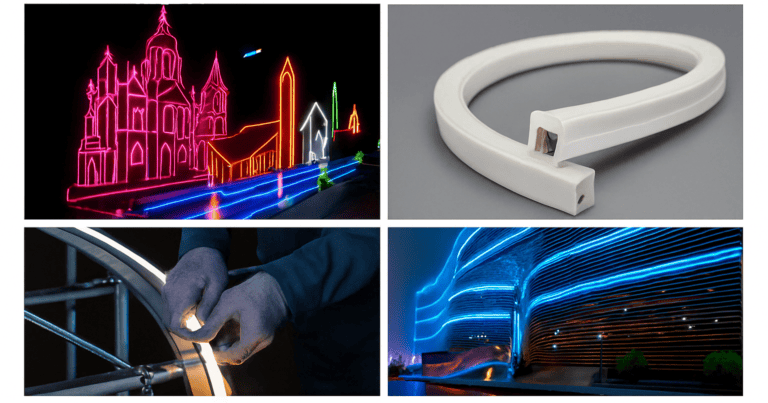
Moderne Geräte mit moderner LED-Linearmodule ist nicht mehr nur eine Option – es ist eine Notwendigkeit für Energieeffizienz und zuverlässige Leistung. Herkömmliche fluoreszierende oder veraltete LED-Systeme leiden häufig unter einem hohen Energieverbrauch, häufiger Wartung und ungleichmäßiger Beleuchtung. Durch den Austausch dieser Geräte durch fortschrittliche LED-Linearmodule können Unternehmen und Hausbesitzer eine bessere Beleuchtung, eine längere Lebensdauer und geringere Kosten erreichen. Dieser Artikel bietet eine praktische, schrittweise Anleitung zum Ersetzen von LED-Linearmodulen in alten Vorrichtungen sowie Lösungen für häufige Nachrüstungsprobleme.

Vorbereitung vor dem Austausch
1. Überprüfen Sie die Kompatibilität der Geräte
Vor dem Austausch der alten Beleuchtung durch LED-Linearmodule ist es wichtig zu bewerten, ob die Leuchte baulich geeignet ist. Das Gehäuse sollte genügend Platz für das neue Modul haben und eine ordnungsgemässe Positionierung für eine gleichmäßige Lichtverteilung ermöglichen. Das Wärmemanagement ist ein weiterer Schlüsselfaktor: LED-Linearmodule erfordern eine effektive Wärmeableitung, um die Leistung und Lebensdauer aufrechtzuerhalten. Wenn die Vorrichtung eine schlechte Belüftung aufweist oder einen Metallboden für die Wärmeübertragung fehlt, können zusätzliche Einstellungen oder ein Nachrüstsatz erforderlich sein, um einen sicheren Betrieb zu gewährleisten.
2. Identifizieren Sie die vorhandene Lichtquelle
Der Typ der Lichtquelle in Ihrer alten Leuchte bestimmt, wie die Nachrüstung abläuft. Wenn die Leuchte Leuchtstoffröhren verwendet, muss das Vorschaltgerät umgangen oder entfernt und ein kompatibles LED-Treiber installiert werden. Bei älteren LED-Modulen müssen Sie möglicherweise bestätigen, ob der vorhandene Treiber die Spannungs- und Stromanforderungen des neuen Moduls unterstützen kann. In vielen Fällen sorgt das Ersetzen oder Aufrüsten der LED-Stromversorgung für optimale Leistung und vermeidet Probleme wie Flackern oder Helligkeit.
3. Sammeln Sie die erforderlichen Werkzeuge
Durch die richtigen Werkzeuge wird der Austauschprozess des LED-Linearmoduls glatter und sicherer. Zumindest benötigen Sie einen Schraubenzieher, eine Zange, Drahtschneider und elektrisches Klebeband. Ein Spannungsprüfer wird dringend empfohlen, um vor dem Start zu bestätigen, dass die Stromversorgung vollständig getrennt ist. Bei Installationen mit mehreren Befestigungen ist auch der Einsatz von isolierten Handschuhen und Schutzbrillen eine gute Praxis. Durch die richtige Vorbereitung wird nicht nur Zeit gespart, sondern auch das Risiko von Verdrahtungsfehlern oder Sicherheitsrisiken verringert.

Schritt-für-Schritt-Ersatz
1. Schalten Sie die Stromversorgung aus und stellen Sie sichery
Der erste und wichtigste Schritt beim Austausch von LED-Linearmodulen ist die vollständige Unterbrechung der Stromversorgung. Schalten Sie den Leistungsschalter oder den Wandschalter immer aus und bestätigen Sie mit einem Spannungsprüfgerät, dass kein Strom fließt. Die Sicherheit kann nicht überbewertet werden - die Arbeit mit spannungsführenden Kabeln birgt ernsthafte Risiken für elektrischen Schlag. Das Tragen von isolierten Handschuhen und einer Schutzbrille bietet während des Prozesses eine zusätzliche Schutzschicht.
2. Entfernen Sie die alte Lichtquelle und den Treiber
Sobald die Befestigung sicher ist, entfernen Sie vorsichtig die Abdeckung oder den Diffusor und legen Sie die internen Komponenten frei. Wenn die alte Leuchte fluoreszierend ist, trennen Sie die Röhre und entfernen Sie sie. Bei Geräten, die bereits ein LED-Linearmodul verwenden, überprüfen Sie die vorhandenen Treiberspezifikationen. Wenn die Ausgangsspannung und der Strom des Fahrers mit dem neuen Modul übereinstimmen, kann dies wiederverwendet werden, um Zeit und Kosten zu sparen. Andernfalls ist es am besten, es durch einen kompatiblen LED-Treiber zu ersetzen, um eine stabile Leistung und langfristige Zuverlässigkeit zu gewährleisten.
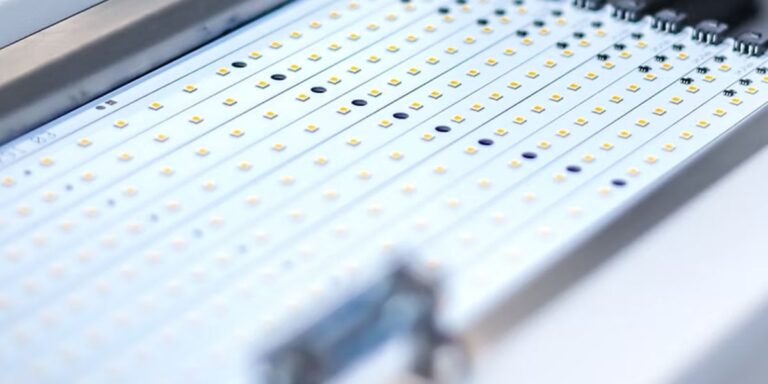
3. Installieren Sie das neue LED-Linearmodul und den Treiber
Nach dem Löschen der alten Komponenten das neue LED-Linearmodul in der Halterung positionieren. Sichern Sie es mit Schrauben oder Befestigungsclips fest und achten Sie darauf, dass es für eine gleichmäßige Beleuchtung ausgerichtet ist. Schließen Sie als nächstes die Drähte vom Modul an den LED-Treiber an, wobei Sie die korrekte Polarität und den vom Hersteller angegebenen Schaltplan einhalten. Achten Sie darauf, die Verbindungen mit dem Klebeband oder den Anschlüssen zu isolieren, um Kurzschlüsse zu vermeiden. Wenn ein neuer Treiber installiert wird, montieren Sie ihn an einem Ort mit angemessenem Luftstrom, um die Wärmeableitung und Haltbarkeit zu unterstützen.
4. Wiederherstellen der Stromversorgung und Testen der Leuchte
Wenn alle Anschlüsse fertig sind, montieren Sie die Befestigung wieder, indem Sie die Abdeckung oder den Diffusor wieder einsetzen. Stellen Sie die Stromversorgung am Schalter oder Schalter wieder her und schalten Sie das Licht ein, um die Installation zu testen. Das neue LED-Linearmodul sollte sofort mit gleichbleibender Helligkeit und ohne Flackern leuchten. Wenn Probleme auftreten, wie z. B. Dimmen oder unregelmäßige Lichtleistung, überprüfen Sie die Verdrahtung und die Treiberkompatibilität. Der erfolgreiche Test der Leuchte stellt sicher, dass der Austausch korrekt durchgeführt wird und dass das verbesserte Beleuchtungssystem die erwarteten Energieeinsparungen und -leistungen liefert.

Fehlersuche bei allgemeinen Problemen
1. Falsche Modulgröße oder Stecker
Eines der häufigsten Probleme beim Austausch von LED-Linearmodulen besteht darin, dass das neue Modul nicht mit der Größe oder dem Anschlusstyp übereinstimmt. Wenn die Abmessungen oder Schnittstellen nicht ausrichten, kann ein Erzwingen der Installation sowohl das Modul als auch das Gehäuse beschädigen. Die beste Lösung ist, sich an Ihren LED-Lieferanten zu wenden, um die richtige Größe nachzubestellen oder ein kundenspezifisches LED-Linearmodul anzufordern, das für Ihre Leuchte entwickelt wurde. Die Arbeit mit einem zuverlässigen LED-Retrofit-Lieferanten sorgt für einen reibungsloseren Upgrade-Prozess.
2. Kein Licht nach dem Einschalten
Wenn sich das LED-Linearmodul nach der Installation nicht einschaltet, überprüfen Sie zunächst die Verdrahtung zwischen Modul und Treiber. Eine falsche Polarität oder eine lose Verbindung verursacht häufig das Problem. Stellen Sie sicher, dass die positiven und negativen Kabel richtig angeschlossen sind, und stellen Sie sicher, dass der LED-Treiber korrekt mit der Netzversorgung verbunden ist. Mit einem Spannungsprüfer kann schnell ermittelt werden, ob die Leistung den Treiber und das Modul erreicht.
3. Flimmern während des Betriebs
Flackernde Lichter können frustrierend sein und weisen normalerweise auf Verkabelungs- oder Fahrerprobleme hin. Überprüfen Sie, ob die Stromzufuhr unterbrochen wird. Eine weitere Möglichkeit besteht darin, dass die Ausgangsspannung des LED-Treibers nicht den Eingangsanforderungen des Moduls entspricht. Wenn der Fahrer nicht kompatibel ist, wird durch den Austausch durch eine ordnungsgemäß bemessene LED-Stromversorgung das Flackern beseitigt und das Modul vor langfristigen Schäden geschützt.
4. Überhitzungsprobleme
Übermäßige Hitze verkürzt die Lebensdauer von LED-Linearmodulen und kann unsachgemäße Installation signalisieren. Stellen Sie sicher, dass das Modul vollständig am Kühlkörper oder Metallgehäuse der Vorrichtung befestigt ist, um eine effektive Wärmeübertragung zu ermöglichen. Eine schlechte Belüftung in der Halterung kann auch zu Wärmebildung führen. In einigen Fällen besteht das Problem darin, dass ein übergroßer Fahrer mehr Strom liefert, als das Modul ausgelegt ist. Das Umschalten auf einen Treiber mit geringerer Leistung mit der richtigen Ausgabe verhindert eine Überhitzung und schützt das LED-System.

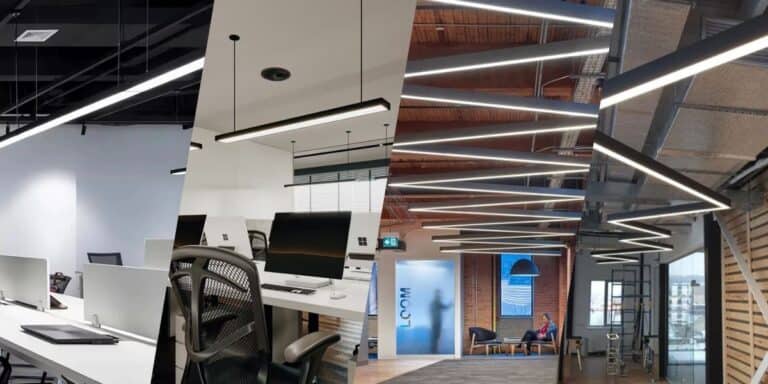
Wichtige Vorteile der Upgrades auf LED-Linearmodule
Das Ersetzen alter Vorrichtungen durch LED-Linearmodule bringt klare Vorteile. Die Energieeffizienz ist am wichtigsten, da LEDs bis zu 601 tp3t weniger Strom verbrauchen als herkömmliche Beleuchtung und gleichzeitig eine hellere, gleichmäßigere Beleuchtung bieten. Eine längere Lebensdauer verringert auch die Wartungshäufigkeit und senkt die Gesamtbetriebskosten. Darüber hinaus bieten LED-Linearmodule Flexibilität bei der Farbtemperatur, Dimmoptionen und der intelligenten Steuerungskompatibilität, sodass sie sowohl für gewerbliche als auch für private Anwendungen geeignet sind.
Bei Signlited sind wir auf die Anpassung von LED-Linearmodulen spezialisiert, die auf Ihre Projektanforderungen zugeschnitten sind. Vom Leiterplatten- und Light-Engine-Design bis hin zu Leistungstests und Qualitätssicherungen liefert unser Team Lösungen, die Zuverlässigkeit und Effizienz gewährleisten. Mit jahrelanger Expertise und einer starken Erfolgsbilanz auf den globalen Märkten ist Signlited der vertrauenswürdige Partner für Großaufträge und maßgeschneiderte LED-Retrofit-Lösungen. Kontaktieren Sie uns noch heute, um zu besprechen, wie wir Ihre Beleuchtungs-Upgrades unterstützen können. Wenn Sie weitere Informationen über LED-Linearmodul erhalten möchten, lesen Sie diesen Artikel: LED-Linearmodul Komplette Anleitung: Struktur, Treiber und Anwendungen
Verwandte Artikel