Amélioration des anciens luminaires avec le moderne Modules linéaires LED Ce n'est plus une option, c'est une nécessité pour l'efficacité énergétique et des performances fiables. Les systèmes traditionnels à LED fluorescents ou obsolètes souffrent souvent d'une consommation d'énergie élevée, d'un entretien fréquent et d'un éclairage irrégulier. En remplaçant ces luminaires par des modules linéaires LED avancés, les entreprises et les propriétaires peuvent obtenir un meilleur éclairage, une durée de vie plus longue et une réduction des coûts. Cet article fournit un guide pratique, étape par étape, sur la façon de remplacer les modules linéaires LED dans les anciens luminaires, ainsi que des solutions aux défis de rénovation courants.

Préparation avant le remplacement
1. Vérifier la compatibilité des
Avant de remplacer l'ancien éclairage par des modules linéaires LED, il est important d'évaluer si le luminaire est structurellement adapté. Le boîtier doit avoir suffisamment d'espace pour le nouveau module et permettre un positionnement correct pour une distribution uniforme de la lumière. La gestion de la chaleur est un autre facteur clé : les modules linéaires LED nécessitent une dissipation thermique efficace pour maintenir les performances et la durée de vie. Si le luminaire a une mauvaise ventilation ou n'a pas de base en métal pour le transfert de chaleur, des ajustements supplémentaires ou un kit de rénovation peuvent être nécessaires pour assurer un fonctionnement sûr.
2. Identifier la source lumineuse existante
Le type de source de lumière dans votre ancien luminaire détermine la manière dont la rénovation se déroulera. Si le luminaire utilise des tubes fluorescents, le ballast doit être contourné ou retiré, et un pilote LED compatible est installé. Pour les anciens modules LED, vous devrez peut-être confirmer si le pilote existant peut prendre en charge les exigences de tension et de courant du nouveau module. Dans de nombreux cas, le remplacement ou la mise à niveau de l'alimentation LED assure des performances optimales et évite les problèmes tels que le scintillement ou la réduction de la luminosité.
3. Rassemblez les outils requis
Avoir les bons outils prêts pour le processus de remplacement du module linéaire LED plus fluide et plus sûr. Au minimum, vous aurez besoin d'un tournevis, d'une pince, d'un coupe-fil et d'un ruban électrique. Un testeur de tension est fortement recommandé pour confirmer que l'alimentation est complètement déconnectée avant de démarrer. Pour les installations impliquant plusieurs appareils, l'utilisation de gants isolés et de lunettes de protection est également une bonne pratique. Une préparation appropriée garantit que le processus de remplacement permet non seulement de gagner du temps, mais également de réduire le risque d'erreurs de câblage ou de dangers pour la sécurité.

Processus de remplacement étape par étape
1. Coupez l'alimentation et assurez la sécuritéje
La première étape et la plus critique lors du remplacement des modules linéaires LED consiste à couper complètement l'alimentation. Arrêtez toujours le disjoncteur ou le commutateur mural contrôlant le luminaire et confirmez avec un testeur de tension qu'aucun courant ne circule. La sécurité ne peut être surestimée : travailler avec des fils sous tension présente de sérieux risques de choc électrique. Le port de gants isolés et de lunettes de sécurité offre une couche supplémentaire de protection pendant le processus.
2. Retirez l'ancienne source de lumière et le pilote
Une fois que le luminaire est sûr à manipuler, retirez soigneusement le couvercle ou le diffuseur et exposez les composants internes. Si l'ancien luminaire est fluorescent, débranchez et retirez le tube et le ballast. Pour les appareils qui utilisent déjà un module linéaire LED, vérifiez les spécifications du pilote existantes. Si la tension de sortie et le courant du conducteur correspondent au nouveau module, il peut être réutilisé pour gagner du temps et des coûts. Sinon, il est préférable de le remplacer par un pilote LED compatible pour garantir des performances stables et une fiabilité à long terme.
3. Installez le nouveau module linéaire et pilote LED
Après avoir effacé les anciens composants, placez le nouveau module linéaire LED à l'intérieur du luminaire. Fixez-le fermement à l'aide de vis ou de clips de montage, en vous assurant qu'il est aligné pour un éclairage uniforme. Ensuite, connectez les fils du module au pilote LED, en suivant la polarité et le schéma de câblage appropriés fournis par le fabricant. Veillez à isoler les connexions avec du ruban électrique ou des connecteurs pour éviter les courts-circuits. Si un nouveau pilote est en cours d'installation, montez-le dans un endroit avec un flux d'air approprié pour favoriser la dissipation de la chaleur et la durabilité.
4. Restaurer la puissance et tester le luminaire
Lorsque toutes les connexions sont terminées, remontez le luminaire en remettant le couvercle ou le diffuseur en place. Rétablir l'alimentation au disjoncteur ou au commutateur et allumer la lumière pour tester l'installation. Le nouveau module linéaire LED doit s'allumer instantanément avec une luminosité constante et aucun scintillement. En cas de problème, comme une gradation ou une sortie de lumière irrégulière, vérifiez le câblage et la compatibilité avec le pilote. Le test réussi du luminaire garantit que le remplacement est effectué correctement et que le système d'éclairage amélioré vous permettra d'économiser et de performances énergétiques.

Dépannage des problèmes courants
1. Taille ou connecteur de module incorrect
L'un des problèmes les plus courants lors du remplacement du module linéaire LED est de constater que le nouveau module ne correspond pas à la taille ou au type de connecteur. Si les dimensions ou les interfaces ne sont pas alignées, forcer l'installation peut endommager le module et le boîtier. La meilleure solution est de contacter votre fournisseur de LED pour commander à nouveau la bonne taille ou demander un module linéaire LED personnalisé conçu pour votre luminaire. Travailler avec un fournisseur de rénovation LED fiable garantit un processus de mise à niveau plus fluide.
2. Pas de lumière après mise sous tension
Si le module linéaire LED ne s'allume pas après l'installation, commencez par vérifier le câblage entre le module et le pilote. Une polarité incorrecte ou une connexion lâche cause souvent le problème. Assurez-vous que les fils positifs et négatifs sont correctement connectés et confirmez que le pilote LED est correctement connecté à l'alimentation secteur. L'utilisation d'un testeur de tension peut rapidement déterminer si la puissance atteint le pilote et le module.
3. Flicker pendant le fonctionnement
Les feux scintillants peuvent être frustrants et indiquent généralement des problèmes de câblage ou de conducteur. Vérifiez les mauvaises connexions qui peuvent interrompre le flux de courant. Une autre possibilité est que la tension de sortie du pilote LED ne corresponde pas aux exigences d'entrée du module. Si le conducteur est incompatible, le remplacer par une alimentation LED correctement évaluée éliminera le scintillement et protégera le module contre les dommages à long terme.
4. Problèmes de surchauffe
Une chaleur excessive raccourcit la durée de vie des modules linéaires LED et peut signaler une mauvaise installation. Assurez-vous que le module est entièrement attaché au dissipateur thermique ou au boîtier en métal de l'appareil pour permettre un transfert thermique efficace. Une mauvaise ventilation dans le luminaire peut également provoquer une accumulation de chaleur. Dans certains cas, le problème est un driver surdimensionné délivrant plus de courant que le module est conçu. Le passage à un pilote de puissance inférieure avec la sortie correcte empêche la surchauffe et protège le système LED.

Principaux avantages de la mise à niveau vers des modules linéaires LED
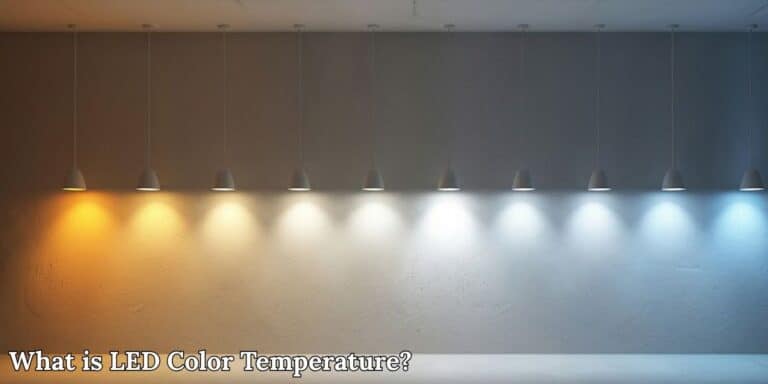
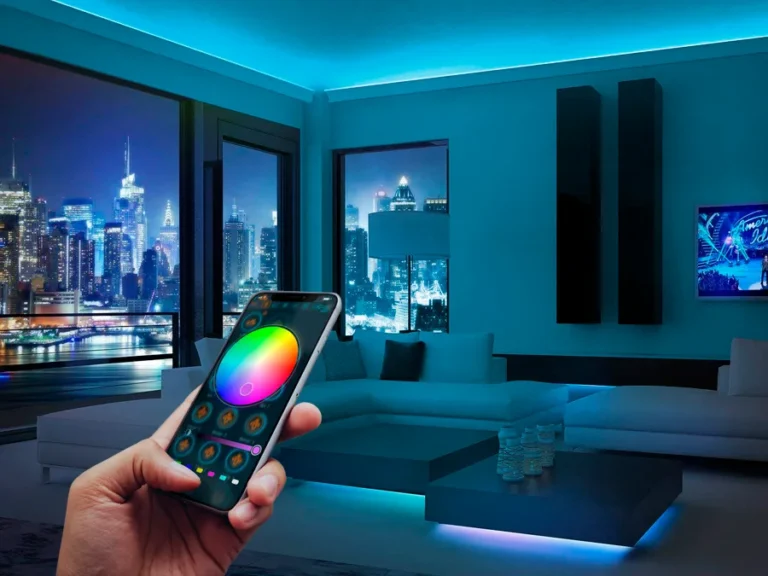
Le remplacement des anciens luminaires par des modules linéaires LED apporte des avantages évidents. L'efficacité énergétique est la plus importante, car les LED consomment jusqu'à 60% moins d'énergie que l'éclairage traditionnel tout en fournissant un éclairage plus lumineux et plus uniforme. Une durée de vie plus longue réduit également la fréquence de maintenance, réduisant les coûts d'exploitation globaux. De plus, les modules linéaires LED offrent une flexibilité dans la température de couleur, les options de gradation et la compatibilité des contrôles intelligents, ce qui les rend adaptés aux applications commerciales et résidentielles.
Chez Signiteled, nous sommes spécialisés dans la personnalisation des modules linéaires LED adaptés aux besoins de votre projet. De la conception de circuits imprimés et de moteurs légers aux tests de performances et à l'assurance qualité, notre équipe fournit des solutions qui garantissent la fiabilité et l'efficacité. Avec des années d'expertise et une solide expérience sur les marchés mondiaux, SignLiteled est le partenaire de confiance pour les commandes groupées et les solutions de rénovation LED personnalisées. Contactez-nous dès aujourd'hui pour discuter de la façon dont nous pouvons prendre en charge vos mises à niveau d'éclairage. Si vous souhaitez obtenir plus d'informations sur le module linéaire LED, consultez cet article : Guide complet du module linéaire LED : structure, pilotes et applications
Articles Similaires