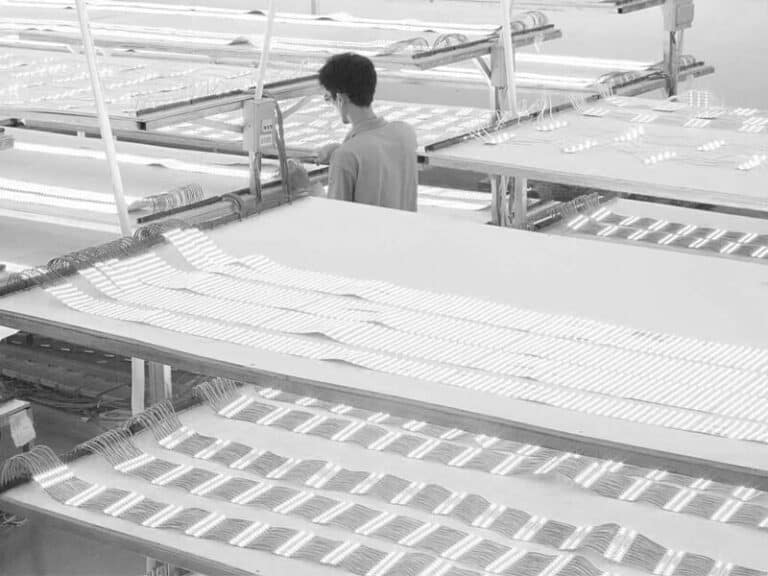
Recently, several of our customers have come to us to report problems with incorrect cutting and lights that don’t turn on throughout the installation process. I’ve written a special page to help you install the LED light strips and solve your issues.
Why is it crucial to install LED strip lights correctly?
When a fixture is put correctly, it will perform effectively and survive for a long time, preventing problems like fading light, uneven illumination, and electrical hazards. Furthermore, it guarantees that the 3M adhesive adheres firmly to the surface, preventing breakage or deterioration of the fixture.
What may be the reason for a dead or non-illuminating lamp bead?
1. Adhesion issues: apply light tape before installation, ensuring sure the surface is free of dust and debris to avoid reducing the light tape paste’s quality.
Take care not to peel the release paper’s adhesive backing surface even once when attaching the light strip. When the light strip is placed with additional paste strips, this will shield the lamp beads from harm.
To avoid uneven surface light from detracting from the overall design and making the strip more prone to failure, the strip light installation platform surface must be level, particularly at the strip board.
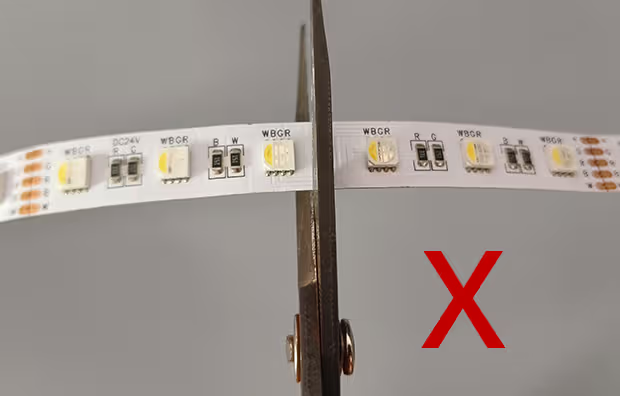
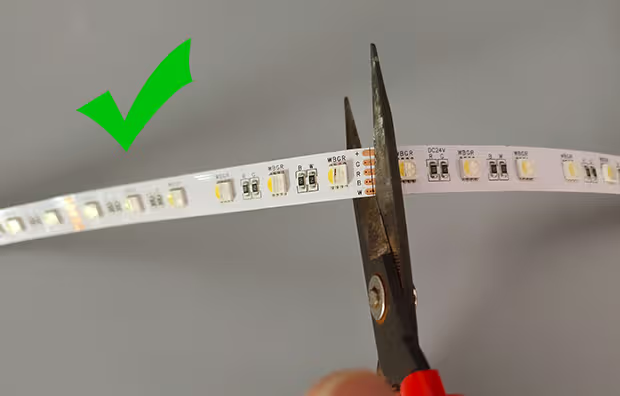
Cutting error: Every strip has a “scissors” mark that can only be cut at that mark. If the cut is made incorrectly, the LED and the circuit will be damaged, which will cause the lamp beads to stop lighting after 0.5 or 1 meters. (The proper way to cut is to carefully examine where the mark is before cutting, referring to the center of the area that is not being cut.)
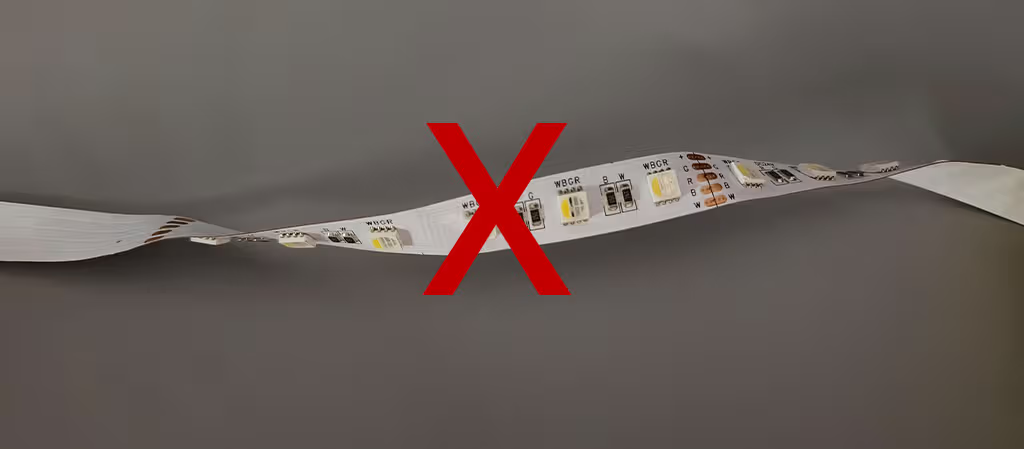
2. Improper installation: The product installation process cannot cause the strip to significantly distort, as this might shatter lamp beads or lead to the removal of components. Furthermore, the strip must be able to withstand tension of at least 60 n; it cannot be utilized excessively. Pulling the light board circuit and damaging the lamp beads are two possible outcomes of excessive straining.
Connecting the power supply’s positive and negative poles in the wrong order: After the installation is finished, the positive and negative poles of the power supply cannot be accessed incorrectly. This means that before turning it on, you must double-check; if you don’t, it will quickly burn through the lamp beads and lamp board lines, which is also the cause of the dead lamp!


What safety measures should I take when installing LED strips?
In addition to the previously mentioned requirement to consider the reason for dead lights, the following details should be taken into consideration while installing:
1. It is strictly forbidden to perform installation operations using electricity. Since we typically use low voltage light strips (12 v and 24 v), we cannot use electricity during the installation process in case something goes wrong and damages the light strip;
2. For indoor use only, non-waterproof LED strip lights, with an air humidity limit of no more than 55%;
3. LED strip lights typically operate in an ambient temperature range of -25°C to 45°C. In order to avoid moisture and damage, appropriate packing and storage techniques are also necessary;
4. Do not unpack it before using it; instead, use it right away or reseal it after unpacking;
How do I install an LED light bar?
1.Verify the power supply: First, ascertain if the LED light bar is to be used at a high or low voltage and what the necessary supply voltage is. Low-voltage LED light bars typically require a transformer or driver to convert their voltage to a level that is appropriate for light bar operation;
2. Attach the power supply: Make sure the connection is solid and pay attention to the difference between the fire and zero wires while connecting the power cable of the driver or transformer to the mains;
3. Clean the mounting surface: To guarantee that the light bar can be securely attached, wash the mounting surface with a clean cloth to remove any dust or contaminants.
4. Peel off the double-sided tape: You must peel off the sticker’s double-sided tape surface (when tearing and attaching) if the back of the LED light bar has self-adhesive 3M double-sided tape.
5. Paste the strip: After adhering the LED strip light to the installation surface, take care to maintain its flatness to prevent creases or air bubbles.
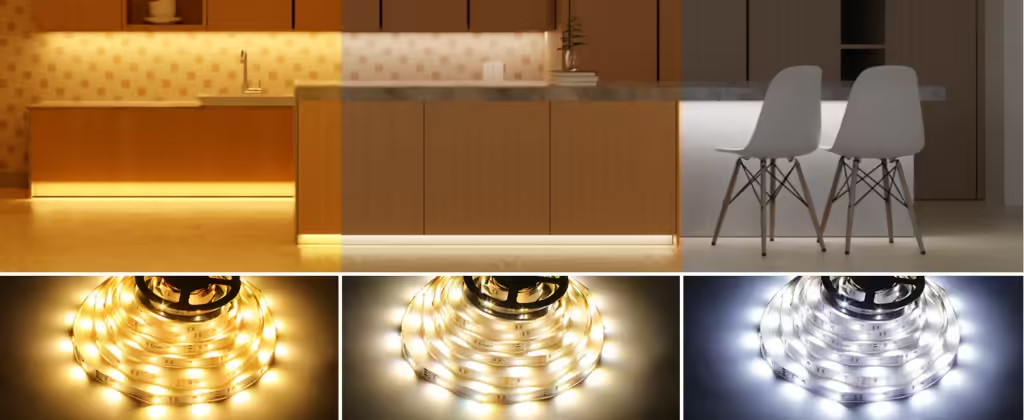
6. Attach the light bar: Check the light bar’s voltage and current using a multimeter before turning it on. After that, switch on the electricity and check to see if the LED strip illuminates, as well as any other oddities like flickering or uneven color;
7. Organize the line: extra line is neatly arranged to prevent clutter, which compromises both safety and attractiveness. If a lampshade needs to be put, it should be placed on the LED strip to guarantee that it is securely fastened and does not interfere with the strip’s bright effect!
The article about installing an LED light bar is above. Please be aware that prior to installation, the process should be thoroughly thought out, carried out with the appropriate equipment, and followed. Allow the LED light bar to enhance our space’s attractiveness and lighting.
FAQ
How are LED strips cut?
Although cutting an LED strip is a straightforward task, care must be taken to prevent damage. It is imperative that the strip be cut from the surface where the scissor marks are marked; cutting from any other area without cutting markings is strictly banned and may result in the strip not lighting up.
How are LED strips joined together?
Soldering or the usage of specialized connections are often needed to link LED strips together. Firstly, confirm that the LED strip type you are using is the same, and only cut where the label says “cuttable”.
When utilizing a connector, ensure sure the metal contacts establish firm contact with the circuit points on the strip by carefully aligning the cut end of the strip and inserting it into the connection. The soldering technique, in which the wires are connected directly to the solder points on the cut end of the LED strip, is an option if you want a stronger connection.
Why does the light on your strip flicker easily?
1. The adhesive backing’s stickiness will be significantly weakened if the material’s surface at the paste site is uneven, dirty, or otherwise imperfect, which will make the strip slip off more readily;
2. Another important element influencing the sticky impact of the light strip is the adhesive backing’s quality. The light strip may potentially come off if the adhesive backing is of low quality or if it becomes less strong with repeated usage.
3. Improper installation technique: When installing LED strip lights, if the product is too squeezed or bent at an excessive angle, the 3M adhesive and the light board may separate, reducing the glue’s effectiveness and shortening the strip lights’ lifespan.
Relevant reading:What are the different types of waterproof light strips?
Related Posts