Modernizacja starych urządzeń z nowoczesnymi Moduły liniowe LED Nie jest już tylko opcją — to konieczność dla efektywności energetycznej i niezawodnej wydajności. Tradycyjne fluorescencyjne lub przestarzałe systemy LED często cierpią z powodu wysokiego zużycia energii, częstej konserwacji i nierównomiernego oświetlenia. Zastępując te urządzenia zaawansowanymi modułami liniowymi LED, firmy i właściciele domów mogą osiągnąć lepsze oświetlenie, dłuższą żywotność i obniżenie kosztów. Ten artykuł zawiera praktyczny przewodnik krok po kroku, jak wymienić moduły liniowe LED w starych oprawach, a także rozwiązania typowych wyzwań związanych z modernizacją.

Przygotowanie przed wymianą
1. Sprawdź kompatybilność oprawy
Przed zastąpieniem starego światła modułami liniowymi LED należy ocenić, czy oprawa jest konstrukcyjnie odpowiednia. Obudowa powinna mieć wystarczająco dużo miejsca na nowy moduł i umożliwiać odpowiednie pozycjonowanie dla równomiernego rozsyłu światła. Zarządzanie ciepłem jest kolejnym kluczowym czynnikiem – moduły liniowe LED wymagają skutecznego rozpraszania ciepła w celu utrzymania wydajności i żywotności. Jeśli urządzenie ma słabą wentylację lub nie ma metalowej podstawy do wymiany ciepła, mogą być konieczne dodatkowe regulacje lub zestaw do modernizacji, aby zapewnić bezpieczną pracę.
2. Zidentyfikuj istniejące źródło światła
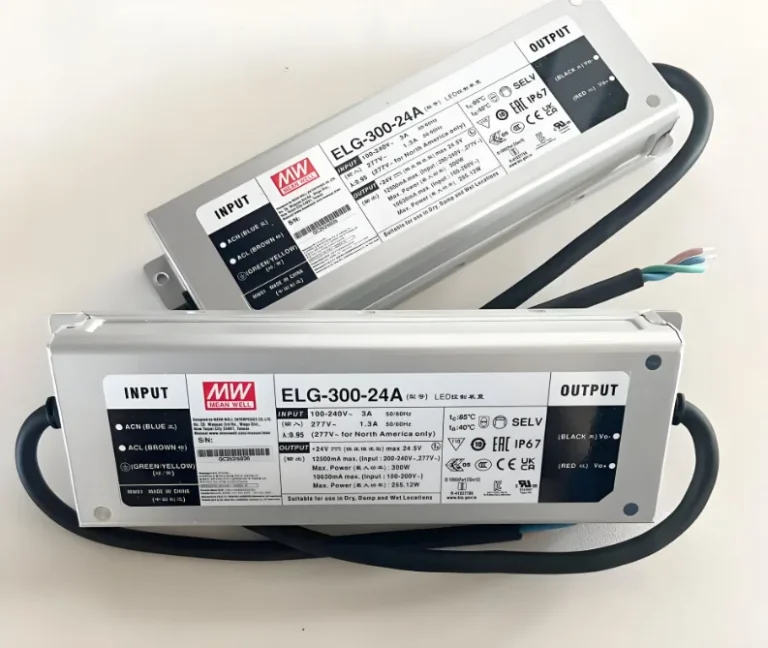
Rodzaj źródła światła w starym oprawie określa, jak będzie przebiegać modernizacja. Jeśli urządzenie wykorzystuje świetlówki, statecznik należy ominąć lub usunąć, a także zainstalowany kompatybilny sterownik LED. W przypadku starszych modułów LED może być konieczne potwierdzenie, czy istniejący sterownik może obsługiwać wymagania dotyczące napięcia i prądu nowego modułu. W wielu przypadkach wymiana lub modernizacja zasilacza LED zapewnia optymalną wydajność i pozwala uniknąć problemów, takich jak migotanie lub zmniejszona jasność.
3. Zbierz wymagane narzędzia
Przygotowanie odpowiednich narzędzi sprawia, że proces wymiany modułu liniowego LED jest płynniejszy i bezpieczniejszy. Przynajmniej będziesz potrzebować śrubokrętu, szczypiec, frezów do drutu i taśmy elektrycznej. Zaleca się, aby tester napięcia był całkowicie odłączony przed uruchomieniem. W przypadku instalacji z wieloma oprawami, dobrym rozwiązaniem jest również używanie izolowanych rękawic i okularów ochronnych. Właściwe przygotowanie zapewnia, że proces wymiany nie tylko oszczędza czas, ale także zmniejsza ryzyko błędów w okablowaniu lub zagrożeń bezpieczeństwa.

Proces wymiany krok po kroku
1. Wyłącz zasilanie i zapewnij bezpieczney
Pierwszym i najbardziej krytycznym krokiem przy wymianie modułów liniowych LED jest całkowite odcięcie zasilania. Zawsze wyłącz wyłącznik lub wyłącznik ścienny sterujący urządzeniem i potwierdź za pomocą testera napięcia, że prąd nie płynie. Bezpieczeństwa nie można przecenić – praca z przewodami pod napięciem stwarza poważne ryzyko porażenia prądem. Noszenie izolowanych rękawiczek i okularów ochronnych zapewnia dodatkową warstwę ochrony podczas procesu.
2. Usuń stare źródło światła i sterownik
Gdy urządzenie jest bezpieczne w obsłudze, ostrożnie zdejmij pokrywę lub dyfuzor i odsłoń elementy wewnętrzne. Jeśli stare urządzenie jest fluorescencyjne, odłącz i wyjmij rurkę i statecznik. W przypadku urządzeń, które już używają modułu liniowego LED, sprawdź istniejące specyfikacje sterowników. Jeśli napięcie wyjściowe i prąd kierowcy pasują do nowego modułu, może on zostać ponownie wykorzystany w celu zaoszczędzenia czasu i kosztów. W przeciwnym razie najlepiej jest zastąpić go kompatybilnym sterownikiem LED, aby zapewnić stabilną wydajność i długotrwałą niezawodność.
3. Zainstaluj nowy moduł liniowy LED i sterownik
Po oczyszczeniu starych komponentów umieść nowy moduł liniowy LED wewnątrz urządzenia. Zabezpiecz go mocno za pomocą śrub lub zacisków montażowych, upewniając się, że jest wyrównany, aby zapewnić równomierne oświetlenie. Następnie podłącz przewody z modułu do sterownika LED, zgodnie z prawidłową polaryzacją i schematem okablowania podanym przez producenta. Zadbaj o izolowanie połączeń taśmą elektryczną lub złączami, aby zapobiec zwarciom. Jeśli instaluje się nowy sterownik, zamontuj go w miejscu z odpowiednim przepływem powietrza, aby wspierać rozpraszanie ciepła i trwałość.
4. Przywróć zasilanie i przetestuj urządzenie
Po zakończeniu wszystkich połączeń zmontuj urządzenie, umieszczając pokrywę lub dyfuzor z powrotem na swoim miejscu. Przywróć zasilanie wyłącznik lub przełącznik i włącz światło, aby przetestować instalację. Nowy moduł liniowy LED powinien świecić natychmiast ze stałą jasnością i bez migotania. W przypadku wystąpienia jakichkolwiek problemów, takich jak ściemnianie lub nieregularna moc światła, sprawdź dwukrotnie instalację okablowania i kompatybilność ze sterownikami. Pomyślne testowanie oprawy zapewnia prawidłowe wykonanie wymiany i że zmodernizowany system oświetlenia zapewni oczekiwane oszczędności energii i wydajność.

Rozwiązywanie typowych problemów
1. Nieprawidłowy rozmiar modułu lub złącze
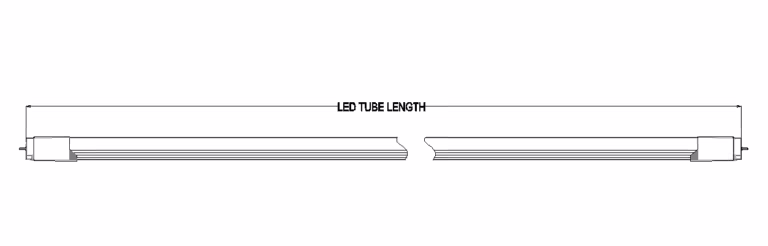
Jednym z najczęstszych problemów podczas wymiany modułu liniowego LED jest stwierdzenie, że nowy moduł nie pasuje do urządzenia pod względem rozmiaru lub typu złącza. Jeśli wymiary lub interfejsy nie są wyrównane, wymuszenie instalacji może uszkodzić zarówno moduł, jak i obudowę. Najlepszym rozwiązaniem jest skontaktowanie się z dostawcą LED w celu zmiany kolejności prawidłowego rozmiaru lub zażądania dostosowanego modułu liniowego LED zaprojektowanego dla Twojego urządzenia. Współpraca z niezawodnym dostawcą modernizacji LED zapewnia płynniejszy proces aktualizacji.
2. Brak światła po włączeniu zasilania
Jeśli moduł liniowy LED nie włącza się po instalacji, zacznij od sprawdzenia okablowania między modułem a sterownikiem. Niewłaściwa polaryzacja lub luźne połączenie często powoduje problem. Upewnij się, że przewody dodatnie i ujemne są prawidłowo podłączone i upewnij się, że sterownik LED jest prawidłowo podłączony do zasilania sieciowego. Za pomocą testera napięcia można szybko określić, czy moc dociera do sterownika i modułu.
3. migotanie podczas pracy
Migotanie świateł może być frustrujące i zwykle wskazuje na problemy z okablowaniem lub sterownikiem. Sprawdź, czy nie ma słabych połączeń, które mogą przerwać przepływ prądu. Inną możliwością jest to, że napięcie wyjściowe sterownika LED nie spełnia wymagań wejściowych modułu. Jeśli sterownik jest niezgodny, wymiana go na odpowiednio zorientowany zasilacz LED wyeliminuje migotanie i ochroni moduł przed długotrwałymi uszkodzeniami.
4. Problemy z przegrzaniem
Nadmierne ciepło skraca żywotność modułów liniowych LED i może sygnalizować nieprawidłową instalację. Upewnij się, że moduł jest całkowicie przymocowany do radiatora lub metalowej obudowy urządzenia, aby umożliwić skuteczny transfer ciepła. Słaba wentylacja w oprawie może również powodować gromadzenie się ciepła. W niektórych przypadkach problemem jest przewymiarowany sterownik dostarczający więcej prądu niż jest oceniany moduł. Przełączenie na sterownik o niższej mocy z prawidłowym wyjściem zapobiega przegrzaniu i zabezpiecza system LED.

Kluczowe korzyści z modernizacji do modułów liniowych LED
Wymiana starych opraw na moduły liniowe LED daje wyraźne zalety. Najważniejsza jest efektywność energetyczna, ponieważ diody LED zużywają do 60% mniej energii niż tradycyjne oświetlenie, zapewniając jaśniejsze, bardziej jednolite oświetlenie. Dłuższa żywotność również zmniejsza częstotliwość konserwacji, obniżając ogólne koszty eksploatacji. Dodatkowo moduły liniowe LED oferują elastyczność w zakresie temperatury barwowej, opcji ściemniania i kompatybilności z inteligentnym sterowaniem, dzięki czemu nadają się zarówno do zastosowań komercyjnych, jak i mieszkaniowych.
W Signlited specjalizujemy się w dostosowywaniu modułów liniowych LED dostosowanych do wymagań projektowych. Od konstrukcji PCB i lekkich silników po testowanie wydajności i zapewnienie jakości, nasz zespół dostarcza rozwiązania zapewniające niezawodność i wydajność. Dzięki wieloletniej wiedzy i dużym doświadczeniu na rynkach światowych Signlited jest zaufanym partnerem w zakresie zamówień zbiorczych i niestandardowych rozwiązań modernizacyjnych LED. Skontaktuj się z nami już dziś, aby omówić, w jaki sposób możemy wspierać Twoje ulepszenia oświetlenia. Jeśli chcesz uzyskać więcej informacji na temat modułu liniowego LED, sprawdź ten artykuł: Kompletny przewodnik modułu liniowego LED: struktura, sterowniki i aplikacje
Powiązane posty