Installing LED strip lights on the ceiling can transform a room by enhancing its atmosphere, providing both functional and decorative lighting. This guide will cover various methods for installing LED strips on ceilings, helping you achieve a professional look. We’ll discuss suitable LED strip types, factors to consider such as brightness and power supply, and step-by-step installation processes. Whether you’re aiming for ambient lighting or accentuating architectural features, this article will guide you through different installation ways to ensure a secure and visually appealing outcome.

The Most Popular LED Strips for Ceiling
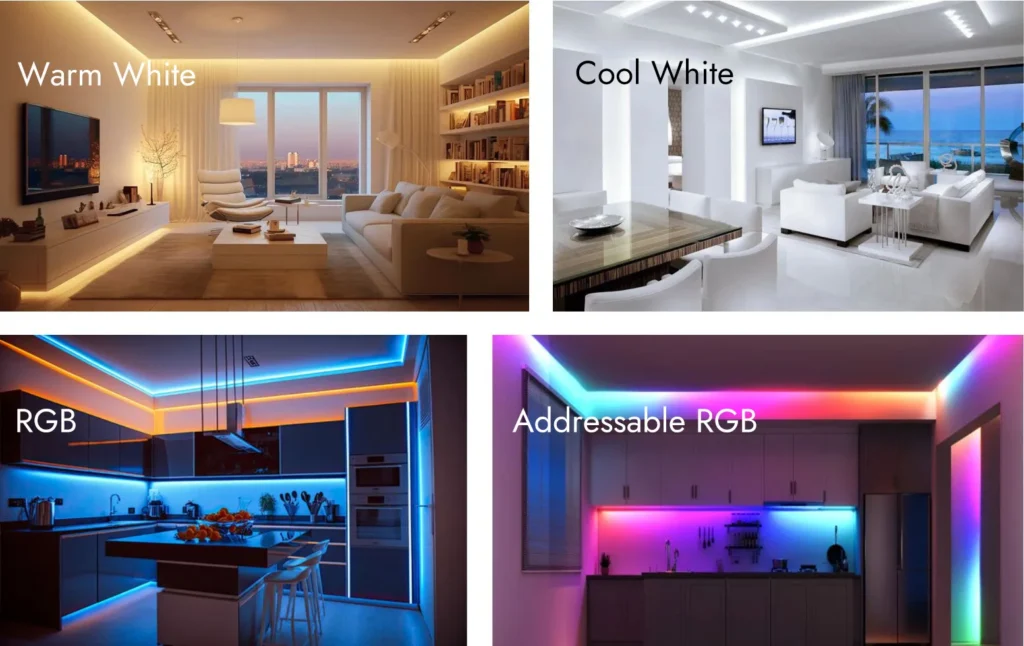
First of all, it’s crucial to get the best LED strips for ceiling. What affect user experience are their color and control method, the most popular LED strips are static white, tunable white, RGB, addressable RGB.
1. Static White LED Strip Lights
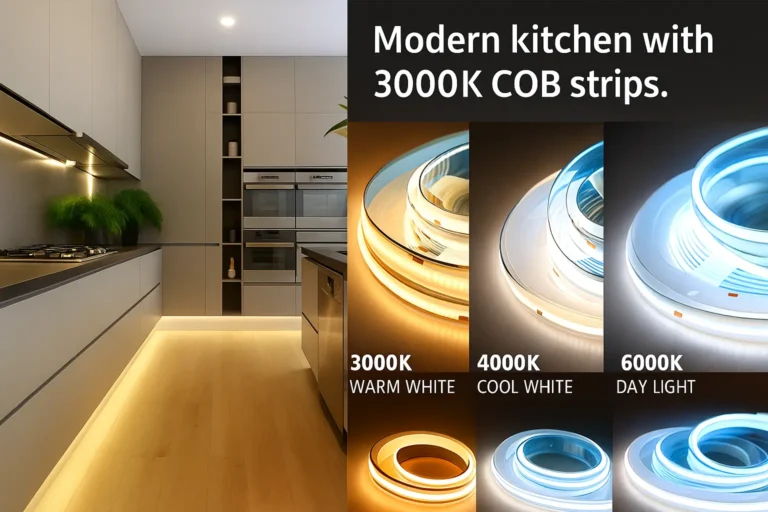
Static white LED strip lights emit a single color of light that remains constant. They are available in two main color temperatures:
Warm White: Warm white LED strips emit a soft, yellowish light that creates a cozy and inviting atmosphere. They are ideal for bedrooms, living rooms, and other spaces where a relaxing ambiance is desired.
Cool White: Cool white LED strips emit a brighter, bluish light that is often used for task lighting or in areas where a more energetic feel is preferred. They are commonly used in kitchens, offices, and bathrooms.
2. Tunable White LED Strip Lights
Tunable white LED strip lights offer the flexibility to adjust the color temperature between warm white and cool white. This allows you to create different moods and atmospheres in your space, they are perfect for areas where you want to control the lighting throughout the day. It’s the best choice if you don’t know choose warm white or cool white, but you have to get a control for it.
3. RGB LED Strip Lights
RGB LED strip lights are capable of producing a wide range of colors, including red, green, and blue. By combining these colors in different proportions, you can create millions of colors and effects. RGB LED strips are ideal for creating dynamic and colorful lighting displays, such as parties, gaming setups, or mood lighting.
RGBW offers brighter and more pure white, RGBCCT offers extra tunable white, they are ideal choice if you need better white color.
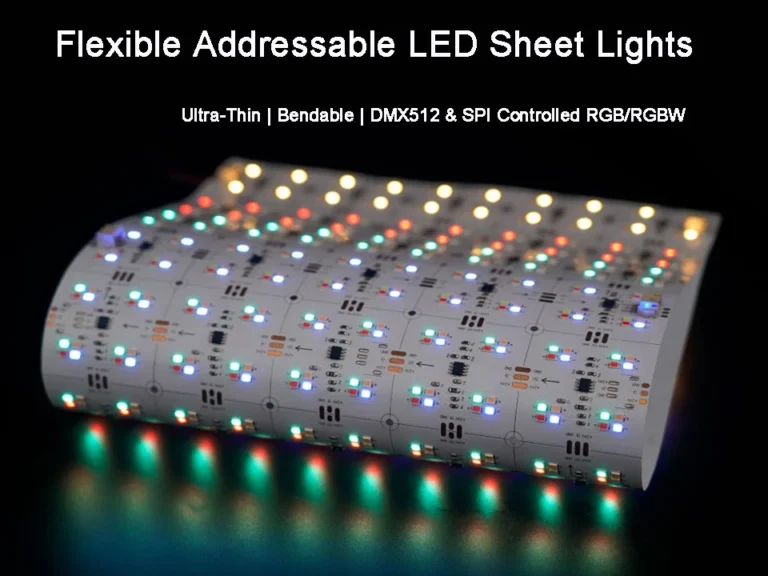
4. Addressable RGB LED Strip Lights
Addressable RGB LED strip lights are a more advanced version of RGB LED strips. They allow you to control individual LEDs within the strip, giving you precise control over the color and brightness of each section. This enables you to create complex lighting patterns, animations, and effects. Addressable RGB LED strips are perfect for advanced lighting projects and artistic installations.

Factors to Consider When Installing LED Strips on Ceilings
1. Brightness, Color and uniformity:
It’s essential to consider brightness, color and light uniformity. Ensure that the brightness level suits the room’s purpose, with higher lumens for task lighting and lower levels for ambiance.
The color also impacts the mood, with cool whites providing energizing light, warm tones creating a cozy feel, RGB and addressable RGB offers better ambient light effects.
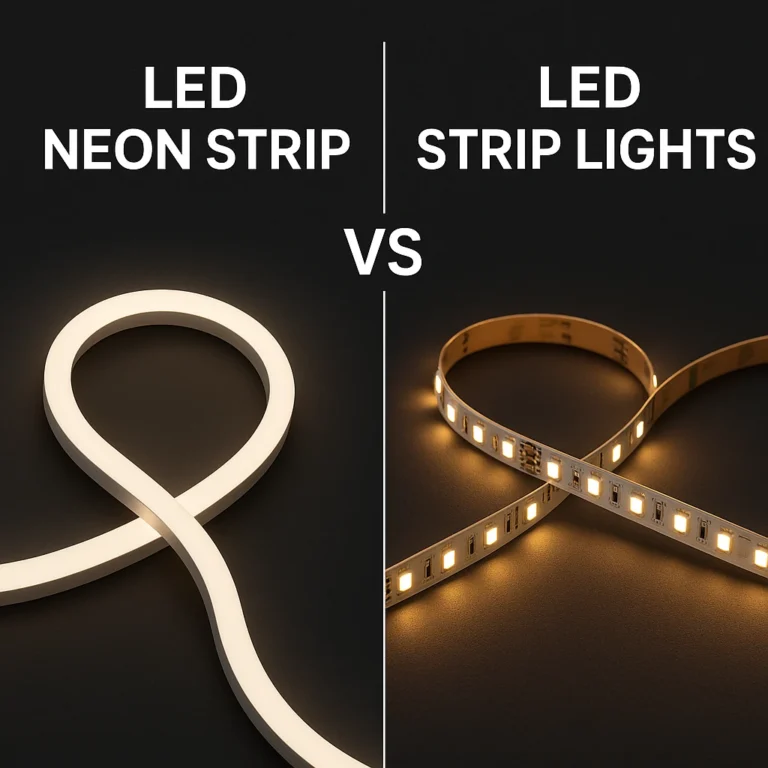
Uniformity ensures an even spread of light across the ceiling, avoiding dark spots. Proper placement and selection of LED strips help achieve consistent and pleasing lighting effects. To get better uniformity, you can either choose COB strip light or install strips in aluminum profile with diffuser.
2. Room Size and Layout:
Room dimensions and shape influence the quantity and placement of LED strips. Measure the area to determine how many strips are needed.
3. Power Supply:
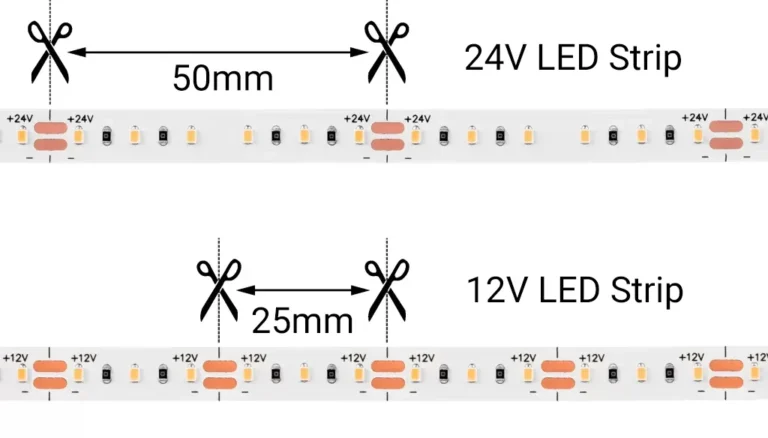
Choose a power supply that matches the LED strip’s voltage and wattage, ensuring enough capacity for your setup. Most strips are 12V or 24V, so double-check compatibility.
4. Installation Method:
Decide whether to use recessed lighting, surface mounting, or cove lighting. Each method offers different lighting effects. Make sure your mounting surface is clean and compatible with adhesive-backed strips or use mounting channels for added security.
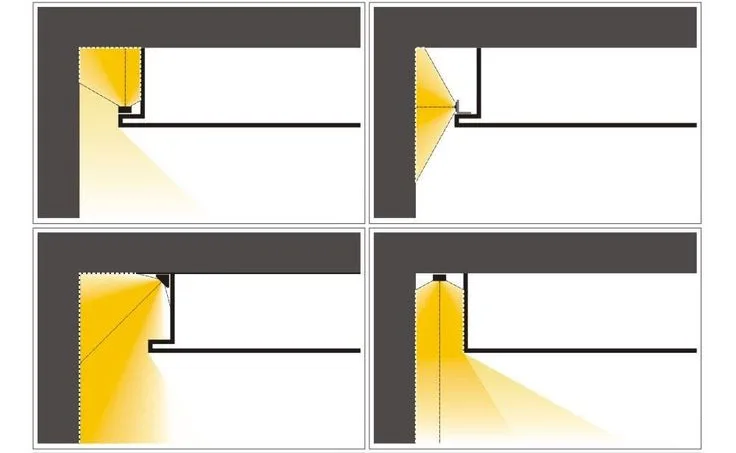
Another thing is how you attach the LED strips, face to the roof or the wall to create indirect lighting which provides soft, diffuse glow, reducing harsh shadows and enhancing ambiance with even, subtle illumination. Face down to the floor to create direct lighting which provides bright and concentrated illumination.
5. Control Method:
Consider how you want to control the lights, whether through a traditional switch, dimmer, or smart home system. Some LED strips can be controlled via smartphone apps, allowing for easy color and brightness adjustments. We have a lot of LED controller for you to choose.
6. Water Resistance:
In humid areas like bathrooms or kitchens, waterproof LED strips (IP65-rated or higher) are necessary to prevent moisture damage.
7. Safety and Fire Hazards:
Ensure the installation is safe by using certified, high-quality LED strips and proper power supplies to avoid short circuits or overheating. Install in areas with adequate ventilation and never overload the circuit.
How to Install LED Strip Lights on the Ceiling
Installing LED strips on the ceiling is a relatively simple process if done properly. Here’s a step-by-step guide to ensure a successful installation:
1. Measure and Plan:
Start by measuring the ceiling where you intend to install the LED strips. Determine the strip length needed and the best route for even lighting. Sketch a layout to visualize where the power supply and control systems will be placed.
2. Prepare Materials:
Gather your materials: LED strips, connectors, power supply, adhesive backing or mounting channels, and tools like scissors, wire cutters, and a screwdriver. Having all tools and materials ready will help streamline the installation.
3. Clean the Ceiling Surface:
Ensure that the ceiling surface is free of dust, dirt, and grease to enhance the adhesive bond. Use a damp cloth or rubbing alcohol for cleaning. A clean surface prevents the LED strips from falling off after installation.
4. Cut and Connect the Strips:
If your LED strip needs to be shortened, cut it only at designated cutting points, usually marked on the strip. Use appropriate connectors to join segments if needed, and ensure that the connections are secure to maintain proper function.
5. Connect the Power Supply:
Connect the LED strips to the power supply, making sure the voltage and wattage match the strip specifications. Secure the connections properly to avoid short circuits or electrical failures. You may also want to connect a controller for dimming or color adjustments.
6. Attach the Strips to the Ceiling:
Carefully attach the LED strips to the ceiling using the adhesive backing or mounting channels for added support. Press firmly along the entire length of the strip to ensure a strong bond.
7. Test and Setup:
Once the strips are attached, test them by turning on the power. Check for any dark spots or connection issues. If using a remote or app control, configure your settings for brightness and color preferences.
8. Finalize Installation:
Secure any loose wires and tidy up the area. If needed, hide the wires behind trim or within the ceiling for a clean, professional look. Ensure that all connections are secure and that the power supply is mounted safely.
Additional Tips:
Use mounting channels if the adhesive backing is not strong enough for your ceiling type.
Ensure that the power supply is positioned in a ventilated area to prevent overheating.
For long LED strip runs, consider adding amplifiers to maintain consistent brightness throughout.
Get a electrician for help if necessary.

7 Common Ways to Install LED Strip on Ceiling
There are several methods to install LED strip lights on a ceiling, each offering different effects and ease of installation. Here are the most common ones:
1. Adhesive Backing:
Many LED strips come with a peel-and-stick adhesive backing. This is the simplest method but works best on smooth, clean surfaces. Ensure the ceiling is clean to guarantee a strong bond.
2. Mounting Channels:
Using mounting channels provides a more durable and polished look. These channels can be screwed into the ceiling and hold the LED strips securely in place, offering better protection for the strips and improving light diffusion.
3. Cove Lighting:
Cove lighting involves installing the LED strips in a recessed or hidden area, such as a gap between the ceiling and a drop-down soffit. This method provides indirect lighting that creates a soft, ambient glow.
4. Suspended Ceilings:
For ceilings with suspended panels, LED strips can be installed around the edges to create a floating effect. This is commonly seen in modern interior designs and can highlight the architectural features of the ceiling.
5. Cornice Lighting:
Placing LED strips within ceiling cornices or molding can add a sophisticated touch. This technique hides the strips while allowing the light to shine upwards or downwards, depending on the design.
6. Surface Mounting with Clips:
For areas where adhesive may not be strong enough, plastic or metal mounting clips can be used. These clips are screwed into the ceiling and hold the LED strips securely.
7. Drop Ceiling Panels:
In drop ceilings, you can place LED strips on top of the panels to illuminate from within. This is commonly used in commercial spaces and can provide a soft, even lighting effect.
Each installation method has its own benefits depending on your design goals, surface materials, and desired lighting effect.
Related Posts