Quick Answer — Safe LED Strip Cutting :
- Locate the LED strip cutting mark between copper pads
- Turn off the LED strip power supply completely
- Use sharp scissors to cut exactly on the cut line
- Do not cut outside the marked LED segment
- Seal the cut end if the strip is waterproof
- Reconnect using LED strip connectors or soldering
LED strip lights can be safely cut without damage if you follow the predefined cut points and correct cutting method.
Most LED strips are designed with fixed circuit segments. Each segment operates independently within a specific voltage range, typically 12V or 24V. Cutting at the marked points preserves circuit integrity and ensures normal operation.
Cutting outside these points breaks the series circuit and permanently disables that section. Incorrect cutting can also reduce copper pad contact area, increasing resistance and causing brightness drop or connection failure.
This guide explains exactly where to cut, what tools to use, how to handle waterproof strips, and how to reconnect LED strips correctly based on real manufacturing data.
Can You Cut LED Strip Lights? (Yes — But Only at the Right Points)
LED strip cut points are predefined circuit break positions designed to allow safe cutting without interrupting electrical continuity. Each cut point sits between two complete circuit units on the PCB.
Most LED strips use a segmented circuit design. Each segment operates independently within a fixed voltage range. Cutting outside the marked line breaks the series circuit and permanently disables that section.
Cutting outside the marked cut point breaks the LED series circuit and causes permanent failure. The damaged segment will not light up and cannot be restored without soldering repair.
If you want to understand the full circuit logic behind cut points, read our detailed guide on can you cut LED strip lights and what happens when you cut in the wrong place.
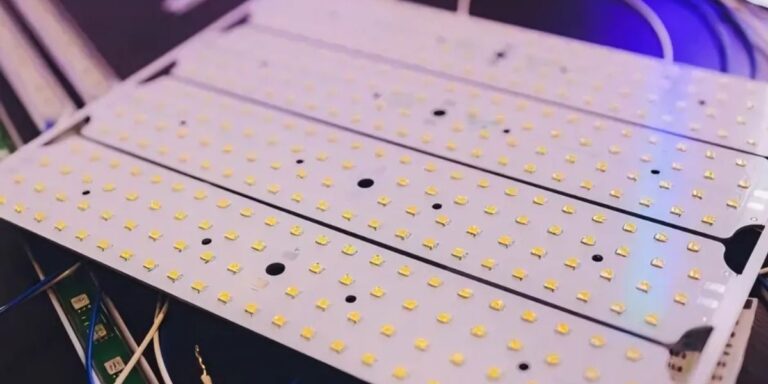
From our manufacturing data, standard SMD LED strips use double-layer FPC with 2oz copper (70μm). This is twice the thickness of common 1oz (35μm) boards. Thicker copper pads reduce contact resistance, improve connector stability, and minimize heat buildup at cut points.
우리의 SMD LED 스트립 조명 are built to this standard, with cut points engineered at every circuit boundary across the full product range.

Are All LED Strips Cuttable?
No — not all LED strips can be safely cut.
· Standard SMD LED strips (12V / 24V): Fully cuttable at marked points
· COB LED strips: Cuttable, but require precise cutting alignment
· RGB / RGBW LED strips: Cuttable, but require correct pin alignment
· Addressable LED strips (IC-controlled): Limited cut points due to data signal flow
· Fixed-length LED strips: Not cuttable — circuit is fully sealed
From a circuit design perspective, cuttable LED strips are built with repeating electrical units. Each unit contains a fixed number of LEDs and a resistor network matched to the input voltage.
Addressable LED strips include integrated control ICs. These chips manage signal timing and data transmission. Cutting in the wrong position interrupts the data chain and disables all downstream LEDs.
How Do You Know Where the Cut Points Are?
LED strip cut points are clearly marked on the strip surface.
Look for these indicators:
- A printed scissors icon
- A straight cut line across the strip
- Exposed copper pads (2–5 pads depending on type)

Each cut point is positioned between two circuit units. This ensures both sides remain electrically functional after cutting.
On waterproof LED strips (IP65 / IP67 / IP68), the copper pads are covered by silicone. The cut line is still visible, but you must align the cut carefully through the coating.
From our production design, the cut point is always placed at the electrical node between parallel circuit paths. Cutting outside this node breaks the current path and stops the LEDs from working.
Where Should You 컷 LED 스트립 조명?
You should only cut LED strip lights at the marked cut lines between copper pads.
These points are designed as safe circuit boundaries, allowing the remaining strip to continue working normally after cutting.
| LED 스트립 유형 | Typical Cut Interval | LEDs per Segment |
| 12V SMD strip | ~50mm | 3 LEDs |
| 24V SMD strip | ~100mm | 6개의 LED |
| COB LED 스트립 | 25mm or 50mm | Varies by density |
| RGB / RGBW 스트립 | Same as voltage | 4–5 copper pads |
| Waterproof strip (IP65–68) | Same as non-waterproof | Pads under silicone |
Key Rules to Follow
- Cut only on the printed line or scissors mark
- Always cut between copper pads, not through them
- Follow the fixed interval based on strip voltage
- Never assume you can cut anywhere — spacing is not adjustable
Why Are Cut Intervals Different?
Rule:
24V LED strips have longer cut intervals than 12V strips.
Reason:
- 12V strips use 3 LEDs per circuit unit
- 24V strips use 6 LEDs in series
- More LEDs per unit = longer physical segment
This is a direct result of voltage and circuit design—not a manufacturing choice.
What Happens If You Cut in the Wrong Place?
- LEDs will stop working immediately
- The circuit becomes permanently broken
- The strip cannot be reused without repair
- Copper traces may be damaged beyond reconnection
빠른 요약
- 12V strips → shorter cut intervals (~50mm)
- 24V strips → longer intervals (~100mm)
- Cut only at marked lines → ensures circuit continuity
- Wrong cut position → permanent failure
무엇 Tools Do You Need to Cut LED Strip Lights?
To cut LED strip lights, you need sharp scissors, a ruler, sealing materials, and optional connectors for reconnection.
Essential Tools (Quick List)
- Sharp scissors or precision knife
- Ruler or straight edge
- Electrical tape or silicone end caps
- LED strip connectors (optional)
Does It Matter What Type of Scissors or Knife You Use?
Yes — using the right cutting tool directly affects cut quality, copper pad integrity, and long-term performance.
Best Cutting Tools for LED Strip Lights
- Sharp scissors — best for flexible PCB (FPC) LED strips
- Precision craft knife — required for rigid PCB strips
- Scoring blade (for COB strips) — improves cutting accuracy
Why Tool Choice Matters
Different LED strip constructions require different cutting methods:
- Flexible PCB strips:
Soft material — dull scissors can crush internal copper layers - Rigid PCB strips:
Hard substrate — scissors can cause edge cracking or delamination - COB LED strips:
Dense LED layout — scoring first prevents uneven cuts
From manufacturing testing, using improper tools can lead to:
- Micro-cracks in copper traces
- Reduced connector contact area
- Increased electrical resistance and heat buildup
How to Cut LED Strip Lights Without Ruining Them: Step-by-Step
Quick Steps — Safe LED Strip Cutting
- Turn off the power completely
- Locate the marked cut line between copper pads
- Cut straight through the center of the line
- Seal or protect the exposed end
- Test the strip before final installation
Step 1 — Turn Off the Power
What to do:
Disconnect the LED strip from the power supply before cutting.
중요한 이유
Cutting a powered strip can create a short circuit and damage the copper pads. Even low-voltage strips (12V or 24V) can generate small arcs that permanently degrade the contact surface.
Step 2 — Find the Exact Cut Line
What to do:
Locate the marked cut line positioned between copper pads (often indicated by a scissors icon or printed line).
중요한 이유
Each cut point is placed between complete circuit segments. Cutting outside this line breaks the electrical pathway and causes that section to stop working.
Pro tip:
For waterproof strips, align the internal copper pads under the silicone before cutting.
Step 3 — Cut Straight Through the Center
What to do:
Use sharp scissors or a precision knife to cut exactly through the center of the marked line.

중요한 이유
An off-center cut reduces the usable copper pad area. Less contact surface increases resistance, leading to heat buildup, poor connections, and potential flickering.
모범 사례:
- Flexible strips → use sharp scissors
- Rigid strips → use a craft knife
- COB strips → score lightly, then cut in one motion
Step 4 — Seal or Protect the Cut End
What to do:
Cover the exposed copper pads immediately after cutting.
중요한 이유
Unprotected copper oxidizes quickly, especially in humid environments. Oxidation increases resistance and weakens future connections.
Options:
- Waterproof strips → use silicone sealant or end caps
- Indoor strips → use electrical tape
Step 5 — Test Before Final Installation
What to do:
Reconnect the strip temporarily and turn on the power to verify performance.
중요한 이유
Testing ensures the cut did not damage the circuit and that connectors are properly aligned before permanent installation.
확인:
- Even brightness across all LEDs
- No flickering or dim sections
- Stable connection at the cut point
For connector selection by strip type, see our LED strip connector guide.
Avoid These Common Mistakes
- Cutting outside the marked cut line
- Cutting while the strip is powered on
- Using dull or improper tools
- Leaving copper pads exposed
- Skipping the testing step
How to Know You Cut It Correctly
A properly cut LED strip should:
- Light up evenly across all LEDs
- Show no flickering or brightness drop
- Maintain a stable connection when reconnected
- Fit securely into connectors or solder joints
How to Cut Waterproof LED Strip Lights (IP65 / IP67 / IP68)

How Do You Cut and Reseal IP65 Waterproof LED Strips?
짧은 대답:
Cut at the marked line and reseal the silicone surface coating.
How to do it:
- Locate the cut line between copper pads
- Cut through the strip using sharp scissors
- Apply clear silicone sealant to the exposed end
- Let the sealant fully cure before use
작동하는 이유:
IP65 LED strips use a surface silicone coating (glue dispensing or coating process). This layer protects against dust and splashes, but the internal circuit is not fully enclosed.
After cutting, the protection layer is broken only at the surface, so resealing with silicone restores most of the original protection.
For a detailed explanation of waterproof ratings, see our waterproof LED strip IP rating guide.
How Do You Cut and Reseal IP67 Waterproof LED Strips?
짧은 대답:
Cut the strip and reseal both the PCB and the silicone tube.
How to do it:
- Cut precisely at the marked cut point
- Trim the outer silicone tube cleanly
- Fill the open tube end with silicone sealant
- Insert and secure a matching end cap
- Ensure both the PCB and tube are sealed
If you need compatible connectors after cutting, see our waterproof LED strip connectors (IP65/IP67).

Why it works (manufacturer insight):
Our IP67 strips use a filled silicone tube construction — silicone resin is injected inside the tube, not just applied to the surface.
This is why:
- IP67 supports temporary immersion up to 1 meter
- IP65 only resists splashes and surface moisture
When you cut the strip, you break a fully enclosed system. Proper resealing must restore both:
- External tube sealing
- Internal moisture barrier
Failure to seal both layers typically leads to moisture ingress within 2–6 weeks.
Can You Cut IP68 LED Strips and Maintain Waterproofing?
짧은 대답:
You can cut IP68 LED strips, but you cannot fully restore their original waterproof rating.
Why:
IP68 LED strips use full silicone extrusion or solid-fill encapsulation, where the entire strip is sealed under controlled factory conditions.
This process:
- Eliminates air gaps
- Creates uniform pressure sealing
- Fully protects internal circuits
Once cut, this factory seal is permanently broken.
What you can do instead:
- Reseal the surface with silicone and end caps for basic protection
- Use cut sections only in non-submerged environments
- Plan installation so cut points stay above water level
For outdoor installation planning, see our guide on how to choose waterproof LED strips for outdoor projects.
How Long Should You Wait Before Powering On After Resealing?
Wait at least 24 hours after resealing before reconnecting power.
중요한 이유
- Silicone sealants release curing agents (often acetic acid) during the curing process
- Powering the strip before full curing can accelerate electrochemical corrosion on copper pads
- Incomplete curing also reduces waterproof effectiveness
모범 사례:
- Allow full 24-hour curing in a dry environment
- Avoid bending or installing during curing
- Test only after sealant is completely set
How Do You Reconnect LED Strips After Cutting?
Yes — you can reconnect LED strips after cutting using clip-on connectors or soldering, as long as the copper pads remain intact.

How to Reconnect Using Clip-On Connectors (No Soldering Required)
짧은 대답:
Use a matching connector to clamp onto the exposed copper pads.
Contact resistance is the hidden variable in cut-and-reconnect installations. A low-quality clip-on connector runs at 0.3–0.5Ω. A precision connector runs at 0.05–0.1Ω — a 6–10× difference. Three low-quality connectors in series on a 12V strip drawing 1A/m add roughly 0.9–1.5Ω total. This causes ~1.5V voltage drop by the final section, reducing end brightness by 10–15%. Use connectors that match your PCB width (8mm / 10mm / 12mm) and strip pin count (2-pin single colour, 4-pin RGB, 5-pin RGBW). For strips with ENIG pads, choose gold-plated contacts.

How to do it:
- Confirm the strip voltage (12V or 24V) matches the connector
- Match connector type to strip (2-pin, 4-pin, or 5-pin)
- Open the connector clip carefully
- Insert the strip so pads align with metal contacts
- Close the clip firmly to secure connection
- Test the connection before installation
작동하는 이유:
Clip-on connectors create a mechanical and electrical contact with the copper pads. Precision connectors maintain stable conductivity with minimal resistance.
How to Connect Cut LED Strips Without Connectors (Soldering Method)
짧은 대답:
Solder wires directly to the copper pads for the most reliable connection.
When to use soldering:
- Long runs where voltage drop must be minimized
- Outdoor or vibration-prone installations
- When connectors do not fit tightly
How to do it:
- Strip 3–5mm of insulation from the wire
- Tin the wire ends with solder
- Apply solder to the copper pads
- Press the wire onto the pad and heat briefly
- Allow the joint to cool without movement
- Insulate with heat shrink or tape

작동하는 이유:
Soldering creates a low-resistance electrical bond. From our testing, a proper solder joint has near-zero measurable resistance compared to mechanical connectors.
Recommended wire size:
- 22 AWG → short runs (<2 meters)
- 20 AWG → medium runs (2–5 meters)
- 18 AWG → long runs (>5 meters)
After reconnecting, see our complete guide to wiring LED strip lights to a power supply.
Can You Reuse the Cut-Off Piece of LED Strip?
Yes — you can reuse the cut-off section if the copper pads are intact and voltage matches.
How to reuse it:
- Connect it using a clip-on connector or solder wires
- Attach it to the same voltage power supply (12V or 24V)
- Ensure polarity (+ / –) is correct
Important limitations:
- Each segment must form a complete circuit unit
- You cannot power partial segments below the cut interval
- Separate pieces may require independent power feeds for long runs
Manufacturer insight:
Each LED strip segment is a self-contained circuit unit. As long as the full unit remains intact, it will function independently when powered correctly.
How to Ensure a Reliable Reconnection
A properly reconnected LED strip should:
- Light evenly with no brightness drop
- Show no flickering at the joint
- Maintain stable output under full load
- Stay cool at the connection point
From our production testing, most reconnection failures are caused by:
- Poor pad alignment
- High connector resistance
- Incomplete solder joints
What Are the Most Common Mistakes When Cutting LED Strip Lights?
The most common mistakes are cutting in the wrong place, using improper tools, and failing to protect or reconnect the strip correctly.
Common LED Strip Cutting Mistakes and What Goes Wrong
| Mistake | What Goes Wrong |
| Cutting outside the marked line | Breaks the LED series circuit — that section will not work |
| Using dull scissors | Crushes copper traces and creates micro-cracks in the FPC |
| Cutting while powered on | Causes short circuits and arc damage to copper pads |
| Leaving waterproof strip ends unsealed | Moisture enters and causes corrosion within 2–6 weeks |
| Mixing 12V and 24V strip sections | Incorrect voltage causes dim output or LED burnout |
| Using wrong connector type | Poor contact leads to flickering or unstable lighting |
| Misaligning connector pins | Interrupts signal flow, especially on RGB/RGBW strips |
| Reconnecting before silicone cures | Traps moisture and accelerates copper oxidation |
| Using scissors on rigid PCB strips | Causes substrate delamination and circuit separation |
One mistake specific to COB strips: COB strips place LED chips at very high density directly on the copper traces. The cut line falls between chip clusters, not between discrete components. A misaligned cut risks cracking a chip at the cluster edge. Use a sharp craft knife with a straight edge — not scissors. Score the line lightly first to confirm position, then cut in a single clean stroke.
How to Avoid These Mistakes
To avoid failures when cutting LED strips:
- Always cut exactly on the marked line
- Use sharp, appropriate tools for the PCB type
- Turn off power before cutting
- Seal waterproof strips immediately after cutting
- Match voltage, connector type, and polarity carefully
From our factory data, over 70% of LED strip failures after cutting are caused by incorrect cutting position or poor reconnection quality — not the strip itself.
How to Check If You Made a Mistake
After cutting and reconnecting, check for these warning signs:
- Section does not light up → likely wrong cut position
- Flickering near the joint → poor connector contact
- Dim brightness at the end → voltage drop from resistance
- Uneven lighting → partial circuit damage
Early detection helps prevent permanent damage and reduces reinstallation time.
Final Thoughts — How to Cut LED Strip Lights Without Damaging Them
Yes — you can cut and reconnect LED strip lights safely if you follow the correct cut points, use proper tools, and ensure reliable reconnection.
Quick Summary — Key Rules to Follow
- Cut only at the marked line between copper pads
- Turn off power before cutting
- Use sharp tools for a clean, precise cut
- Seal waterproof strips immediately after cutting
- Reconnect using matched connectors or soldering
- Test the strip before final installation
What Determines a Successful Cut and Reconnection?
A successful LED strip cut depends on three technical factors:
1. Circuit integrity
Each cut must preserve a complete LED circuit unit. Cutting outside the marked line breaks the series connection and disables the segment.
2. Contact resistance
From our factory testing, connection quality directly affects brightness. High-resistance connectors (0.3–0.5Ω) can reduce voltage by up to 1.5V across multiple joints, causing visible dimming.
3. Environmental protection
For waterproof strips, resealing is critical. Moisture exposure can corrode copper pads within weeks if the cut end is not properly sealed.
When Done Correctly, Performance Is Not Affected
Cut LED strips perform the same as uncut strips when installed properly.
From our production data, there is no measurable reduction in lifespan, brightness, or stability when:
- Cuts are made at correct positions
- Connections are low-resistance and secure
- Waterproof protection is restored where required
Next Step: Plan Your Installation Properly
After cutting and reconnecting your LED strips, the next step is proper installation and mounting.
자주 묻는 질문
관련 게시물