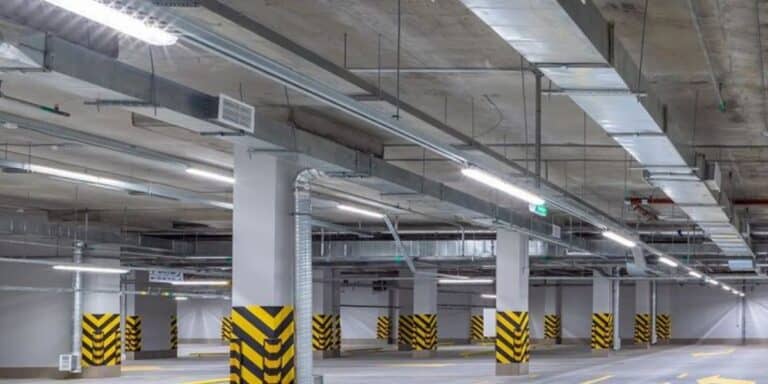
LED-tri-proof lichten - ook bekend als waterdichte LED-armaturen, dampdichte lichten, stofdichte LED-lampen of latlicht - worden veel gebruikt in veeleisende omgevingen zoals fabrieken, magazijnen, parkeergarages en metrostations. Hun naam "Tri-Proof" verwijst naar bescherming tegen water, stof en corrosie, waardoor ze een betrouwbare keuze zijn voor industriële en commerciële verlichting. Maar zelfs de meest duurzame armatuur kan falen als deze niet correct is geïnstalleerd. Onjuiste montage, losse bedrading of slechte waterdichte afdichting kunnen leiden tot veiligheidsrisico's, verminderde lichtefficiëntie en kostbaar onderhoud. Daarom is het volgen van een heldere LED Tri-Proof Light Installation Guide cruciaal. In dit artikel zullen we stapsgewijze installatie-instructies en tips voor het oplossen van problemen doornemen, zodat u een veilig, langdurig en energiezuinig verlichtingssysteem kunt bereiken.

Voorbereiding voor installatie
1. Omgevingscontrole
Voordat u een LED-tri-proof licht, inspecteer de omgeving zorgvuldig. Zorg ervoor dat het oppervlak stabiel, droog en vrij van overmatig stof of olie is. Controleer de vochtigheids- en temperatuurniveaus om te bevestigen dat ze voldoen aan de specificaties van het armatuur, wat helpt om de waterdichte en stofdichte prestaties te behouden.
2. Materialen en gereedschappen voorbereiding
Verzamel alle vereiste items voordat u begint. Dit omvat de LED-tri-proof lamp, montagebeugels, schroeven, waterdichte connectoren en einddoppen. Essentieel gereedschap omvat vaak een boor, schroevendraaier, tang en isolatietape. Alles klaar hebben zorgt voor een soepel en efficiënt installatieproces.

3. Veiligheidsmaatregelen
Snijd altijd de hoofdvoeding af voordat u de bedrading bekabelt. Gebruik geïsoleerde gereedschappen en draag beschermende handschoenen om ongelukken te voorkomen. Controleer nogmaals of alle elektrische verbindingen voldoen aan de lokale normen. Prioriteit geven aan veiligheid in de voorbereidingsfase garandeert een betrouwbare en duurzame LED-tri-proof lichtinstallatie.
Stapsgewijze montagemethoden
Opbouwmontage installatie
- Meet de lengte van de LED Tri-Proof Light en markeer de boorposities op het plafond of de muur.
- Boor de gaten op de gemarkeerde punten, zorg ervoor dat de diepte overeenkomt met de expansiepluggen.
- Steek expansiepluggen in de geboorde gaten.
- Bevestig de metalen bevestigingsbeugels met schroeven en draai ze stevig vast om beweging te voorkomen.
- Lijn de lamp uit met de geïnstalleerde beugels.
- Druk de armatuur voorzichtig in de beugels totdat deze stevig op zijn plaats klikt.
- Sluit de waterdichte stroomkabel aan volgens het bedradingsschema.
- Controleer de stabiliteit en uitlijning opnieuw voordat u naar de volgende stap gaat.
geschorste installatie
- Markeer twee ophangpunten op het plafond, zodat ze overeenkomen met de lengte van het armatuur.
- Boor gaten en steek expansiepluggen in de gemarkeerde posities.
- Schroef de ophanghaken in of installeer stevige ankers van staaldraad.
- Stel de lengte van de hangende kettingen of staalkabels op de gewenste installatiehoogte in.
- Bevestig beide uiteinden van de ophangset aan de bevestigingsclips van de armatuur.
- Beveilig het licht om slingerende of oneffen evenwicht te voorkomen.
- Test de stabiliteit door voorzichtig aan de armatuur te trekken voordat u hem aanzet.
- Sluit de waterdichte bedrading zorgvuldig aan en zorg ervoor dat de afdichtringen goed zijn vastgedraaid.

Tips voor installatie
Houd het armatuur tijdens de installatie om een gelijkmatige verlichting te garanderen.
Vermijd te hard aandraaiende schroeven of beugels om schade aan de behuizing te voorkomen.
Plaats geen armaturen direct onder sterke waterstralen, tenzij de nominale IP66 of hoger.
Controleer altijd of alle connectoren en afdichtingen volledig zijn vergrendeld om de waterdichte bescherming te behouden.
| Installatietype | Belangrijkste stappen | Typische toepassing |
| opbouwend | Boor → Bevestigen → Bevestigen in → Bedrading aansluiten | Parkeergarages, gangen |
| hangend | Boor → Haken installeren → Kettingen aanpassen → Hangarmatuur → Bedrading aansluiten | magazijnen, fabrieken, zalen |
Bedrading & waterdichte verbindingen
Bedradingsmethoden
Bij het installeren van een LED-tri-proof licht, kan bedrading worden gedaan via single-end input of double-end input, afhankelijk van de projectvereisten. Single-end input is gebruikelijk in kleinere installaties, terwijl dubbele-end ingang geschikt is voor langere runs of daisy-chain-verbindingen. Controleer altijd de spanningsclassificatie van de armatuur, of het nu gaat om AC220V, AC277V of hogere industriële normen zoals AC347V of AC480V, om niet-overeenkomende stroomvoorzieningsproblemen te voorkomen.
Waterdichte verbindingen
Een belangrijke factor bij het handhaven van IP65- of IP66-bescherming ligt in de connectoren. Gebruik hoogwaardige waterdichte kabelwartels en zorg ervoor dat afdichtringen correct zijn vastgedraaid. Het aanbrengen van isolatietape of een siliconenring rond kwetsbare gebieden kan secundaire bescherming bieden. Een goede aarding is ook nodig om elektrische veiligheid en stabiliteit te garanderen.
Veelvoorkomende bedradingsproblemen
Losse verbindingen zijn de meest voorkomende oorzaak van storingen zoals flikkeringen, kortsluiting of zelfs waterinvoer. Om deze problemen te voorkomen, controleer altijd of draden op de juiste lengte zijn gestript, volledig zijn ingebracht en stevig zijn bevestigd. Extra voorzichtig zijn in dit stadium garandeert een betrouwbare en duurzame LED-tri-proof lichtinstallatie.

Controleren en testen & probleemoplossing
controle
Voordat u wordt ingeschakeld, moet u een zorgvuldige inspectie uitvoeren om een veilige installatie te garanderen. Controleer of alle elektrische draden stevig zijn aangesloten en dat de isolatie correct wordt toegepast om kortsluiting te voorkomen. Controleer of het LED-tri-proof licht goed is bevestigd aan beugels of ophangsets, zonder losse fittingen. Controleer voor hangende installaties of de hanghoogte zelfs is om uniforme verlichting te behouden. Zorg er ten slotte voor dat de PC-diffusorafdekking volledig op zijn plaats is vergrendeld om waterdichte en stofdichte prestaties te garanderen.
proeven
Schakel na inspectie de stroom in om de armatuur te testen. Bevestig dat het LED-tri-proof licht onmiddellijk inschakelt en een consistente helderheid levert. Observeer nauwlettend op flikkerende, dimmende of ongebruikelijke geluiden van de bestuurder. Deze stap zorgt ervoor dat zowel elektrische als mechanische verbindingen correct zijn voordat de lichten dagelijks worden gebruikt.
probleemoplossing
Als er tijdens het testen problemen optreden, overweeg dan de volgende veelvoorkomende gevallen:
lampje gaat niet aan → Controleer of de bedrading correct is aangesloten of of de stroomvoorziening defect is.
Flikkerend probleem → Inspecteer of de bestuurder slecht contact heeft met de LED-kaart, of controleer of de uitgangsspanning van de bestuurder overeenkomt met de vereisten van de LED-module.
Condens of vocht binnen → Zorg ervoor dat de diffusorafdekking goed is vergrendeld en dat de kabelinvoer volledig is afgedicht met waterdichte connectoren.
Een goede controle, test en probleemoplossing zal de veiligheid en levensduur van uw LED-tri-proof lichtinstallatie maximaliseren.


Conclusie
Een goede installatie, zorgvuldige bedrading en grondige testen zijn de sleutels om ervoor te zorgen dat LED-tri-proof lampen betrouwbare prestaties leveren in veeleisende omgevingen. Door de aanbevolen stappen te volgen en indien nodig methoden voor het oplossen van problemen toe te passen, kunnen gebruikers veelvoorkomende problemen zoals flikkering, stroomuitval of waterinvoer vermijden. Een goed geïnstalleerd systeem verbetert niet alleen de veiligheid, maar vermindert ook de onderhoudskosten op lange termijn.
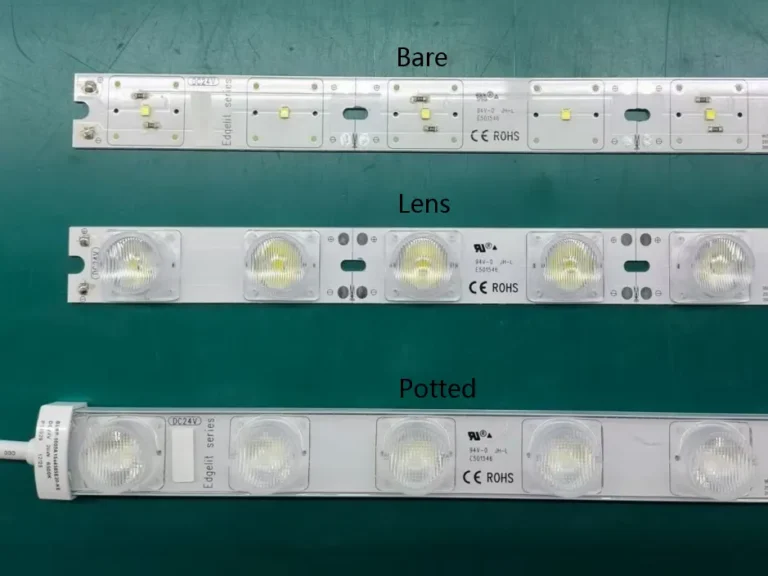
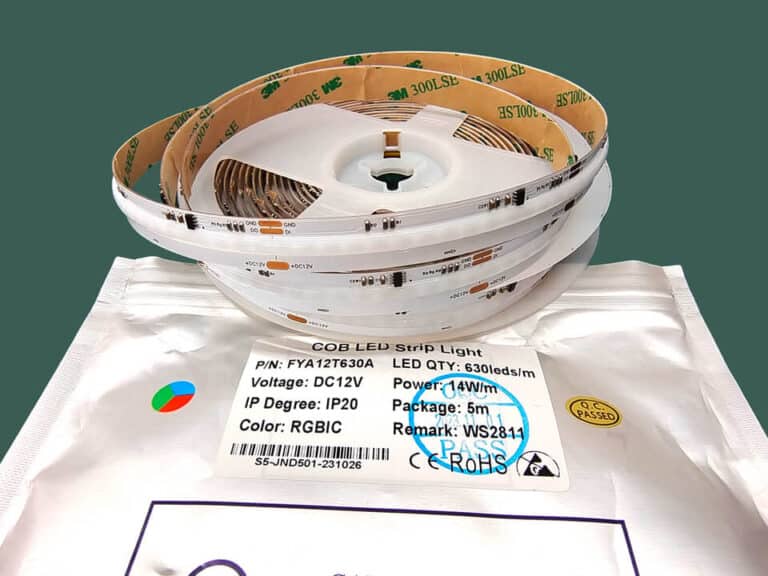
Bij Signlitetled ondergaat elk tri-proof licht dat we produceren strikte inspectie en tests om er zeker van te zijn dat er geen stroomstoringen of waterdichtingsproblemen zijn. Onze producten zijn ontworpen met flexibiliteit in gedachten - ze ondersteunen daisy-chain-verbindingen voor grootschalige projecten en kunnen ook worden gecombineerd met noodstroomoplossingen voor extra veiligheid. Of u nu duurzame armaturen nodig heeft voor fabrieken, magazijnen of parkeergarages, Siglitetled biedt professionele, betrouwbare en aanpasbare LED-tri-proof verlichting om aan uw projectvereisten te voldoen. Als u uw eigen tri-proof lamp heeft, kunt u ook op maat worden gemaakt Lineaire module Neem bij ons vandaag nog contact met ons op voor bulklevering en technische ondersteuning op maat.
Gerelateerde berichten