Deutsch
  English
  简体中文
简体中文  Español
  Français
  Italiano
  日本語
日本語  한국어
한국어  Polski
  Português
  Русский
  Türkçe
  Nederlands
  Tiếng Việt
  ไทย
ไทย 
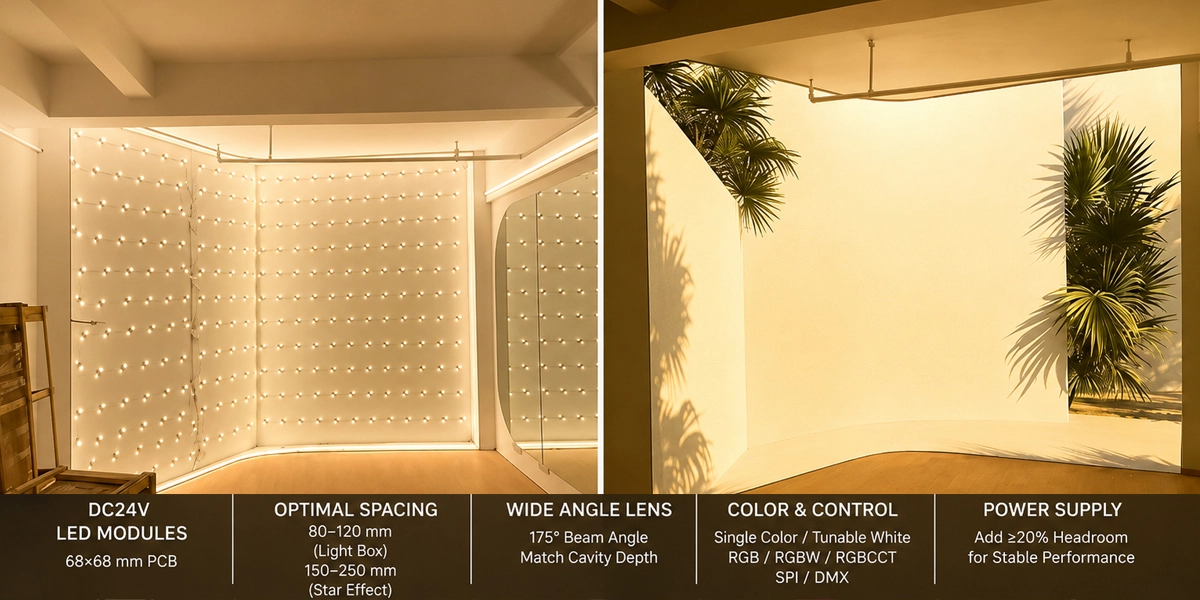
Wählen Sie das Richtige LED-Module Bei Leuchtkästen und Deckenbeleuchtungen fallen fünf technische Entscheidungen an: Wie viele Module sind zu installieren, welchen Abstrahlwinkel Ihre Hohlraumtiefe ermöglicht, welches Farb- und Steuerungssystem der Platz benötigt und wie die Stromversorgung bemessen wird. Die kurze Antwort für die meisten Projekte lautet: Verwenden Sie ein DC24V-Objektivmodul auf einer 68 × 68-mm-Platine, platzieren Sie die Module ungefähr 80–120 mm voneinander für eine gleichmäßige Lichtbox (oder 150–250 mm auseinander, wenn das Ziel ein Deckenstern-Effekt ist), passen Sie die 175° Weitwinkellinse bis zur Hohlraumtiefe an und fügen Sie mindestens 201 TP3T Headroom bei der Auswahl des Treibers hinzu. Dieser Leitfaden geht Schritt für Schritt durch die richtigen Zahlen, sodass Sie ein komplettes System - Module, Controller und Stromversorgung - ohne Rätselraten und ohne Überbestellung vorsehen können.
Warum Lichtkästen und Decken spezielle Module benötigen
Lichtkästen und Decken sind unversöhnliche Oberflächen. Eine Leuchtkastenfläche, die als eine gerade Panel leuchten sollte, verrät jeden Hot Spot und jedes dunkle Band, wenn das Modulgitter falsch ist, eine Decke, die einen fließenden Stern oder Farbeffekt tragen soll, flackert, flacht oder strobe, wenn die Steuerung falsch angegeben ist. Der Fehlerbereich ist klein und das Ergebnis ist von der anderen Seite des Raums aus sichtbar.
LED-Module wurden genau für diesen Job konzipiert. ungleich LED-Streifen, die durchgehend und linear ist, ist ein Modul eine diskrete Lichtmaschine - normalerweise 4–6 LEDs auf einer starren 68 × 68 mm-Platine mit eigener 175 ° -Linse -, die Sie frei über die Oberfläche positionieren. Diese Freiheit macht zwei sehr unterschiedliche Ergebnisse möglich: ein dichtes, gleichmäßiges Gitter, das eine Lichtbox in eine einheitliche Platte verwandelt, und ein spärliches, pixel-adressierbares Gitter, das eine Decke in ein Sternenfeld oder eine fließende Lichtshow verwandelt. Im Bereich Signlited hat jedes Modul den gleichen 68 × 68 × 5,5 mm großen Platz und den DC24V-Eingang, so dass Sie Farben und Steuerungstypen in einer Installation mischen können, während das Layout und die Verkabelung identisch sind. Bevor Sie eine Bestellung aufgeben, gehen Sie die folgenden sechs Schritte durch.

Schritt 1 — Messen Sie den Bereich und planen Sie das Modulraster
Die erste Zahl, die Sie benötigen, ist die gesamte Lichtfläche. Für eine Leuchtbox ist das einfach die beleuchtete Fläche in Quadratmetern. Bei einer Decke ist es der Deckenbereich, der die Module erhält - Messen Sie den vollständigen Abschnitt oder das abgehängte Gitterteil, nicht nur die sichtbaren Fliesen.
Wie viele Module benötigen Sie?
Module pro Fläche = Gesamtfläche ÷ (Abstand × Abstand).
Der Abstand ist der Abstand zwischen den Mitten benachbarter Module, und der richtige Wert hängt ganz davon ab, was die Oberfläche tun soll. An den gegenüberliegenden Enden der Dichteskala sitzen ein Leuchtkasten und ein Deckensterneffekt:
| Flächentyp | Typischer Abstand | resultierende Dichte | Tor |
| Flachlichtkasten (50–80 mm tief) | 80–100 mm | 100–156 Module/m² | gerade Panel, keine Hotspots |
| Tieflichtbox (100 mm+ tief) | 100–120 mm | 69–100 Module/m² | sogar Panel, Licht hat Raum zum Ausbreiten |
| Decke sogar Hintergrundbeleuchtung | 100–120 mm | 69–100 Module/m² | Gleichmäßiger Glanz über der Decke |
| Deckenstern-Effekt (Punkt-Quelle) | 150–250 mm | 16–44 Module/m² | Jedes Modul liest sich als diskreter „Stern“ |
Gearbeitetes Beispiel - Lichtkasten: Eine 1 m × 2 m Lichtbox ist 2 m² groß. Bei 100 mm Abstand benötigen Sie 2 ÷ (0,1 × 0,1) = 200 Module. Bei 80 mm Abstand steigt dies auf 312 Module, was heller aber auch 561 TP3T mehr Leistungsaufnahme ist. Die richtige Dichte hängt vom Acryl, der Entfernung zum Gesicht und der erforderlichen Leuchtdichte ab – 200 Module einer 4-W-Einheit (800 W) liefern bereits ungefähr 5.000–6.000 Lumen pro Quadratmeter bei 120 lm/W, was für die meisten beleuchteten Leuchtkästen angenehm ist.
Beispiel: Deckenstern-Effekt: Die gleiche 2 m² Decke bei 200 mm Abstand benötigt nur 2 ÷ (0,2 × 0,2) = 50 Module. Ein Sterneffekt ist absichtlich spärlich - jedes Modul soll als individueller Lichtpunkt gesehen werden, der nicht in ein Panel gemischt wird. Gehen Sie dichter als 150 mm und die Sterne verschmelzen zu einer Wäsche, spärlicher als 250 mm und die Decke wirkt unterbevölkert. DMX- oder SPI-Steuerung macht diese 50 Punkte in ein fließendes, tönendes oder jagendes Muster.
Ein Detail, das es wert ist, vor dem Messen zu kennzeichnen: Die beiden obigen Deckenanwendungen haben entgegengesetzte Ziele. Eine Deckenleuchte mit einer Decke nutzt ein dichtes Gitter und ein breites Objektiv, um die einzelnen Module zu verbergen, ein Deckensterneffekt verwendet ein spärliches Gitter und lässt jedes Modul als sichtbaren Punkt anzeigen. Teilen Sie dem Lieferanten mit, welches Ergebnis Sie möchten – die Modulanzahl, das Objektiv und die Steuerempfehlung ändern sich damit.
Bestellen Sie 3–5% Extra Module als Ersatzteil, ein beschädigtes Modul mit der Installation ist weit günstiger zu ersetzen als nachzubestellen und auf den Versand zu warten.
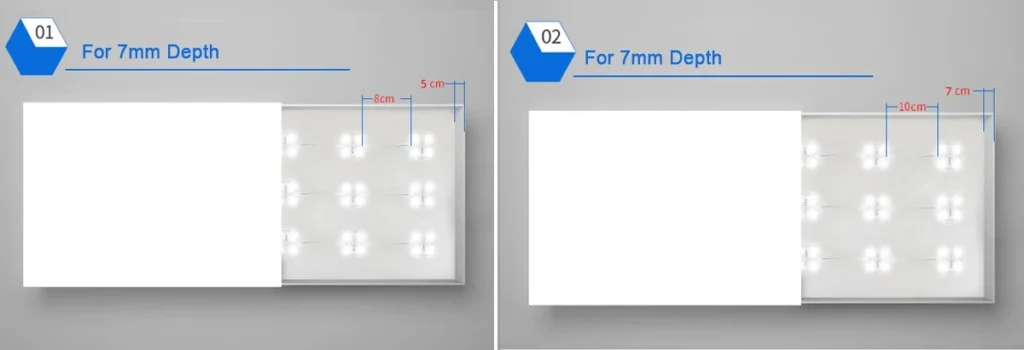
LED-Modul-Abstandslayout für Leuchtkastenflächen: 80mm für 5mm dicke Platten, 100mm für 7mm dicke Platten
Schritt 2 – Passen Sie den Abstrahlwinkel an die Hohlraumtiefe an
Dies ist die Entscheidung, die ein professionelles Ergebnis von einem lückenhaften trennt. Der Abstrahlwinkel der Linse bestimmt, wie weit sich das Licht direkt unter jedem Modul ausbreitet. Zu eng für die Tiefe, und zwischen ihnen erhalten helle Kreise mit dunklen Ringen - so genannte "Hot Spotting". zu breit, und das Licht strömt über den vorgesehenen Bereich hinaus und wäscht sich aus. Die gleiche Logik gilt, ob es sich bei dem Hohlraum um ein Leuchtkastengehäuse oder die Hohlraumdecke oberhalb einer abgehängten Decke handelt.
| Hohlraumtiefe | Empfohlener Strahlwinkel | Warum |
| 50–80 mm (Flachlichtkasten / niedrige Deckenhohle) | 175° Weitwinkelobjektiv | Licht breitet sich aus, bevor es das Gesicht erreicht, und füllt die Lücken zwischen den Modulen |
| 80–120 mm (Standardbox / Standard-Deckenhohle) | 160–175 ° | Weitwinkel hält das Gesicht gleichmäßig ohne Überbeabstandung |
| 120 mm+ (Tiefkasten / hohe Decke ungültig) | 160 ° oder schmalere Option | tiefere Hohlraume ermöglichen engere Winkel; sehr weite Winkel verlieren im Abstand an Intensität |
Die Signlited-Module werden standardmäßig mit einer 175°-Weitwinkellinse geliefert – das ist der Sweet Spot für die 50–120 mm Hohlraumtiefen, die in den meisten Leuchtkästen und Deckeninstallationen verwendet werden. Wenn Ihr Projekt eine bestimmte Verbreitung erfordert, z. B. eine schmalere Linse für eine sehr tiefe Lichtbox oder einen benutzerdefinierten Winkel für eine Sternen-Effekt-Decke, ist dies eine Anpassung, die die Fabrik bei der Auswahl von Leiterplatten und Objektiven vornehmen kann. Fragen Sie daher nach einem Angebot, anstatt davon auszugehen, dass sich das Standardobjektiv gleicht.
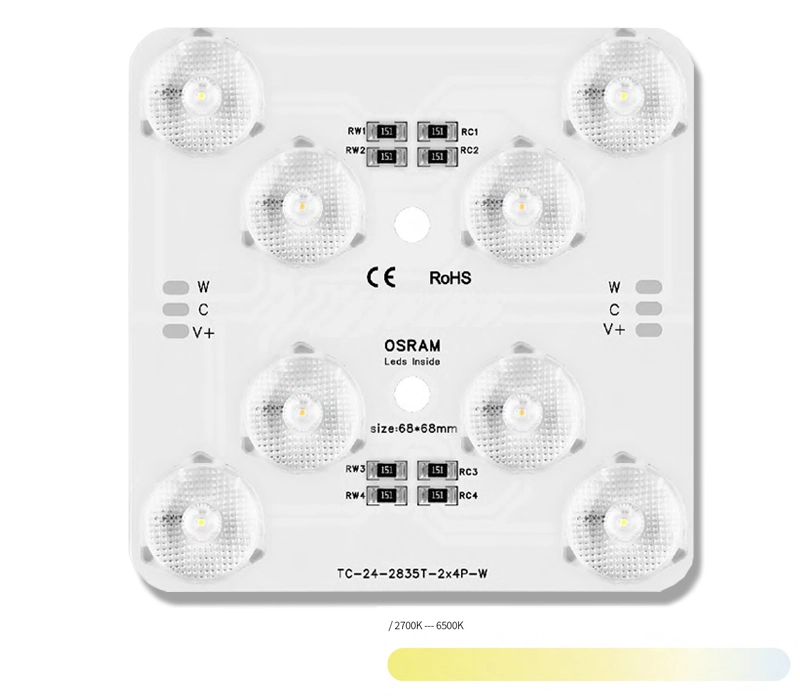
Tunable White LED-Module
- LED-Typ: 2835 SMD
- LED-Menge: 2 × 4 Stück
- Leistung 4 + 4W
- Effizienz: 100lm/W oder 150lm/W
- Farbe: 2700K – 6500K
- CRI: RA90+
- Größe: 68×68×5,5 mm
- Einzelne einfarbige BIN, 3 Stufen SDCM verfügbar
Pro-Tipp - Die 3: 1-Ungleichmäßigkeitsregel. Der akzeptierte Maßstab für eine „gerade“ Lightbox-Gesichts- oder Decken-Hintergrundbeleuchtung ist ungefähr ein Helligkeitsverhältnis von 3:1: Der hellste Punkt sollte nicht mehr als das Dreifache des schwachsten Punktes sein. Sie können dies vor Ort mit einem billigen Lux-Meter überprüfen, bevor Sie sich auf ein vollständiges Layout einlassen - gehen Sie auf der Oberfläche, beachten Sie die hohen und niedrigen Messwerte und passen Sie den Abstand oder den Objektivwinkel an, bis das Verhältnis unter 3: 1 bleibt. Das Auffangen eines Heißtauchproblems auf der Modellphase kostet einen Tag; das Auffangen an einer fertigen, installierten Decke oder einem Schild kostet eine Neulampe. (Für eine Sternen-Effekt-Decke gilt die 3:1-Regel nicht - Sie Bedürf Sichtbare Punktquellen, also Gleichmäßigkeit ist die falsche Metrik.)
Schritt 3 - Wählen Sie das Farbsystem
Sobald das Gitter und die Linse fixiert sind, entscheiden Sie, was die Oberfläche zeigen wird. Dies ist eine Produkt-Familien-Entscheidung, denn das Farbsystem bestimmt, welches Modul Sie kaufen:
| Farbsystem | Was es tut | Am besten für |
| Einfarbig (3000K / 4000K / 6500K) | Eine feste CCT, statische Ausgabe | Standard-Lichtkästen, sogar Decken-Hintergrundbeleuchtung, kostensensitive Projekte |
| Tunable Weiß (2700K – 6500K) | Anpassen von Warm-to-Cool White | Büro- und Hoteldecken, die den ganzen Tag über die Stimmung ändern |
| RGBW | RGB-Farbmischung + ein spezieller weißer Kanal | Deckenleuchte zeigt, dass auch sauberes weißes Umgebungslicht benötigt wird |
| RGBCCT | RGB + Warmweiß + Kühles Weiß in einem Gerät | Vollfarbdeckeneffekte plus einstellbares Weiß in einem Modul |
Jedes Modul in diesem Sortiment läuft bei RA90+, was wichtiger ist als die meisten Käufer erwarten. Ein 90-facher CRI bedeutet die Rottöne in einem Markenlogo, die Hauttöne in einer gedruckten Grafik und die Farben in einem Einzelhandelsraum werden genau angezeigt, anstatt ausgewaschen zu aussehen. Auf einer Leuchtkastenfläche - wo die Lichtquelle direkt hinter farbigen Grafiken sitzt - ist ein niedriger CRI sofort sichtbar. Wenn Ihre Lightbox Markenfarben trägt, gehen Sie bei CRI keine Kompromisse ein.
Welche weiße Temperatur? 6500K Cool White ist die Standardeinstellung für die meisten kommerziellen Lichtboxen - es liest knackig und hell und passt zum blau-weißen Aussehen der modernen Einzelhandelsbeleuchtung. 4000K neutrales Weiß ist die sicherere Wahl für Decken, die auch den Raum darunter beleuchten, z. B. offene Büros oder Lobbys, da es ohne klinische Blaustiche nahe am Tageslicht sitzt. 3000K Warm White gehört in Gastfreundschaft, Boutiquen und Premium-Deckenumgebungen, die ein warmes, hochwertiges Gefühl haben möchten. Wenn Sie sich nicht vor Ort entscheiden können, überwindet das Tunable-White-Modul das Risiko vollständig: Installieren Sie es und der Kunde kann die Temperatur von 2700K auf 6500K einstellen, nachdem die Decke hoch ist.
Schritt 4 - Entscheiden Sie, wie die Beleuchtung gesteuert wird
Bei der Kontrolle explodieren die Projektbudgets leise, wenn Sie falsch raten. Definieren Sie also das Verhalten vor der Bestellung. Dies ist auch die Entscheidung, die eine Deckeninstallation in zwei völlig unterschiedliche Produkte aufteilt: Eine statische Deckenleuchte verwendet ein Modul, eine Sternen-Effekt- oder eine fließende Farbe eine andere. Es gibt drei Familien, die nicht austauschbar sind:
| Kontrolltyp | Wie es funktioniert | Adressierung | Typische Verwendung |
| statisch (kein Regler) | Always-On oder einfacher Dimmer / PWM | Keine - ganze Schaltung auf einem Kanal | Leuchtkästen, gleichmäßige Deckenbeleuchtung, statische Markenpaneele |
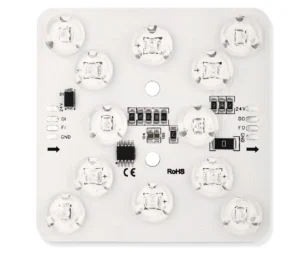
| SPI adressierbar | Jedes Modul ist ein Pixel auf einem Datenbus | Jedes Modul einzeln ansprechbar | Programmierbare Deckenmuster, Chasing-Effekte, mittelgroße Sternfelder |
| DMX512 | Industriestandard-Protokoll, professionelle Controller | DMX-Universen, pro Fixture oder pro Kanal | Synchronisierte Mehrzonendecken, Architekturprojekte, große Sternshows |
Statische Module sind der richtige Ruf für die meisten Leuchtkästen und sogar Deckenbeleuchtungen – sie sind einfacher, billiger und brauchen keine Programmierung. Wählen Sie SPI, wenn die Decke selbst in kleinerem Maßstab modulweise animiert werden soll. Wählen Sie DMX512, wenn mehrere Zonen über ein Gebäude synchronisiert bleiben müssen oder wenn der Kunde die Beleuchtung über einen Beleuchtungstisch oder ein Gebäudemanagementsystem bedient. Auf diese Weise wird eine Hotellobbydecke über mehrere hundert Module hinweg mit einer koordinierten Sternen- und Waschshow betrieben. Für einen tieferen Protokollhintergrund finden Sie unsere Anleitung für DMX-LED-Systeme und das SPI-adressierbare LED-Erklärung im Wissens-Hub und unserem Begleitartikel über DMX RGB LED-Module für Fassaden, Beschilderung und Decken.
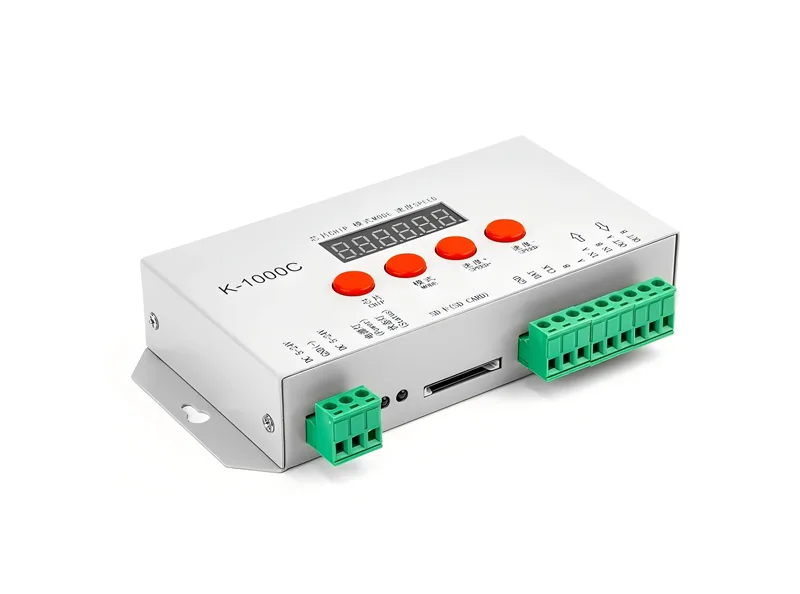
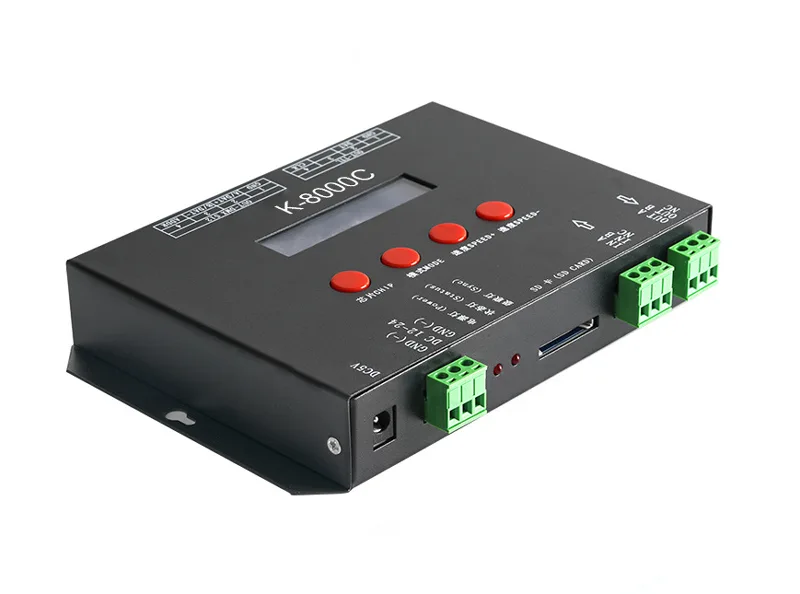
Hinweis zu individuell steuerbaren Modulen: Wenn der Brief sagt: „Jedes Modul muss separat steuerbar und dimmbar sein“, ist dies eine SPI- oder DMX-Spezifikation, keine statische. DMX512 behandelt es sauber – jedes Modul (oder jede Gruppe) belegt seine eigene Adresse, sodass Sie jede Einheit unabhängig von einem Controller dimmen, farblich mischen und sequenzieren können. Genau so wird eine Sternen-Effekt-Decke aufgebaut: Jedes Modul ist ein Pixel, und ein DMX-Programm treibt sie in funkelnde, fließende oder jagende Muster. Bei einem DMX-gesteuerten Job fragen Sie speziell nach DMX-Modulen, anstatt davon auszugehen, dass eine statische Einheit später mit einer Steuerung nachgerüstet werden kann, die Modulhardware ist anders.
Verdrahtung für gesteuerte Module. SPI- und DMX-Module Daisy-Chain: Jede Einheit gibt Daten-Ein- und Datenausgänge weiter, wobei der Controller am Kopf der Kette liegt. Halten Sie die Daten kurz und ordentlich - lange, ungeschirmte Datenkabel sind dort, wo Signalprobleme beginnen - und folgen Sie dem Schaltplan des Moduls für die genaue Ein- / Aus-Reihenfolge und für den separaten DC24V-Vorschub. Behalten Sie für DMX jedes Universum als beendete Daisy-Kette bei, eine Decke, die mehrere Universen überspannt, fügt nur eine weitere Kette vom Controller hinzu.
Schritt 5 - Netzteil dimensionieren
Gesamtleistung = Anzahl Module × Watt pro Modul
Netzteilleistung = Gesamtleistung × 1,2 (201 TP3T Headroom Minimum)
(Wenn Sie auch den Fahrer beschaffen, ist unser DC24V LED-Stromversorgungsbereich Deckt die gängigen 60 W – 400 W-Konstantspannungsausgänge ab, die in den Beispielen dieses Leitfadens verwendet werden.)
| System | Berechnung | Ausgang |
| 200 × 4 W einfarbige Lightbox-Module | 200 × 4 W | 800 W |
| mit 20% Headroom | 800 × 1,2 | 960 W → 1000 W-Treiber auswählen |
| 50 × 6 W DMX RGBW Deckensternmodule | 50 × 6 W | 300 W → 360 W → Ein 400 W-Treiber |
| 300 × 4 W-Module | 300 × 4 W | 1200 W → 1440 W → Zwei 720 W+ Treiber |
Bemessen Sie einen Treiber nicht auf genau 1001 tp3t der Last. Bei kaltem und abweichendem Abdunkeln in einigen Konfigurationen ziehen die Module etwas mehr, ein Treiber läuft heiß und schlägt frühzeitig fehl. Die 20%-Regel ist die Industrie-Basislinie — 30%, wenn die Installation in einem heißen Klima oder in einer geschlossenen Decke ohne Luftstrom ausgeführt wird.
Zwei weitere Verdrahtungspunkte. Lassen Sie zunächst jede Leistung innerhalb der Strombelastbarkeit des Kabels und der Ausgangskanäle des Fahrers laufen - verteilen Sie große Layouts auf zwei oder mehr Treiber, anstatt die gesamte Decke oder den Leuchtkasten auf ein Paar Kabel zu verketten. Zweitens folgen Sie dem Schaltplan des Herstellers für das jeweilige Modul: Der DC24V-Eingang und die Datenleitung (für SPI/DMX) sind separate Schaltkreise, und das Mischen ist der häufigste Feldfehler, den wir sehen.
Wenn die Installation abblendet, sagen Sie dies, wenn Sie den Treiber dimensionieren. Nicht jeder Treiber dimmt mit jedem Modul reibungslos, und das Koppeln eines Konstantspannungstreibers mit der richtigen Dimmschnittstelle - PWM, 0–10 V oder DALI - ist Teil der Systemspezifikation und kein nachträglicher Gedanke. Ein Fahrer, der in sichtbaren Schritten dimmt, ist eine der häufigsten Beschwerden bei Nachrüstarbeiten, bei denen der Dimmer nach der Auswahl der Module angeschraubt wurde.
Schritt 6 - Betrachten Sie die Umgebung
- Innenleuchten und Decken – Standardmodule sind in Ordnung, kein zusätzlicher Schutz hinter einer Acrylfläche oder über einer abgehängten Decke erforderlich.
- Außenleuchten - Wenn die Box auslaufen oder kondensieren kann, geben Sie wasserdichte Module und vergossene oder abgedichtete Treiber an. Kondenswasser in einer versiegelten Außenbox ist ein echter Fehlermodus, kein theoretischer.
- Wärme – Module sind am glücklichsten unter 50°C Umgebung. In tropischen Installationen oder in einer Decke, die mit anderen Diensten vollgepackt ist, die Lüftung oder die Modulzahl pro Fahrer verringern.
- Spannungsabfall – Bei langen Laufstrecken halten Sie die Vorschubseillehre so dick, dass das ferne Ende noch nahe an 24 V liegt; die Module dimmen sich sichtbar unter ~21 V.
Im Zweifelsfall senden Sie den Installationsort und das Klima als Teil des Angebots an den Lieferanten – das richtige Gehäuse, die IP-Bewertung und die Auswahl des Fahrers hängen davon ab. Eine vollständige Anleitung zu Montage, Verdrahtung und Inbetriebnahme finden Sie unter Design und Installation von LED-Systemen Abschnitt unseres Wissens-Hubs.
Kurzreferenz: Die 9-Modul-Familie auf einen Blick
Alle Module teilen sich die 68×68×5,5 mm-Fußabdruck, den DC24V-Eingang und die Farbwiedergabe RA90+, sodass jede folgende Kombination zum gleichen Raster- und Verdrahtungsplan passt:
| Modul | LED-Layout | Strom | Farbe | Kontrolle |
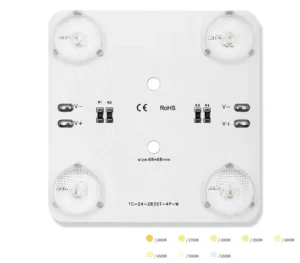
| Einfarbigkeit | 4×2835 | 4 w | 3000K / 4000K / 6500K | statisch |
| Abstimmbares Weiß | 2×4×2835 | 4 + 4 W | 2700–6500k | Statisch (CCT-Controller) |
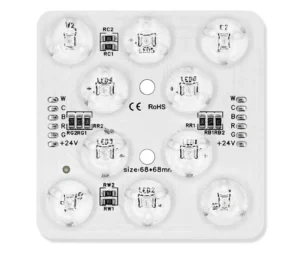
| RGBW | 6×4 (3030+2835) | 4 + 4 W | RGB + Weiß | Statisch (RGBW-Controller) |
| RGBCCT | 6×4 (3030+2835) | 4 + 4 W | RGB + WW + CW | statisch (RGBCCT-Controller) |
| SPI RGBW | 6×6 (3030+2835) | 4 w | RGB + Weiß | SPI, individuell ansprechbar |
| SPI RGBCCT | 6×6 (3030+2835) | 6 w | RGB + WW + CW | SPI, individuell ansprechbar |
| DMX Tunable White | 2×4×2835 | 2 × 4 W | 2700–6500k | DMX512 |
| DMX RGBW | 6×4 (3030+2835) | 6 + 4 w | RGB + Weiß | DMX512 |
| DMX RGBCCT | 6×4 (3030+2835) | 6 + 4 w | RGB + WW + CW | DMX512 |
Durchsuchen Sie das gesamte Sortiment mit den Spezifikationen auf dem LED-Modul-Licht-Produktseite, und springen direkt zum DMX-gesteuerte Serien Wenn Ihr Deckenprojekt synchronisierte oder individuell steuerbare Module erfordert.
Drei Fehler, die Installateure Geld kosten
- Bestellung nach Preis pro Modul statt nach Lux pro Quadratmeter. Ein billigeres Modul mit einem engeren Objektiv oder einer geringeren Leistung bedeutet oft, dass mehr Module die gleiche Helligkeit erreichen - die Option „billig“ ist häufig die teure, nachdem die Zählung neu berechnet wurde.
- Ignorieren der Hohlraumtiefe bei der Auswahl einer Linse. Der Kauf eines 160°-Objektivs für einen 60 mm flachen Lichtkasten oder für eine niedrige Deckenhohlraum ist eine der Hauptursachen für heiße Flecken, das Fix ist nicht mehr Module, es ist das breite 175°-Objektiv.
- Größe des Fahrers ohne Kopffreiheit. Ein mit 1001 tp3t geladener Treiber schlägt im Garantiefenster weitaus häufiger als eine Größe bei 1201 tp3t fehl - und ein toter Fahrer bedeutet eine dunkle Decke oder einen hellen Kästchen, während Sie auf einen Ersatz warten.
FAQ
Fazit: Spezifizieren Sie das gesamte System, nicht nur die Module
Eine Lichtbox oder Deckeninstallation ist ein System: Module, Objektive, Controller und Fahrer müssen sich einig sein. Wenn Sie die Oberflächenabmessungen, die Hohlraumtiefe, das erforderliche Farb- und Kontrollverhalten an das Signlited-Team senden, erhalten Sie eine vollständige Empfehlung - Modulfamilie, Abstandsplan und Leistungsgrößen - auf Ihr Projekt abgestimmt. Das ist schneller und billiger als zu raten, zu bestellen und nachzubestellen.
Senden Sie uns Ihre Leuchtkasten- oder Deckenmaße und erhalten Sie eine Modulsystemempfehlung →
Geschrieben von: Elaine Zhu, Geschäftsführerin bei SignliteLED
Technische Überprüfung: Jason Chen, F&E-Führer bei Signlited
E-Mail: info@signliteled.com
Verwandte Artikel