Español
  English
  简体中文
简体中文  Deutsch
  Français
  Italiano
  日本語
日本語  한국어
한국어  Polski
  Português
  Русский
  Türkçe
  Nederlands
  Tiếng Việt
  ไทย
ไทย 
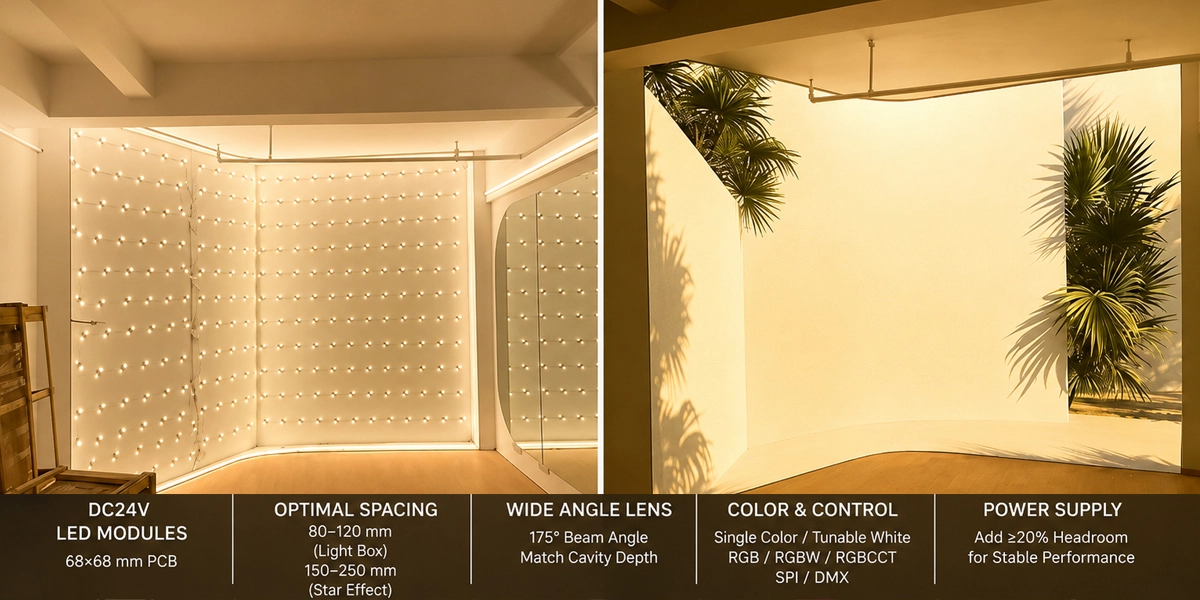
Elegir el derecho Módulos LED Para cajas de luz y la iluminación del techo se reduce a cinco decisiones de ingeniería: cuántos módulos instalar, qué ángulo de haz permite la profundidad de su cavidad, qué color y sistema de control necesita el espacio y cómo dimensionar la fuente de alimentación. La respuesta corta para la mayoría de los proyectos es la siguiente: Utilice un módulo con lente DC24V en una PCB de 68 × 68 mm, espaciemos los módulos aproximadamente entre 80 y 120 mm para una cara de caja de luz uniforme (o 150 a 250 mm de distancia si el objetivo es un efecto de estrella de techo), coincida con el lente gran angular de 175 ° con la profundidad de la cavidad y agregue al menos 20% Headroom. Esta guía recorre cada decisión paso a paso con números reales, de modo que pueda especificar un sistema completo (módulos, controlador y fuente de alimentación) sin adivinanzas y sin pedidos excesivos.
Por qué las cajas de luz y los techos necesitan módulos dedicados
Las cajas de luz y los techos son superficies implacables. Una cara de caja de luz que debería brillar como un panel par traicionará cada punto caliente y banda oscura si la cuadrícula del módulo está equivocada; un techo que debería llevar una estrella que fluye o un efecto de color parpadeará, aplanerá o estroboscó si el control está mal especificado. El margen de error es pequeño y el resultado es visible desde el otro lado de la habitación.
Los módulos LED fueron diseñados para exactamente este trabajo. diferente a Tira de LED, que es continuo y lineal, un módulo es un motor de luz discreto, generalmente de 4 a 6 LED en una PCB rígida de 68 × 68 mm con su propia lente de 175 °, que se coloca libremente en la superficie. Esa libertad es lo que hace posible dos resultados muy diferentes: una cuadrícula densa y uniforme que convierte una caja de luz en un panel uniforme y una cuadrícula escasa y direccionable que convierte un techo en un campo de estrellas o en un espectáculo de luces que fluye. En el rango de SignLiteled, cada módulo comparte la misma huella de 68 × 68 × 5,5 mm y la entrada DC24V, por lo que puede mezclar colores y tipos de control en una instalación manteniendo el diseño y el cableado idénticos. Antes de realizar un pedido, revise los seis pasos a continuación.

Paso 1: mida el área y planifique la cuadrícula del módulo
El primer número que necesitas es el área luminosa total. Para una caja de luz, eso es simplemente la cara iluminada en metros cuadrados. Para un techo, es el área del techo la que recibirá los módulos: mida el panel completo o la sección de cuadrícula suspendida, no solo las baldosas visibles.
¿Cuántos módulos necesitas?
Módulos por superficie = área total ÷ (espaciado × espaciado).
El espaciado es la distancia entre los centros de los módulos adyacentes, y el valor correcto depende completamente de lo que se supone que debe hacer la superficie. Una caja de luz y un efecto estrella del techo se encuentran en extremos opuestos de la escala de densidad:
| Tipo de superficie | Espacio típico | densidad resultante | portería |
| Caja de luz poco profunda (50–80 mm de profundidad) | 80-100 mm | 100–156 módulos/m² | Panel par, sin puntos calientes |
| Caja de luz profunda (100 mm + profundidad) | 100–120 mm | 69–100 módulos/m² | Panel uniforme, la luz tiene espacio para extenderse |
| Luz de fondo incluso de techo | 100–120 mm | 69–100 módulos/m² | Resplandor uniforme en el techo |
| Efecto Estrella de Techo (fuente de punto) | 150–250 mm | 16–44 módulos/m² | Cada módulo se lee como una “estrella” discreta |
Ejemplo resuelto — Caja de luz: Una caja de luz de 1 m × 2 m es de 2 m². Con un espaciamiento de 100 mm, necesita 2 ÷ (0,1 × 0,1) = 200 módulos. A 80 mm de espaciamiento que se eleva a 312 módulos, que es más brillante pero también 56% más de consumo de energía. La densidad correcta depende del acrílico, la distancia a la cara y la luminancia requerida: 200 módulos de una unidad de 4 W (800 W en total) ya entregan aproximadamente 5.000 a 6.000 lúmenes por metro cuadrado a 120 lm/W, lo que es cómodo para la mayoría de las cajas de luz iluminadas.
Ejemplo trabajado — Efecto de estrella de techo: El mismo techo de 2 m² con un espaciamiento de 200 mm solo necesita 2 ÷ (0,2 × 0,2) = 50 módulos. Un efecto de estrella es deliberadamente escaso: cada módulo debe verse como un punto de luz individual, no mezclado en un panel. Vaya más denso de 150 mm y las estrellas se funden en un lavado; se escaso de 250 mm y el techo parece despoblado. El control DMX o SPI es lo que convierte esos 50 puntos en un patrón que fluye, parpadea o persigue.
Un detalle que vale la pena señalar antes de medir: las dos aplicaciones de techo anteriores tienen objetivos opuestos. Una luz de fondo incluso de techo utiliza una rejilla densa y una lente amplia para ocultar los módulos individuales; un efecto de estrella de techo utiliza una cuadrícula escasa y permite que cada módulo se muestre como punto visible. Dígale al proveedor qué resultado desea: el número de módulos, la lente y la recomendación de control cambian con él.
Ordene 3-5% módulos adicionales como repuestos; un módulo dañado de instalación a mitad de precio es mucho más barato reemplazar desde el stock que volver a pedir y esperar el envío.
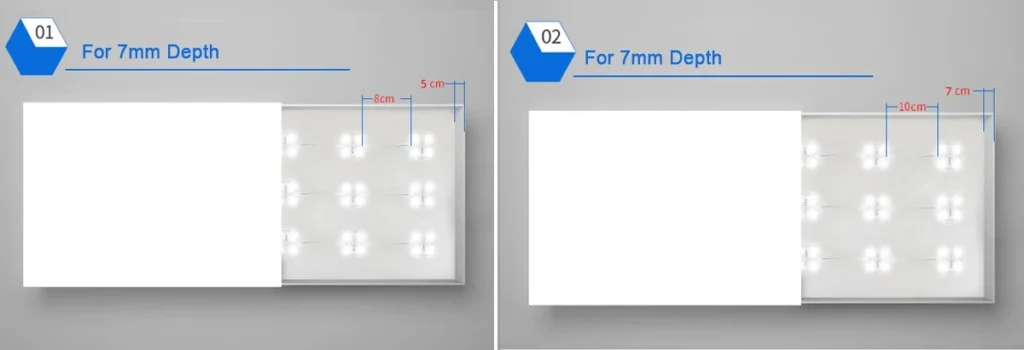
Diseño de espaciado de módulos LED para caras de caja de luz: 80 mm para paneles de 5 mm de grosor, 100 mm para paneles de 7 mm de espesor
Paso 2: haga coincidir el ángulo del haz con la profundidad de la cavidad
Esta es la decisión que separa un resultado profesional de uno irregular. El ángulo del haz de la lente determina hasta qué punto se extiende la luz directamente debajo de cada módulo. Demasiado angosto para la profundidad, y obtienes círculos brillantes con anillos oscuros entre ellos, llamados "manchado caliente". Demasiado ancho, y la luz se derrama más allá del área prevista y se lava. La misma lógica se aplica si la cavidad es una caja de luz o el vacío sobre un techo suspendido.
| profundidad de la cavidad | Ángulo de haz recomendado | Por qué |
| 50–80 mm (caja de luz poco profunda / vacío de techo bajo) | Lente gran angular de 175° | La luz se extiende antes de llegar a la cara, llenando los huecos entre los módulos |
| 80–120 mm (caja estándar / vacío de techo estándar) | 160-175° | El gran angular mantiene la cara uniforme sin sobreespacio |
| 120 mm+ (caja profunda / techo alto vacío) | Opción 160° o más estrecha | La cavidad más profunda permite ángulos más estrechos; los ángulos muy amplios pierden intensidad a distancia |
Los módulos SignLiteled se envían con una lente gran angular de 175° como estándar, que es el punto ideal para las profundidades de cavidad de 50 a 120 mm utilizadas en la gran mayoría de las cajas de luz y las instalaciones de techo. Si su proyecto requiere una extensión específica, como una lente más estrecha para una caja de luz muy profunda o un ángulo personalizado para un techo de efecto de estrella, es una personalización que la fábrica puede hacer durante la selección de PCB y lentes, así que pídala cuando solicite una cotización en lugar de asumir que la lente estándar se comportará de la misma manera.
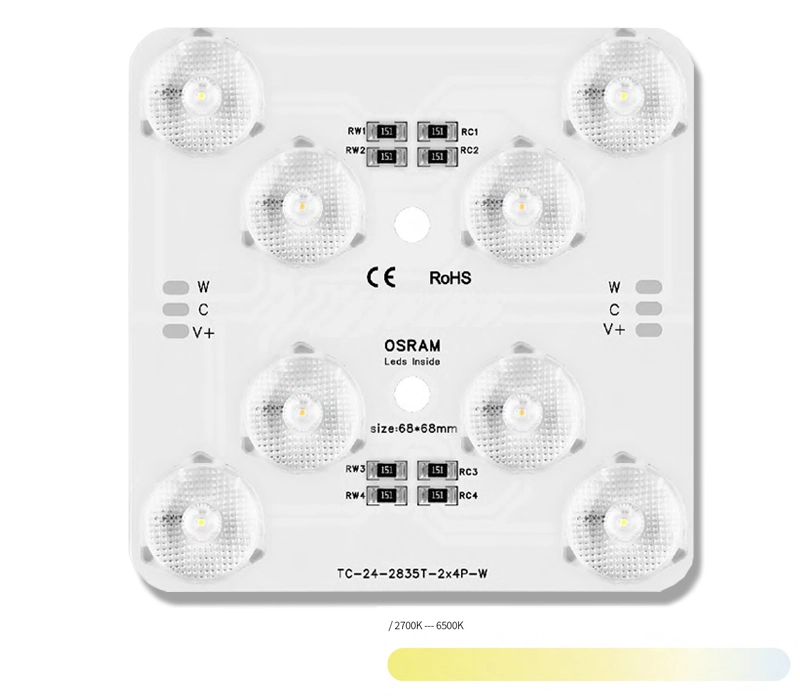
Módulos LED blancos sintonizables
- Tipo de LED: 2835 SMD
- Cantidad de LED: 2 × 4 uds
- Potencia 4+4W
- Eficiencia: 100lm/W o 150 lm/W
- Color: 2700K–6500K
- CRI: RA90+
- Tamaño: 68×68×5,5 mm
- Un solo color BIN, 3 pasos SDCM disponible
Consejo profesional: la regla de uniformidad 3:1. El punto de referencia aceptado para una cara de caja de luz "ipar" o una luz de fondo del techo es aproximadamente una relación de brillo de 3:1: el punto más brillante no debe ser más de tres veces el punto más tenue. Puede verificar esto en el campo con un medidor Lux barato antes de comprometerse con un diseño completo: camine por la superficie, anote las lecturas alta y baja y ajuste el espaciado o el ángulo del lente hasta que la relación se mantenga por debajo de 3:1. Atrapar un problema de observación en caliente en la etapa de maqueta cuesta un día; atraparlo en un techo terminado, instalado o un letrero cuesta una re-lámpara. (Para un techo de efecto estrella, la regla 3:1 no se aplica: escasez fuentes de puntos visibles, por lo que la uniformidad es la métrica incorrecta.)
Paso 3: Elija el sistema de color
Una vez que la rejilla y la lente estén fijas, decida qué mostrará la superficie. Esta es una decisión de producto-familia, porque el sistema de color determina qué módulo compra:
| sistema de cromo | que hace | Lo mejor para |
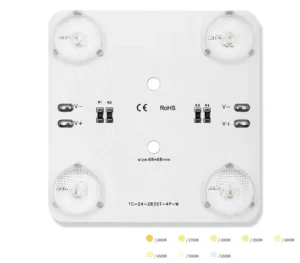
| Color único (3000 K / 4000 K / 6500 K) | Un CCT fijo, salida estática | Cajas de luz estándar, incluso retroiluminación en el techo, proyectos sensibles al costo |
| Blanco sintonizable (2700K–6500K) | Ajustar blanco cálido a frío | Techos de oficina y hoteles que cambian el estado de ánimo durante el día |
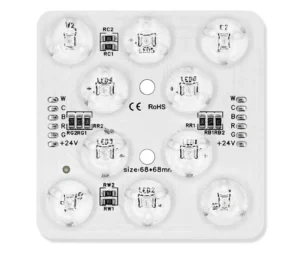
| RGBW | Mezcla de color RGB + un canal blanco dedicado | La luz de techo muestra que también necesita una luz ambiental blanca limpia |
| RGBCCT | RGB + blanco cálido + blanco frío en una unidad | Efectos de techo a todo color más blanco ajustable en un solo módulo |
Cada módulo de este rango funciona en RA90+, lo que importa más de lo que la mayoría de los compradores esperan. Un CRI para mayores de 90 significa los rojos en el logotipo de una marca, los tonos de piel en un gráfico impreso y los colores de pintura en un espacio comercial se procesan con precisión en lugar de verse descoloridos. En una cara de caja de luz, donde la fuente de luz se encuentra directamente detrás de los gráficos de colores, el CRI bajo se ve inmediatamente. Si su caja de luz lleva colores de marca, no se comprometa con el CRI.
¿Qué temperatura blanca? El blanco frío de 6500 K es el predeterminado para la mayoría de las cajas de luz comerciales: se lee nítido y brillante y combina con el aspecto azul-blanco de la iluminación comercial moderna. 4000K Neutral White es la opción más segura para los techos que también iluminan el espacio de abajo, como oficinas abiertas o vestíbulos, porque se encuentra cerca de la luz del día sin el yeso azul clínico. 3000K blanco cálido pertenece a la hospitalidad, las boutiques y los entornos de techo premium que quieren una sensación cálida y de alta gama. Si no puede decidirse en el sitio, el módulo Tunable-White elimina el riesgo por completo: instálelo y el cliente puede configurar la temperatura de 2700K a 6500K después de que el techo esté arriba.
Paso 4: Decide cómo se controlará la iluminación
El control es donde los presupuestos de proyecto explotan silenciosamente si adivinas mal, así que defina el comportamiento antes de realizar el pedido. Esta es también la decisión que divide una instalación de techo en dos productos completamente diferentes: una luz de fondo estática del techo utiliza un módulo, un techo de efecto estrella o de color fluido. Hay tres familias, y no son intercambiables:
| Tipo de control | como funciona | direccionamiento | Uso típico |
| Estático (sin controlador) | Siempre encendido o simple atenuador / PWM | Ninguno: circuito completo en un canal | Cajas de luz, incluso retroiluminación de techo, paneles de marca estáticos |
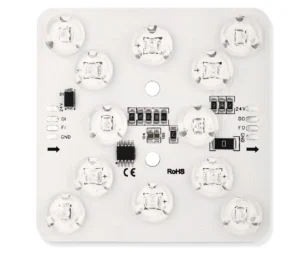
| SPI direccionable | Cada módulo es un píxel en un bus de datos | Cada módulo direccionable individualmente | Patrones de techo programables, efectos de persecución, campos estelares de escala media |
| DMX512 | Protocolo estándar de la industria, controladores profesionales | Universos DMX, por cada uno o por canal | Techos multizona sincronizados, proyectos arquitectónicos, grandes espectáculos de estrellas |
Los módulos estáticos son la decisión correcta para la mayoría de las cajas de luz e incluso las luces de fondo del techo: son más simples, más baratos y no necesitan programación. Elija SPI cuando desee que el techo en sí se anime, módulo por módulo, en una escala más pequeña. Elija DMX512 cuando varias zonas deben permanecer sincronizadas en un edificio, o cuando el cliente operará la iluminación desde un escritorio de iluminación o un sistema de gestión de edificios; así es como el techo de un hotel ejecuta un espectáculo coordinado de estrellas y lavado en varios cientos de módulos. Para obtener un fondo de protocolo más profundo, consulte nuestro Guía de sistemas LED DMX y el Explicador LED direccionable SPI en el Centro de conocimiento y nuestro artículo complementario sobre Módulos LED DMX RGB para fachadas, señalización y techos.
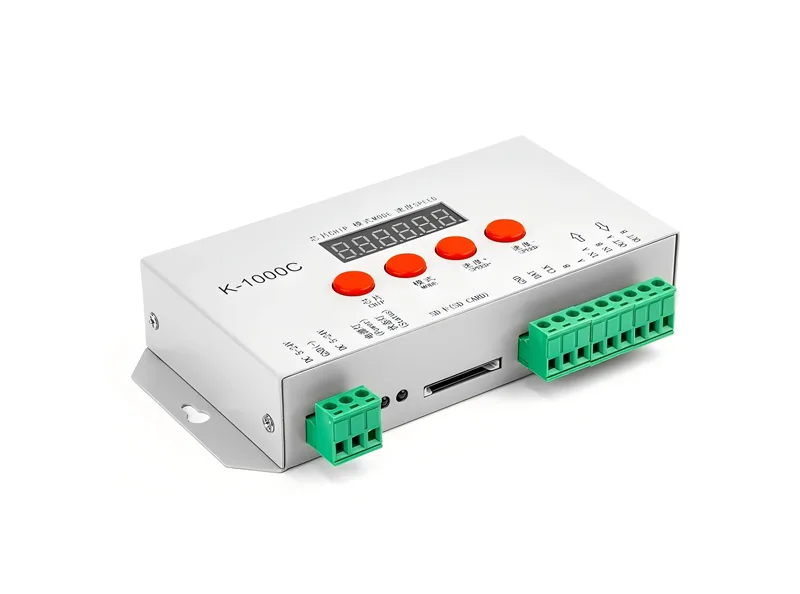
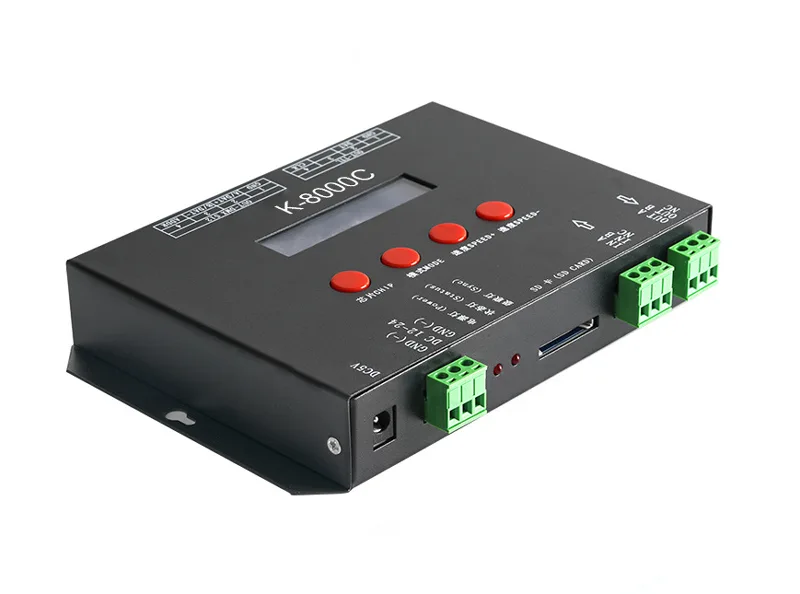
Una nota sobre los módulos controlables individualmente: Si el resumen dice "cada módulo debe ser controlable y regulable por separado", esa es una especificación SPI o DMX, no estática. DMX512 lo maneja limpiamente: cada módulo (o grupo) ocupa su propia dirección, de modo que puede atenuar, mezclar color y secuenciar cada unidad independientemente de un controlador. Así es exactamente como se construye un techo de efecto estrella: cada módulo es un píxel y un programa DMX los lleva a parpadear, fluir o perseguir patrones. Para un trabajo impulsado por DMX, pregunte específicamente por los módulos DMX en lugar de asumir que una unidad estática se puede adaptar más tarde con un controlador; el hardware del módulo es diferente.
Cableado para módulos controlados. Módulos SPI y DMX DAISY-CHAIN: Cada unidad pasa datos de entrada y salida, con el controlador en la cabeza de la cadena. Mantenga los datos cortos y ordenados (los cables de datos largos y sin blindaje) son donde comienzan los problemas de señal y siga el diagrama de cableado del módulo para conocer el orden de entrada/salida exacto y para la alimentación separada DC24V. Para DMX, mantenga cada universo como una cadena de margaritas terminada; un techo que abarca varios universos solo agrega otra cadena del controlador.
Paso 5 — Dimensionar la fuente de alimentación
Potencia total = número de módulos × vataje por módulo
Clasificación de la fuente de alimentación = potencia total × 1.2 (20% Mínimo de espacio libre)
(Si también está buscando al conductor, nuestro Rango de fuente de alimentación LED DC24V Cubre las salidas de voltaje constante de 60 W–400 W comunes utilizadas en los ejemplos de esta guía.)
| Sistema | cómpu | éxito |
| Módulos de caja de luz de un solo color de 200 × 4 W | 200 × 4 W | 800 W |
| Con 20% Headroom | 800 × 1.2 | 960 W → Seleccione un driver de 1000 W |
| Módulos de estrella de techo DMX RGBW de 50 × 6 W | 50 × 6 W | 300 W → 360 W → Un conductor de 400 W |
| Módulos de 300 × 4 W | 300 × 4 W | 1200 W → 1440 W → Dos 720 W+ |
No dimensione un controlador exactamente a 100% de la carga. Los módulos se desprenden un poco más cuando están en frío y se están atenuando desde la salida completa en algunas configuraciones; un controlador que funciona en su límite se calienta y falla temprano. La regla 20% es la línea base de la industria: 30% si la instalación funciona en un clima cálido o dentro de un vacío de techo sellado sin flujo de aire.
Dos puntos de cableado más. Primero, mantenga cada potencia dentro de la clasificación actual del cable y los canales de salida del conductor: difunda grandes diseños en dos o más controladores en lugar de encadenar todo el techo o la caja de luz en un par de cables. En segundo lugar, siga el diagrama de cableado del fabricante para el módulo específico: la entrada DC24V y la línea de datos (para SPI/DMX) son circuitos separados, y mezclarlos es el error de campo más común que vemos.
Si la instalación se atenuará, dígalo cuando dimensione el controlador. No todos los controladores se atenúan sin problemas con cada módulo, y el emparejamiento de un controlador de voltaje constante con la interfaz de atenuación correcta (PWM, 0–10 V o DALI) es parte de la especificación del sistema, no una ocurrencia tardía. Un controlador que se atenúa en pasos visibles es una de las quejas más comunes sobre trabajos de actualización donde se atornilla el dimmer después de que los módulos ya se eligieron.
Paso 6: Considere el medio ambiente
- Cajas y techos de luz interior: los módulos estándar están bien; no se necesita protección adicional detrás de una cara acrílica o sobre un techo suspendido.
- Cajas de luz para exteriores: si la caja puede tener fugas o condensarse, especifique los módulos impermeables y los controladores en macetas o sellados. La condensación dentro de una caja exterior sellada es un modo de falla real, no teórico.
- Calor: los módulos son más felices por debajo de los 50 °C. En instalaciones tropicales, o en un techo vacío repleto de otros servicios, agregue ventilación o reduzca el conteo de módulos por conductor.
- Caída de voltaje: para recorridos largos, mantenga el medidor de cable de alimentación lo suficientemente grueso como para que el extremo lejano aún se vea cerca de 24 V; los módulos se atenúan visiblemente por debajo de ~21 V.
En caso de duda, envíe la ubicación y el clima de instalación al proveedor como parte de la cotización: el recinto correcto, la clasificación IP y la elección del conductor dependen de ello. Para un recorrido completo de montaje, cableado y puesta en marcha, consulte el Diseño e instalación del sistema LED sección de nuestro centro de conocimiento.
Referencia rápida: la familia de 9 módulos de un vistazo
Todos los módulos comparten la huella de 68×68×5,5 mm, la entrada DC24V y la representación del color RA90+, por lo que cualquier combinación que se encuentre a continuación se ajusta al mismo plan de red y cableado:
| módulo | Diseño LED | Potencia | Color | Controlar |
| color único | 4×2835 | 4 w | 3000K / 4000K / 6500K | inactivo |
| Blanco sintonizable | 2×4×2835 | 4+4 W | 2700K–6500K | Estático (controlador CCT) |
| RGBW | 6×4 (3030+2835) | 4+4 W | RGB + blanco | Estático (controlador RGBW) |
| RGBCCT | 6×4 (3030+2835) | 4+4 W | RGB + WW + CW | Estático (controlador RGBCCT) |
| sprgbw | 6×6 (3030+2835) | 4 w | RGB + blanco | SPI, direccionable individualmente |
| sprgbcc | 6×6 (3030+2835) | 6 W | RGB + WW + CW | SPI, direccionable individualmente |
| DMX sintonizable blanco | 2×4×2835 | 2×4 W | 2700K–6500K | DMX512 |
| DMX RGBW | 6×4 (3030+2835) | 6+4 W | RGB + blanco | DMX512 |
| DMX RGBCC | 6×4 (3030+2835) | 6+4 W | RGB + WW + CW | DMX512 |
Explore la gama completa con las especificaciones en el Luz de módulo LED Página del producto, y salta directamente a la Serie controlada por DMX Si su proyecto de techo requiere módulos sincronizados o controlables individualmente.
Tres errores que cuestan dinero a los instaladores
- Pedido por precio por módulo en lugar de lux por metro cuadrado. Un módulo más barato con una lente más ajustada o una salida más baja a menudo significa más módulos para alcanzar el mismo brillo: la opción "barato" es frecuentemente la cara después de volver a calcular el recuento.
- Ignorando la profundidad de la cavidad al elegir una lente. Comprar una lente de 160° para una caja de luz poco profunda de 60 mm, o para un vacío de techo bajo, es la principal causa de manchado en caliente; la solución no es más módulos, es la lente más ancha de 175°.
- Dimensionar al conductor sin espacio para la cabeza. Un controlador que funciona con una carga de 100% falla en la ventana de garantía con mucha más frecuencia que de un tamaño en 120%, y un controlador muerto significa un techo oscuro o una caja de luz mientras espera un reemplazo.
PREGUNTAS FRECUENTES
Conclusión: especifique todo el sistema, no solo los módulos
Una caja de luz o instalación de techo es un sistema: los módulos, lentes, controlador y controlador tienen que estar de acuerdo. Si envía las dimensiones de la superficie, la profundidad de la cavidad, el color requerido y el comportamiento de control al equipo de SignLiteled, obtendrá una recomendación completa (familia de módulos, plan de espaciado y tamaño de potencia) que se ajusta a su proyecto. Eso es más rápido y más barato que adivinar, ordenar y volver a ordenar.
Envíenos las dimensiones de su caja de luz o techo y obtenga una recomendación del sistema de módulo →
Escrito por: Elaine Zhu, Gerente General de SignliteLED
Revisión técnica: Jason Chen, líder de I+D en Signliteled
Correo electrónico: info@signliteled.com
Publicaciones relacionadas