한국어
한국어  English
  简体中文
简体中文  Deutsch
  Español
  Français
  Italiano
  日本語
日本語  Polski
  Português
  Русский
  Türkçe
  Nederlands
  Tiếng Việt
  ไทย
ไทย 
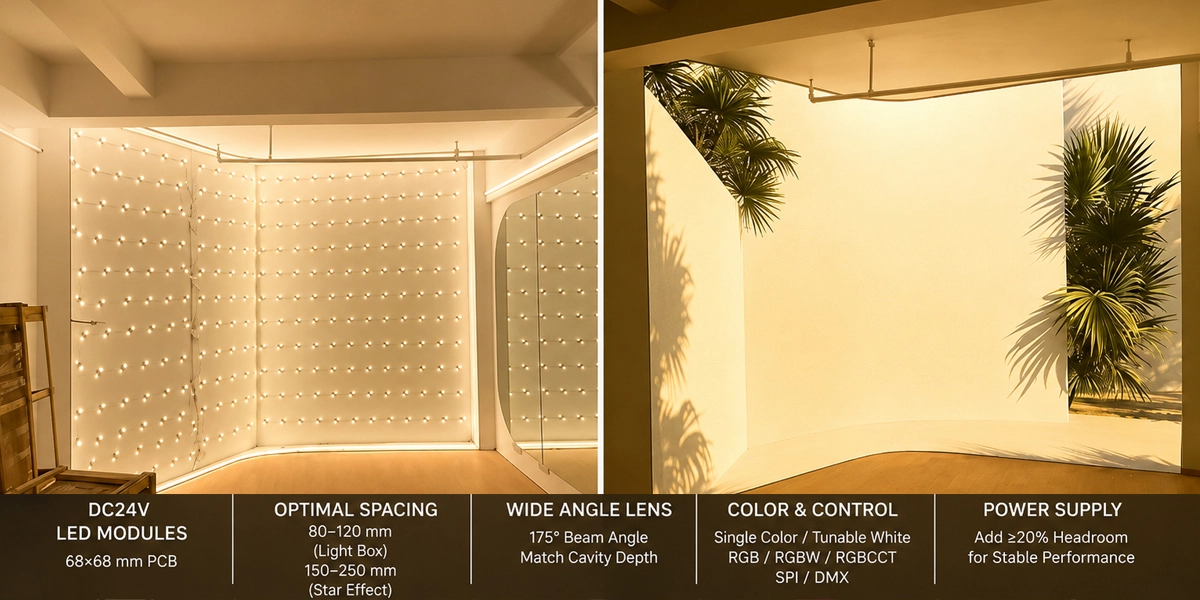
올바른 선택 LED 모듈 라이트 박스 및 천장 조명의 경우 설치할 모듈 수, 캐비티 깊이가 허용하는 빔 각도, 공간에 필요한 색상 및 제어 시스템, 전원 공급 장치의 크기를 조정하는 방법 등 5가지 엔지니어링 결정에 따라 결정됩니다. 대부분의 프로젝트에 대한 짧은 대답은 다음과 같습니다. 68×68mm PCB에 DC24V 렌즈 모듈을 사용하고, 균일한 라이트 박스 면(또는 목표가 천장 별 효과인 경우 150-250mm 간격)을 위해 모듈을 간격을 두십시오. 175° 광각 렌즈를 캐비티 깊이에 맞추고, 드라이버를 선택할 때 20% 헤드룸을 추가합니다. 이 가이드는 실수와 과도한 주문 없이 전체 시스템(모듈, 컨트롤러 및 전원 공급 장치)을 지정할 수 있도록 각 결정을 단계별로 살펴봅니다.
라이트 박스와 천장에 전용 모듈이 필요한 이유
라이트 박스와 천장은 용서할 수 없는 표면입니다. 하나의 균등한 패널처럼 빛나야 하는 라이트 박스 얼굴은 모듈 그리드가 잘못되면 모든 핫스팟과 다크 밴드를 배반하고, 흐르는 별이나 색상 효과를 전달해야 하는 천장은 컨트롤이 잘못되면 깜박거리거나 평평하거나 스트로브됩니다. 오차 한계는 작고 결과는 방 전체에서 볼 수 있습니다.
LED 모듈은 정확히 이 작업을 위해 설계되었습니다. 닮지 않은 LED 스트립, 연속적이고 선형적인 모듈은 표면을 가로질러 자유롭게 배치할 수 있는 개별적인 가벼운 엔진(일반적으로 175° 렌즈가 있는 단단한 68×68mm PCB의 4–6 LED)입니다. 그 자유는 두 가지 매우 다른 결과를 가능하게 하는 것입니다. 라이트 박스 면을 균일한 패널로 바꾸는 조밀하고 균일한 그리드와 천장을 스타 필드 또는 흐르는 빛 쇼로 바꾸는 희소하고 픽셀 주소가 있는 그리드입니다. 서명된 범위에서 모든 모듈은 동일한 68×68×5.5mm 풋프린트와 DC24V 입력을 공유하므로 레이아웃과 배선을 동일하게 유지하면서 한 번의 설치로 색상과 제어 유형을 혼합할 수 있습니다. 주문하기 전에 아래 6단계를 통해 작업하십시오.

1단계 — 면적 측정 및 모듈 그리드 계획
필요한 첫 번째 숫자는 총 발광 영역입니다. 라이트 박스의 경우, 그것은 단순히 평방 미터의 얼굴을 밝힙니다. 천장의 경우 모듈을 수신하는 천장 영역입니다. 보이는 타일뿐만 아니라 전체 패널 또는 매달린 그리드 섹션을 측정합니다.
얼마나 많은 모듈이 필요합니까?
표면당 모듈 = 총 면적 ÷(간격 × 간격).
간격은 인접한 모듈의 중심 사이의 거리이며 올바른 값은 표면이 수행해야 하는 작업에 전적으로 따라 다릅니다. 라이트 박스와 천장 별 효과는 밀도 척도의 반대쪽 끝에 있습니다.
| 표면 유형 | 일반적인 간격 | 결과 밀도 | 목표로 향하다 |
| 얕은 라이트 박스(50~80mm 깊이) | 80–100mm | 100–156 모듈/m² | 패널도 핫스팟이 없습니다 |
| 딥 라이트 박스(100mm+ 깊이) | 100–120mm | 69–100 모듈/m² | 패널도 펼쳐지는 공간이 있어 |
| 천장까지 백라이트 | 100–120mm | 69–100 모듈/m² | 천장을 가로지르는 균일한 빛 |
| 천장 별 효과(포인트 소스) | 150–250mm | 16–44 모듈/m² | 각 모듈은 별개의 "별"로 읽습니다. |
작업 예 — 라이트 박스: A 1m × 2m 라이트 박스는 2m²입니다. 100mm 간격으로 2 ÷ (0.1 × 0.1) = 200 모듈이 필요합니다. 80mm 간격으로 312개의 모듈로 상승하여 더 밝지만 56%의 전력 소모가 더 많습니다. 아크릴, 면까지의 거리, 그리고 필요한 휘도에 따라 밀도가 달라집니다. 4W 단위의 200개 모듈(총 800W)은 이미 120lm/w에서 평방 미터당 대략 5,000~6,000루멘을 제공하며, 이는 대부분의 조명이 켜진 라이트 박스에 적합합니다.
작업 예 — 천장 별 효과: 200mm 간격의 동일한 2m² 천장에는 2 ÷(0.2 × 0.2) = 50개의 모듈만 있으면 됩니다. 별 효과는 의도적으로 희소합니다. 각 모듈은 패널에 혼합되지 않고 개별적인 빛의 지점으로 간주되어야 합니다. 150mm보다 더 밀도가 높으면 별이 씻겨 나갑니다. 250mm보다 희소하게 이동하고 천장이 인구가 부족해 보입니다. DMX 또는 SPI 컨트롤은 50점을 흐르고 반짝거리거나 쫓는 패턴으로 바꾸는 것입니다.
측정하기 전에 플래그를 지정할 가치가 있는 한 가지 세부 사항: 위의 두 천장 응용 프로그램은 반대 목표를 가지고 있습니다. 천장 짝수 백라이트는 개별 모듈을 숨기기 위해 빽빽한 그리드와 넓은 렌즈를 사용하며, 천장 별 효과는 희소 그리드를 사용하며 각 모듈을 가시점으로 표시합니다. 원하는 결과를 공급업체에 알리십시오. 모듈 수, 렌즈 및 제어 권장 사항이 모두 변경됩니다.
3–5% 추가 모듈을 예비품으로 주문하십시오. 손상된 모듈은 재주문하고 배송을 기다리는 것보다 재고에서 교체하는 것이 훨씬 저렴합니다.
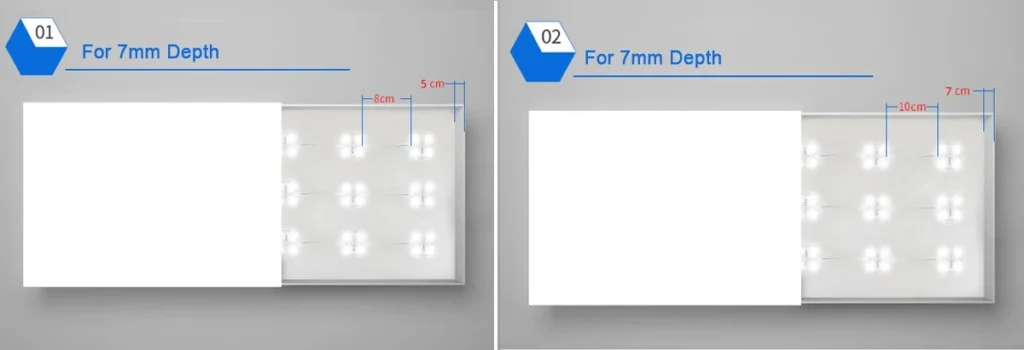
라이트 박스 면을 위한 LED 모듈 간격 배치: 5mm 두께 패널의 경우 80mm, 7mm 두께의 패널용 100mm
2단계 — 빔 각도를 캐비티 깊이에 맞추기
이것은 전문적인 결과와 고르지 못한 결과를 구분하는 결정입니다. 렌즈의 빔 각도는 각 모듈 바로 아래에서 빛이 얼마나 멀리 퍼지는지 결정합니다. 깊이에 비해 너무 좁고 그 사이에 어두운 고리가 있는 밝은 원이 생깁니다. "핫스팟팅"이라고 합니다. 너무 넓고 빛이 의도한 영역을 지나 흘러내립니다. 캐비티가 라이트 박스 하우징이든 매달린 천장 위의 공극이든 상관없이 동일한 논리가 적용됩니다.
| 공동 깊이 | 권장 빔 각도 | 왜 |
| 50~80mm(얕은 라이트 박스/천장 공극) | 175° 광각 렌즈 | 빛이 얼굴에 닿기 전에 퍼져서 모듈 사이의 간격을 메웁니다. |
| 80–120 mm (표준 박스/표준 천장 공극) | 160–175° | 과도한 간격 없이 얼굴을 균일하게 유지 |
| 120 mm+ (깊이 박스 / 높은 천장 공극) | 160° 이하 옵션 | 더 깊은 캐비티는 더 좁은 각도를 허용하며 매우 광각은 거리에서 강도를 잃습니다. |
서명된 모듈은 175° 광각 렌즈를 표준으로 제공합니다. 이는 대부분의 라이트 박스 및 천장 설치에 사용되는 50–120mm 캐비티 깊이의 최적의 지점입니다. 프로젝트에서 매우 깊은 라이트 박스를 위한 좁은 렌즈나 별 효과 천장을 위한 맞춤형 각도와 같은 특정 스프레드가 필요한 경우, 이는 PCB 및 렌즈 선택 중에 공장에서 사용자 정의할 수 있는 사용자 정의이므로 표준 렌즈가 동일하게 작동한다고 가정하지 말고 견적을 요청할 때 요청하십시오.
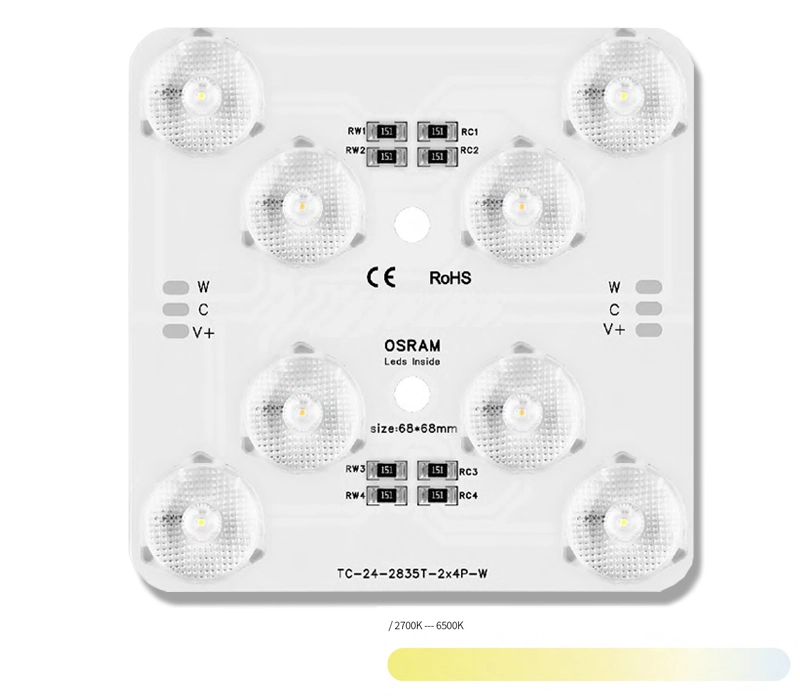
조정 가능한 백색 LED 모듈
- LED 유형: 2835 SMD
- LED 수량: 2 × 4 개
- 전력 4+4W
- 효율: 100lm/w 또는 150lm/w
- 색상: 2700K–6500K
- CRI: RA90+
- 크기: 68×68×5.5mm
- 단일 단색 BIN, 3단계 SDCM 사용 가능
프로 팁 — 3:1 균일성 규칙. "균등한" 라이트 박스 얼굴 또는 천장 백라이트에 대해 허용되는 벤치마크는 대략 3:1 밝기 비율입니다. 가장 밝은 점은 가장 희미한 지점의 3배를 넘지 않아야 합니다. 전체 레이아웃을 수행하기 전에 저렴한 Lux 미터로 현장에서 이를 확인할 수 있습니다. 표면을 걷고, 높음과 낮은 판독값을 기록하고 비율이 3:1 미만으로 유지될 때까지 간격이나 렌즈 각도를 조정하십시오. 목업 단계에서 핫스팟 문제를 잡는 것은 하루에 비용이 많이 들고, 완성된 천장이나 간판에서 그것을 잡는 것은 다시 램프입니다. (별효과 상한선의 경우 3:1 규칙은 적용되지 않습니다. 가난 가시점 소스가 있으므로 균일성은 잘못된 메트릭입니다.)
3단계 — 색상 시스템 선택
그리드와 렌즈가 고정되면 표면에 무엇을 표시할지 결정하십시오. 색상 시스템이 구매하는 모듈을 결정하기 때문에 제품군 결정입니다.
| 컬러 시스템 | 그것이하는 일 | 최상의 대상 |
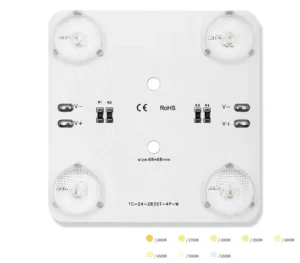
| 단색(3000K/4000K/6500K) | 고정 CCT, 정적 출력 | 표준 라이트 박스, 천장 백라이트까지, 비용에 민감한 프로젝트 |
| 조정 가능한 흰색(2700K–6500K) | 따뜻한 흰색을 조정합니다. | 하루 종일 기분을 바꾸는 사무실과 호텔 천장 |
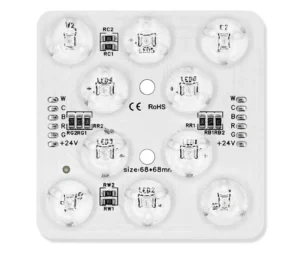
| RGBW | RGB 색상 혼합 + 전용 화이트 채널 | 깨끗한 흰색 주변 조명도 필요한 천장 조명 |
| RGBCCT | RGB + 따뜻한 흰색 + 쿨 화이트 한 유닛에 | 풀 컬러 천장 효과 플러스 화이트 조절식 화이트 |
이 범위의 모든 모듈은 RA90+에서 실행되며 이는 대부분의 구매자가 기대하는 것보다 더 중요합니다. 90+ CRI는 브랜드 로고의 빨간색, 인쇄된 그래픽의 피부 톤, 소매 공간의 페인트 색상을 씻겨 보이지 않고 정확하게 렌더링합니다. 광원이 컬러 그래픽 바로 뒤에 있는 라이트 박스 페이스에서는 낮은 CRI가 즉시 표시됩니다. 라이트 박스에 브랜드 색상이 있는 경우 CRI를 타협하지 마십시오.
어떤 백색 온도? 6500K Cool White는 대부분의 상업용 라이트 박스의 기본값입니다. 선명하고 밝게 읽히며 현대 소매 조명의 청백색 모양과 일치합니다. 4000K Neutral White는 오픈 오피스나 로비와 같이 아래 공간을 밝히는 천장에 더 안전한 선택입니다. 왜냐하면 임상적 블루 캐스트 없이 일광에 가깝기 때문입니다. 3000K 웜 화이트는 따뜻하고 고급스러운 느낌을 원하는 환대, 부티크 및 프리미엄 천장 환경에 속합니다. 사이트를 결정할 수 없는 경우 Tunable-White 모듈은 위험을 완전히 제거합니다. 설치하면 클라이언트가 천장이 올라간 후 2700K에서 6500K로 온도를 설정할 수 있습니다.
4단계 — 조명 제어 방법 결정
제어는 잘못된 추측이 있으면 프로젝트 예산이 조용히 폭발하는 곳이므로 주문하기 전에 동작을 정의하십시오. 이것은 천장 설치를 완전히 다른 두 가지 제품으로 분할하는 결정이기도 합니다. 정적 천장 백라이트는 하나의 모듈을 사용하고 별 효과 또는 흐르는 색상 천장은 다른 모듈을 사용합니다. 세 가족이 있으며, 서로 교환할 수 없습니다.
| 제어 유형 | 작동 방식 | 주소를 지정하는 | 일반적인 사용 |
| 정적(컨트롤러 없음) | 상시 사용 또는 단순 조광기 / PWM | 없음 — 한 채널의 전체 회로 | 라이트 박스, 천장 백라이트, 정적 브랜드 패널 |
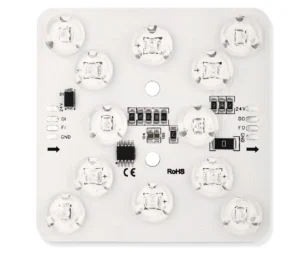
| SPI 주소 지정 가능 | 각 모듈은 데이터 버스의 픽셀입니다. | 모든 모듈은 개별적으로 주소 지정 가능 | 프로그래밍 가능한 천장 패턴, 추격 효과, 중간 규모의 별장 |
| DMX512 | 산업 표준 프로토콜, 전문 컨트롤러 | DMX 유니버스, 고정 장치 또는 채널당 | 동기화된 다중 구역 천장, 건축 프로젝트, 대형 스타 쇼 |
정적 모듈은 대부분의 라이트 박스와 천장 백라이트의 올바른 호출입니다. 더 간단하고 저렴하며 프로그래밍이 필요하지 않습니다. 천장 자체가 모듈별로 더 작은 규모로 애니메이션되도록 하려면 SPI를 선택합니다. 여러 구역이 건물 전체에서 동기화된 상태를 유지해야 하는 경우 또는 클라이언트가 조명 데스크 또는 건물 관리 시스템에서 조명을 작동할 때 DMX512를 선택합니다. 이것이 호텔 로비 천장이 수백 개의 모듈에 걸쳐 조정된 스타 앤 워시 쇼를 실행하는 방식입니다. 더 깊은 프로토콜 배경은 DMX LED 시스템 가이드 그리고 SPI 주소 지정 가능한 LED 설명 지식 허브와 우리의 동반자 기사에서 파사드, 간판 및 천장용 DMX RGB LED 모듈.
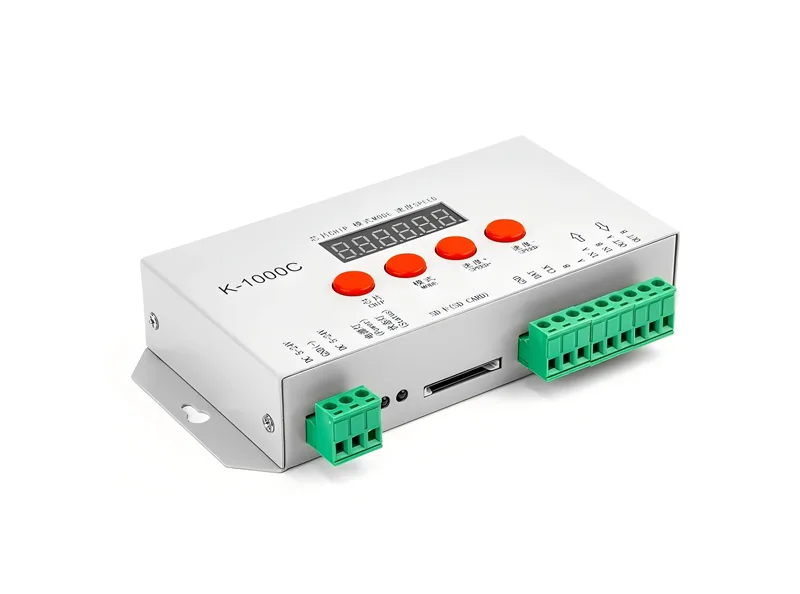
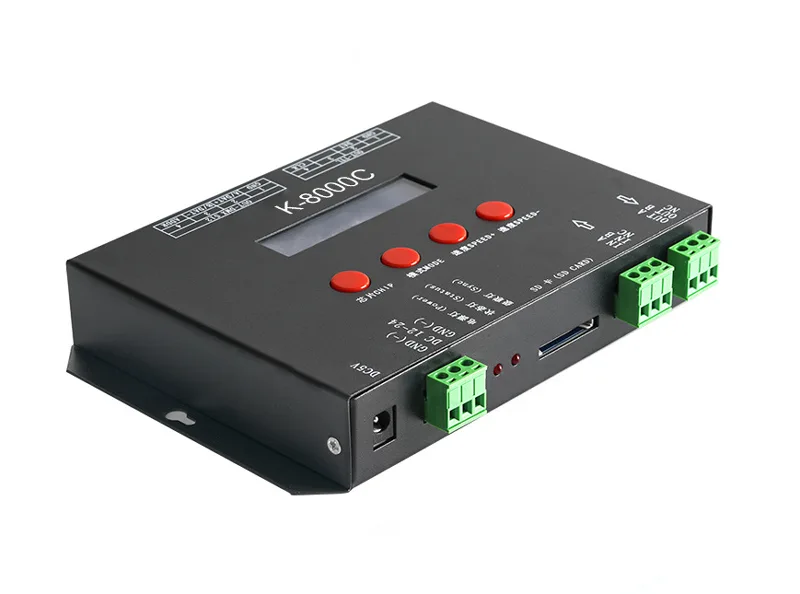
개별적으로 제어 가능한 모듈에 대한 참고 사항: 요약에 "각 모듈은 별도로 제어 가능하고 디밍 가능해야 합니다."라고 표시되면 정적이 아니라 SPI 또는 DMX 사양입니다. DMX512는 이를 깔끔하게 처리합니다. 각 모듈(또는 그룹)이 자체 주소를 차지하므로 하나의 컨트롤러에서 모든 장치를 독립적으로 어둡게, 색상 혼합 및 시퀀싱할 수 있습니다. 이것이 바로 별 효과 천장이 구축되는 방식입니다. 각 모듈은 픽셀이며 DMX 프로그램은 반짝이는 패턴으로 흐르거나 쫓는 패턴으로 만듭니다. DMX 구동 작업의 경우, 정적 장치를 나중에 컨트롤러로 개조할 수 있다고 가정하지 말고 DMX 모듈을 특별히 요청하십시오.
제어 모듈을 위한 배선. SPI 및 DMX 모듈 데이지 체인: 각 장치는 데이터를 전달하고, 컨트롤러는 체인의 머리 부분에 있습니다. 데이터를 짧고 깔끔하게 유지하십시오. 길고 차폐되지 않은 데이터 케이블은 신호 문제가 시작되는 곳입니다. 정확한 입/출력 순서와 별도의 DC24V 피드에 대해 모듈의 배선도를 따르십시오. DMX의 경우 각 유니버스를 종료된 데이지 체인으로 유지하며, 여러 유니버스에 걸쳐 있는 천장은 컨트롤러에서 또 다른 체인을 추가합니다.
5단계 - 전원 공급 장치 크기
총 와트수 = 모듈 수 × 모듈당 와트수
전원 공급 장치 정격 = 총 와트 × 1.2 (20% 헤드룸 최소)
(운전사를 소싱하는 경우 DC24V LED 전원 공급 장치 범위 이 가이드의 예에서 사용되는 일반적인 60W–400W 정전압 출력을 다룹니다.)
| 시스템 | 계산 | 결과 |
| 200 × 4 W 단색 라이트 박스 모듈 | 200 × 4 W | 800W |
| 20% 헤드룸 포함 | 800 × 1.2 | 960 W → 1000W 드라이버 선택 |
| 50 × 6 W DMX RGBW 천장 별 모듈 | 50 × 6 W | 300W → 360W → 400W 드라이버 1개 |
| 300 × 4W 모듈 | 300 × 4 W | 1200W → 1440W → 720 W+ 드라이버 2대 |
드라이버의 크기를 정확히 100%로 설정하지 마십시오. 일부 구성에서는 차가운 상태에서 전체 출력에서 어두울 때 약간 더 많이 그립니다. 20% 규칙은 산업 기준입니다. 설치가 더운 기후에서 실행되는 경우 또는 기류가 없는 밀봉된 천장 공극 내부에서 실행되는 경우 30%입니다.
두 개의 배선 지점이 더 있습니다. 첫째, 모든 전력을 케이블과 운전자의 출력 채널의 현재 정격 내에서 유지하십시오. 전체 천장이나 라이트 박스를 한 쌍의 전선에 데이지 체인 방식으로 연결하지 않고 두 명 이상의 드라이버에 대규모 레이아웃을 분산시킵니다. 둘째, 특정 모듈에 대한 제조업체의 배선도를 따르십시오. DC24V 입력과 데이터 라인(SPI/DMX용)은 별도의 회로이며, 이를 혼합하는 것이 가장 흔한 필드 오류입니다.
설치가 어두워지면 드라이버의 크기를 조정할 때 그렇게 말하십시오. 모든 드라이버가 모든 모듈에서 원활하게 어두워지는 것은 아니며, 정전압 드라이버를 올바른 디밍 인터페이스(PWM, 0–10V 또는 Dali)와 페어링하는 것이 나중에 생각하는 것이 아니라 시스템 사양의 일부입니다. 눈에 보이는 단계에서 어두워지는 드라이버는 모듈이 이미 선택된 후 조광기가 장착된 개조 작업에 대한 가장 일반적인 불만 중 하나입니다.
6단계 — 환경 고려
- 실내 조명 상자 및 천장 — 표준 모듈은 괜찮으며 아크릴 면 뒤 또는 매달린 천장 위의 추가 보호가 필요하지 않습니다.
- 실외 라이트 박스 — 상자에서 누출 또는 응축이 있을 수 있는 경우 방수 모듈과 포팅 또는 밀봉된 드라이버를 지정하십시오. 밀봉된 실외 상자 내부의 응축은 이론적인 것이 아니라 실제 고장 모드입니다.
- 열 — 모듈은 50°C 주변에서 가장 행복합니다. 열대 설비 또는 다른 서비스가 가득한 천장 공백에서 환기를 추가하거나 드라이버당 모듈 수를 낮춥니다.
- 전압 강하 — 장시간 작동의 경우, 멀리 끝이 24V에 가깝게 보이는 만큼 충분히 두껍게 유지하고, 모듈은 ~21V 미만으로 눈에 띄게 어둡습니다.
확실한 경우 견적의 일부로 설치 위치와 기후를 공급업체에 보내십시오. 올바른 인클로저, IP 등급 및 드라이버 선택에 따라 다릅니다. 장착, 배선 및 시운전에 대한 전체 설명은 다음을 참조하십시오. LED 시스템 설계 및 설치 지식 허브의 섹션.
빠른 참조: 9-모듈 제품군
모든 모듈은 68×68×5.5mm 풋프린트, DC24V 입력 및 RA90+ 컬러 렌더링을 공유하므로 아래의 모든 조합은 동일한 그리드 및 배선 계획에 맞습니다.
| 모듈 | LED 레이아웃 | 전원 | 색상 | 제어 |
| 단일 색상 | 4×2835 | 4W | 3000K / 4000K / 6500K | 정정 |
| 조정 가능한 흰색 | 2×4× 2835 | 4+4 W | 2700K–6500K | 정적(CCT 컨트롤러) |
| RGBW | 6×4 (3030+2835) | 4+4 W | RGB + 화이트 | 정적(RGBW 컨트롤러) |
| RGBCCT | 6×4 (3030+2835) | 4+4 W | RGB + WW + CW | 정적(RGBCCT 컨트롤러) |
| 스피 RGBW | 6×6 (3030+2835) | 4W | RGB + 화이트 | 개별적으로 주소 지정 가능한 SPI |
| SPI RGBCCCT | 6×6 (3030+2835) | 6W | RGB + WW + CW | 개별적으로 주소 지정 가능한 SPI |
| DMX 조정 가능 화이트 | 2×4× 2835 | 2×4 W | 2700K–6500K | DMX512 |
| dmx rgbw | 6×4 (3030+2835) | 6+4 W | RGB + 화이트 | DMX512 |
| DMX RGBCCCT | 6×4 (3030+2835) | 6+4 W | RGB + WW + CW | DMX512 |
에 대한 사양으로 전체 범위를 탐색하십시오. LED 모듈 라이트 제품 페이지, 그리고 바로 점프 DMX 제어 시리즈 천장 프로젝트에 동기화되거나 개별적으로 제어 가능한 모듈이 필요한 경우.
설치자가 비용을 들이는 세 가지 실수
- 평방 미터당 럭스 대신 모듈당 가격으로 주문합니다. 더 꽉 찬 렌즈나 더 낮은 출력의 저렴한 모듈은 동일한 밝기에 도달하기 위해 더 많은 모듈을 의미하는 경우가 많습니다. "저렴한" 옵션은 카운트를 다시 계산한 후 종종 값비싼 옵션입니다.
- 렌즈를 선택할 때 캐비티 깊이를 무시합니다. 60mm 얕은 라이트 박스 또는 낮은 천장 공백에 대해 160° 렌즈를 구입하는 것이 핫스팟팅의 주요 원인이며, 수정은 더 많은 모듈이 아니라 더 넓은 175° 렌즈입니다.
- 헤드룸이 없는 운전자의 크기 조정. 100% 로드에서 실행되는 드라이버는 120%에서 크기가 1개보다 훨씬 더 자주 보증 기간에 실패합니다. 그리고 죽은 드라이버는 교체를 기다리는 동안 어두운 천장 또는 라이트 박스를 의미합니다.
자주 묻는 질문
결론: 모듈뿐만 아니라 전체 시스템을 사양
라이트 박스 또는 천장 설치는 시스템입니다. 모듈, 렌즈, 컨트롤러 및 드라이버는 모두 동의해야 합니다. Surface Dimensions, Cavity Depth, 필수 색상 및 제어 동작을 서명된 팀에 전송하면 프로젝트에 맞는 완전한 권장 사항(모듈 제품군, 간격 계획 및 전원 크기 조정)을 다시 받을 수 있습니다. 그것은 추측, 주문 및 재주문보다 빠르고 저렴합니다.
라이트 박스 또는 천장 치수를 보내고 모듈 시스템 권장 사항을 받으십시오 →
작성자: Elaine Zhu, 총괄 책임자 사인라이트LED
기술 검토: SignLiteled의 R&D 리더인 Jason Chen
이메일: info@signliteled.com
관련 게시물