标牌和 LED 灯带工厂,始于 2011 年

如何选择用于灯箱和天花板照明的LED模块

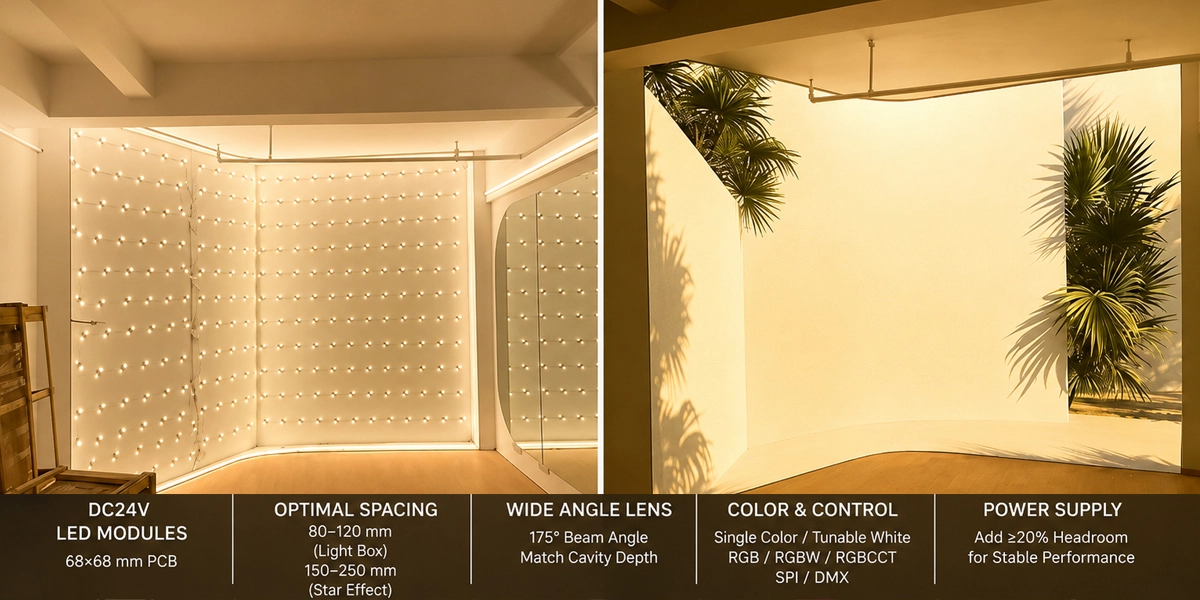
选择正确的 LED模块 for light boxes and ceiling lighting comes down to five engineering decisions: how many modules to install, what beam angle your cavity depth allows, which color and control system the space needs, and how to size the power supply. The short answer for most projects is this: use a DC24V lensed module on a 68×68 mm PCB, space the modules roughly 80–120 mm apart for an even light-box face (or 150–250 mm apart if the goal is a ceiling star effect), match the 175° wide-angle lens to the cavity depth, and add at least 20% headroom when you select the driver. This guide walks through each decision step by step with real numbers, so you can spec a complete system — modules, controller and power supply — without guesswork and without over-ordering.

led-module-layout-for-light-boxes-ceiling-lighting

Why light boxes and ceilings need dedicated modules

Light boxes and ceilings are unforgiving surfaces. A light-box face that should glow as one even panel will betray every hot spot and dark band if the module grid is wrong; a ceiling that should carry a flowing star or color effect will flicker, flatten or strobe if the control is mis-specified. The margin for error is small, and the result is visible from across the room.

LED modules were designed for exactly this job. Unlike LED 灯带, which is continuous and linear, a module is a discrete light engine — typically 4–6 LEDs on a rigid 68×68 mm PCB with its own 175° lens — that you position freely across the surface. That freedom is what makes two very different results possible: a dense, even grid that turns a light-box face into a uniform panel, and a sparse, pixel-addressable grid that turns a ceiling into a star field or a flowing light show. On the SignliteLED range, every module shares the same 68×68×5.5 mm footprint and DC24V input, so you can mix colors and control types in one installation while keeping the layout and wiring identical. Before you place an order, work through the six steps below.

YouTube 视频

Step 1 — Measure the area and plan the module grid

The first number you need is the total luminous area. For a light box, that is simply the lit face in square meters. For a ceiling, it is the ceiling area that will receive the modules — measure the full panel or suspended-grid section, not just the visible tiles.

How many modules do you need?

Modules per surface = total area ÷ (spacing × spacing).

Spacing is the distance between the centers of adjacent modules, and the right value depends entirely on what the surface is supposed to do. A light box and a ceiling star effect sit at opposite ends of the density scale:

Surface typeTypical spacingResulting densityGoal
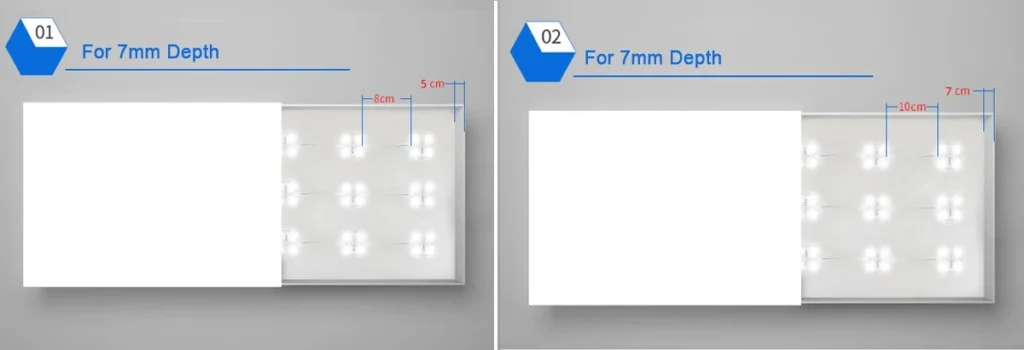
Shallow light box (50–80 mm deep)80–100 毫米100–156 modules/m²Even panel, no hot spots
Deep light box (100 mm+ deep)100–120 mm69–100 modules/m²Even panel, light has room to spread
Ceiling even backlight100–120 mm69–100 modules/m²Uniform glow across the ceiling
Ceiling star effect (point-source)150–250 mm16–44 modules/m²Each module reads as a discrete “star”

Worked example — light box: a 1 m × 2 m light box is 2 m². At 100 mm spacing you need 2 ÷ (0.1 × 0.1) = 200 modules. At 80 mm spacing that rises to 312 modules, which is brighter but also 56% more power draw. The right density depends on the acrylic, the distance to the face, and the required luminance — 200 modules of a 4 W unit (800 W total) already delivers roughly 5,000–6,000 lumens per square meter at 120 lm/W, which is comfortable for most illuminated light boxes.

Worked example — ceiling star effect: the same 2 m² ceiling at 200 mm spacing needs only 2 ÷ (0.2 × 0.2) = 50 modules. A star effect is deliberately sparse — each module is meant to be seen as an individual point of light, not blended into a panel. Go denser than 150 mm and the stars merge into a wash; go sparser than 250 mm and the ceiling looks under-populated. DMX or SPI control is what turns those 50 points into a flowing, twinkling or chasing pattern.

One detail worth flagging before you measure: the two ceiling applications above have opposite goals. A ceiling even backlight uses a dense grid and a wide lens to hide the individual modules; a ceiling star effect uses a sparse grid and lets each module show as a visible point. Tell the supplier which result you want — the module count, the lens and the control recommendation all change with it.

Order 3–5% extra modules as spares; a damaged module mid-install is far cheaper to replace from stock than to re-order and wait for shipping.

统一背光的单色LED矩阵布局

LED module spacing layout for light box faces: 80mm for 5mm thick panels, 100mm for 7mm thick panels

Step 2 — Match the beam angle to the cavity depth

This is the decision that separates a professional result from a patchy one. The beam angle of the lens determines how far the light spreads from directly under each module. Too narrow for the depth, and you get bright circles with dark rings between them — called “hot spotting.” Too wide, and the light spills past the intended area and washes out. The same logic applies whether the cavity is a light-box housing or the void above a suspended ceiling.

腔深度Recommended beam angle为什么
50–80 mm (shallow light box / low ceiling void)175° wide-angle lensLight spreads before it reaches the face, filling the gaps between modules
80–120 mm (standard box / standard ceiling void)160–175°Wide angle keeps the face uniform without over-spacing
120 mm+ (deep box / high ceiling void)160° or narrower optionDeeper cavity allows tighter angles; very wide angles lose intensity at distance

The SignliteLED modules ship with a 175° wide-angle lens as standard — that is the sweet spot for the 50–120 mm cavity depths used in the vast majority of light boxes and ceiling installations. If your project calls for a specific spread, such as a narrower lens for a very deep light box or a custom angle for a star-effect ceiling, that is a customization the factory can make during PCB and lens selection, so ask for it when you request a quote rather than assuming the standard lens will behave the same.

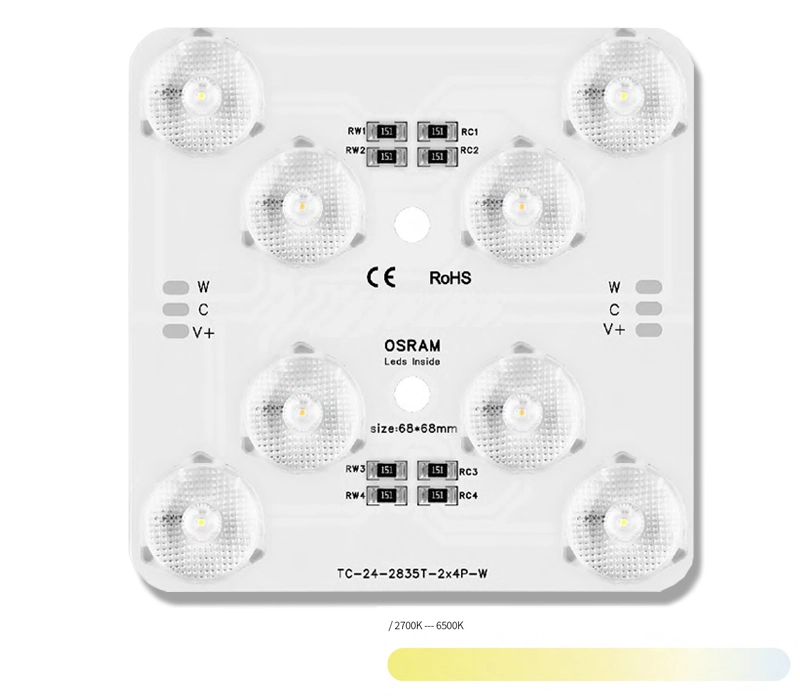
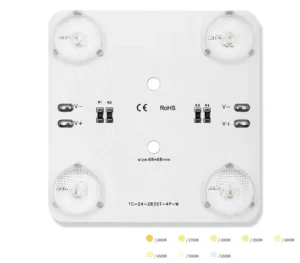
Tunable White LED Modules 1

可调谐的白色 LED 模块

  • LED Type: 2835 SMD
  • LED Qty: 2 × 4 pcs
  • Power 4+4W
  • Efficiency: 100lm/W or 150 lm/W
  • Color: 2700K–6500K
  • CRI: Ra90+
  • Size: 68×68×5.5 mm
  • 单色 BIN,3 步 SDCM 可选

Pro tip — the 3:1 uniformity rule. The accepted benchmark for an “even” light-box face or ceiling backlight is roughly a 3:1 brightness ratio: the brightest point should be no more than three times the dimmest point. You can verify this in the field with a cheap lux meter before committing to a full layout — walk the surface, note the high and low readings, and adjust spacing or lens angle until the ratio stays under 3:1. Catching a hot-spotting problem at the mock-up stage costs a day; catching it on a finished, installed ceiling or sign costs a re-lamp. (For a star-effect ceiling the 3:1 rule does not apply — you want visible point sources, so uniformity is the wrong metric.)

Step 3 — Pick the color system

Once the grid and lens are fixed, decide what the surface will show. This is a product-family decision, because the color system determines which module you buy:

Color systemWhat it does最适合
Single color (3000K / 4000K / 6500K)One fixed CCT, static outputStandard light boxes, even ceiling backlight, cost-sensitive projects
Tunable white (2700K–6500K)Adjust warm-to-cool whiteOffice and hotel ceilings that change mood through the day
RGBWRGB color mixing + a dedicated white channelCeiling light shows that also need clean white ambient light
RGBCCTRGB + warm white + cool white in one unitFull-color ceiling effects plus adjustable white in a single module

Every module in this range runs at Ra90+, which matters more than most buyers expect. A 90+ CRI means the reds in a brand logo, the skin tones in a printed graphic, and the paint colors in a retail space render accurately instead of looking washed out. On a light-box face — where the light source sits directly behind colored graphics — low CRI is immediately visible. If your light box carries brand colors, do not compromise on CRI.

Which white temperature? 6500K cool white is the default for most commercial light boxes — it reads crisp and bright and matches the blue-white look of modern retail lighting. 4000K neutral white is the safer choice for ceilings that also light the space below, such as open offices or lobbies, because it sits close to daylight without the clinical blue cast. 3000K warm white belongs in hospitality, boutiques and premium ceiling environments that want a warm, high-end feel. If you cannot decide on site, the tunable-white module removes the risk entirely: install it, and the client can set the temperature from 2700K to 6500K after the ceiling is up.

Step 4 — Decide how the lighting will be controlled

Control is where project budgets quietly explode if you guess wrong, so define the behavior before ordering. This is also the decision that splits a ceiling installation into two completely different products: a static ceiling backlight uses one module, a star-effect or flowing-color ceiling uses another. There are three families, and they are not interchangeable:

Control typeHow it worksAddressing典型用途
Static (no controller)Always-on, or simple dimmer / PWMNone — whole circuit on one channelLight boxes, even ceiling backlight, static brand panels
SPI addressableEach module is a pixel on a data busEvery module individually addressableProgrammable ceiling patterns, chasing effects, medium-scale star fields
DMX512Industry-standard protocol, professional controllersDMX universes, per-fixture or per-channelSynchronized multi-zone ceilings, architectural projects, large star shows

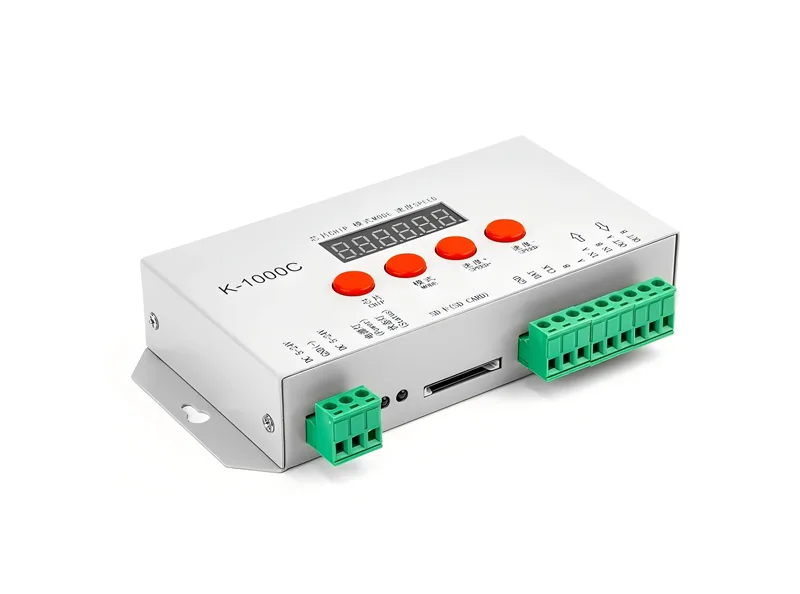
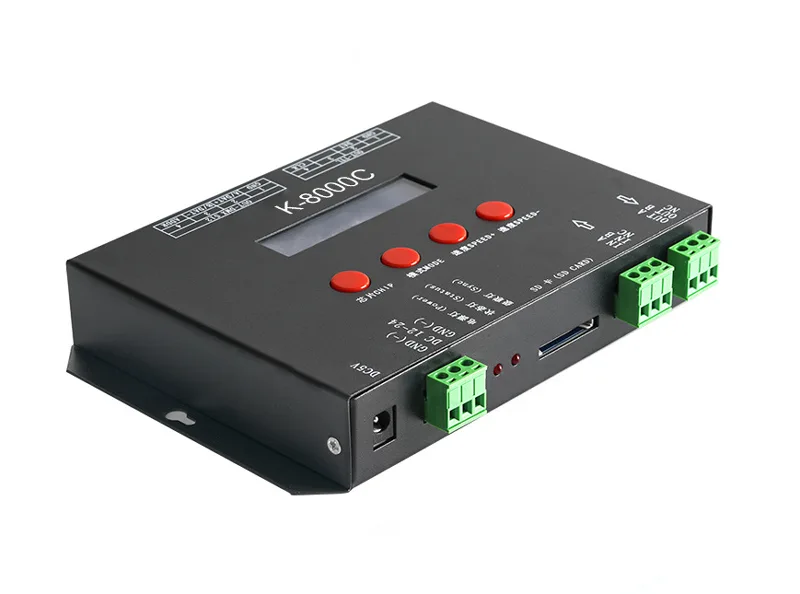
Static modules are the right call for the majority of light boxes and even ceiling backlights — they are simpler, cheaper and need no programming. Choose SPI when you want the ceiling itself to animate, module by module, on a smaller scale. Choose DMX512 when multiple zones must stay synchronized across a building, or when the client will operate the lighting from a lighting desk or building management system — this is how a hotel lobby ceiling runs a coordinated star-and-wash show across several hundred modules. For deeper protocol background, see our DMX LED systems guide and the SPI addressable LED explainer in the Knowledge Hub, and our companion article on DMX RGB LED modules for façades, signage and ceilings.

A note on individually controllable modules: if the brief says “each module must be controllable and dimmable separately,” that is an SPI or DMX specification, not a static one. DMX512 handles it cleanly — each module (or group) occupies its own address, so you can dim, color-mix and sequence every unit independently from one controller. This is exactly how a star-effect ceiling is built: each module is a pixel, and a DMX program drives them into twinkling, flowing or chasing patterns. For a DMX-driven job, ask specifically for DMX modules rather than assuming a static unit can be retrofitted with a controller later; the module hardware is different.

Wiring for controlled modules. SPI and DMX modules daisy-chain: each unit passes data in and data out, with the controller at the head of the chain. Keep the data run short and tidy — long, unshielded data cables are where signal problems start — and follow the module’s wiring diagram for the exact in/out order and for the separate DC24V feed. For DMX, keep each universe as a terminated daisy chain; a ceiling spanning several universes just adds another chain off the controller.

Step 5 — Size the power supply

Total wattage = number of modules × wattage per module

Power supply rating = total wattage × 1.2 (20% headroom minimum)

(If you are also sourcing the driver, our DC24V LED power supply range covers the common 60 W–400 W constant-voltage outputs used in this guide’s examples.)

系统Calculation致使
200 × 4 W single-color light-box modules200 × 4 W800 W
With 20% headroom800 × 1.2960 W → select a 1000 W driver
50 × 6 W DMX RGBW ceiling star modules50 × 6 W300 W → 360 W → one 400 W driver
300 × 4 W modules300 × 4 W1200 W → 1440 W → two 720 W+ drivers

Do not size a driver to exactly 100% of the load. Modules draw slightly more when cold and when dimming down from full output in some configurations; a driver running at its limit runs hot and fails early. The 20% rule is the industry baseline — 30% if the installation runs in a hot climate or inside a sealed ceiling void with no airflow.

Two more wiring points. First, keep every power run within the current rating of the cable and the driver’s output channels — spread large layouts across two or more drivers rather than daisy-chaining the entire ceiling or light box onto one pair of wires. Second, follow the manufacturer’s wiring diagram for the specific module: the DC24V input and the data line (for SPI/DMX) are separate circuits, and mixing them up is the most common field error we see.

If the installation will dim, say so when you size the driver. Not every driver dims smoothly with every module, and pairing a constant-voltage driver with the right dimming interface — PWM, 0–10V or DALI — is part of the system spec, not an afterthought. A driver that dims in visible steps is one of the most common complaints on retrofit jobs where the dimmer was bolted on after the modules were already chosen.

Step 6 — Consider the environment

  • Indoor light boxes & ceilings — standard modules are fine; no extra protection needed behind an acrylic face or above a suspended ceiling.
  • Outdoor light boxes — if the box can leak or condense, specify waterproof modules and potted or sealed drivers. Condensation inside a sealed outdoor box is a real failure mode, not a theoretical one.
  • Heat — modules are happiest below 50°C ambient. In tropical installations, or in a ceiling void packed with other services, add ventilation or derate the module count per driver.
  • Voltage drop — for long runs, keep the feed cable gauge thick enough that the far end still sees close to 24V; modules dim visibly below ~21V.

When in doubt, send the installation location and climate to the supplier as part of the quote — the correct enclosure, IP rating and driver choice depend on it. For a full walkthrough of mounting, wiring and commissioning, see the LED system design & installation section of our Knowledge Hub.

Quick reference: the 9-module family at a glance

All modules share the 68×68×5.5 mm footprint, DC24V input and Ra90+ color rendering, so any combination below fits the same grid and wiring plan:

LED layout电源颜色控制
单色4× 28354 W3000K / 4000K / 6500K大电干扰
可调白色2×4× 28354+4 W2700K–6500KStatic (CCT controller)
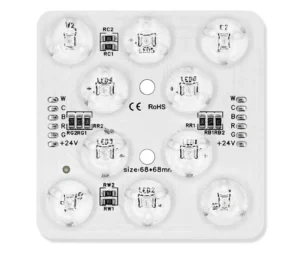
RGBW6×4 (3030+2835)4+4 WRGB+白Static (RGBW controller)
RGBCCT6×4 (3030+2835)4+4 WRGB + WW + CWStatic (RGBCCT controller)
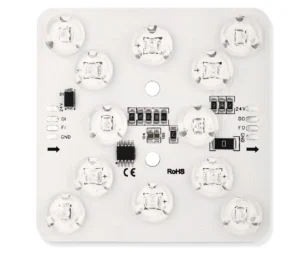
SPI RGBW6×6 (3030+2835)4 WRGB+白SPI, individually addressable
SPI RGBCCT6×6 (3030+2835)6 WRGB + WW + CWSPI, individually addressable
DMX Tunable White2×4× 28352×4 W2700K–6500KDMX512
DMX RGBW6×4 (3030+2835)6+4 WRGB+白DMX512
DMX RGBCCT6×4 (3030+2835)6+4 WRGB + WW + CWDMX512

Browse the full range with specifications on the LED module light product page, and jump straight to the DMX-controlled series if your ceiling project requires synchronized or individually controllable modules.

Three mistakes that cost installers money

  • Ordering by price per module instead of by lux per square meter. A cheaper module with a tighter lens or lower output often means more modules to reach the same brightness — the “cheap” option is frequently the expensive one after the count is recalculated.
  • Ignoring the cavity depth when choosing a lens. Buying a 160° lens for a 60 mm shallow light box, or for a low ceiling void, is a leading cause of hot spotting; the fix is not more modules, it is the wider 175° lens.
  • Sizing the driver without headroom. A driver running at 100% load fails in the warranty window far more often than one sized at 120% — and a dead driver means a dark ceiling or light box while you wait for a replacement.

常见问题

Conclusion: Spec the whole system, not just the modules

A light box or ceiling installation is a system: modules, lenses, controller and driver all have to agree. If you send the surface dimensions, cavity depth, required color and control behavior to the SignliteLED team, you get back a complete recommendation — module family, spacing plan and power sizing — matched to your project. That is faster and cheaper than guessing, ordering, and re-ordering.

Send us your light-box or ceiling dimensions and get a module system recommendation →

撰写: 朱伊莱恩,总经理 信号灯
技术审查: Signliteled研发负责人Jason Chen
电子邮件: info@signliteled.com

SMD2835 单色LED灯带样品,用于评估中国专业的LED灯带供应商SMD2835 单色LED灯带样品,用于评估中国专业的LED灯带供应商
如何在中国寻找专业的LED灯带供应商
.Supplier-bordered-table{overflow-x:auto}.puplier-bordered-table 表{width:100%;border-collapse:background:#fff}.supplier-bordered-table td{border:1px 实体 1tpp5t44;pds 1.p5t44;pd5T44;p5t44;p5t44;p5t44;p5t44;p5t44;p5t44;p5t44;p5t44;p5t44;p5t44;p5t44;p5t44; 100% 100%;border-collapse;background:#fff} 应根据所购买的确切 LED 灯条配置评估供应商,而不是通用产品名称。
建筑LED照明建筑LED照明
建筑LED照明:设计、系统和商业应用(2026指南)
建筑LED照明已成为现代建筑设计的核心元素,照明不仅用于可见性,还用于定义空间、增强结构和创造视觉形象。 在当代建筑中,照明从早期设计阶段开始集成,以确保功能和美学的协同作用。 与...
如何评估中国可靠的COB LED灯带制造商(2025指南)
2025年,随着照明项目转向更高的视觉舒适度、无缝照明和提高色彩准确性,对COB LED灯带灯的需求继续飙升。 然而,COB 市场的快速增长也带来了不均衡的制造质量、不一致的性能和不可靠的供应商。 选择合适的中国制造商...
模块化线性LED照明模块化线性LED照明
LED模块:现代照明的类型和应用
为什么“哪种类型的LED模块最适合现代照明项目?”当今最常被问到的问题之一? LED模块已成为现代照明设计的关键组成部分,提供灵活性、模块化和高质量照明。 设计师和工程师可以从不同的模块类型中进行选择,以满足...
LED声学照明开放式天花板办公室LED声学照明开放式天花板办公室
现代办公室和开放式天花板的声学LED线性吊灯
一台悬挂式解决方案中的光 + 声音控制 现代商业内饰要求的不仅仅是一般照明。 开放式办公室、联合办公空间和公共场所需要照明系统,以增强视觉舒适度,同时解决声学性能。 噪音干扰和眩光是这些空间中的常见问题,通常会影响注意力、沟通和整体...
RGB-LED 灯条-应用RGB-LED 灯条-应用
2024 年 LED 灯条类型最新指南
在住宅照明解决方案中,LED 灯条越来越受欢迎。您可能遇到过各种讨论,强调 LED 技术相对于传统白炽灯和卤素灯泡的优势。这些优势包括能效更高、亮度更强、寿命更长、发热量最小,以及易于控制和使用。

分享:

Facebook
叽叽喳喳
Pinterest
LinkedIn
订阅评论
提醒
来宾
0 评论
最老的
最新 最多投票
内联反馈
查看所有评论

搜索 SignliteLED 博客

类别

滚动至顶部

立即获取报价