Nederlands
  English
  简体中文
简体中文  Deutsch
  Español
  Français
  Italiano
  日本語
日本語  한국어
한국어  Polski
  Português
  Русский
  Türkçe
  Tiếng Việt
  ไทย
ไทย 
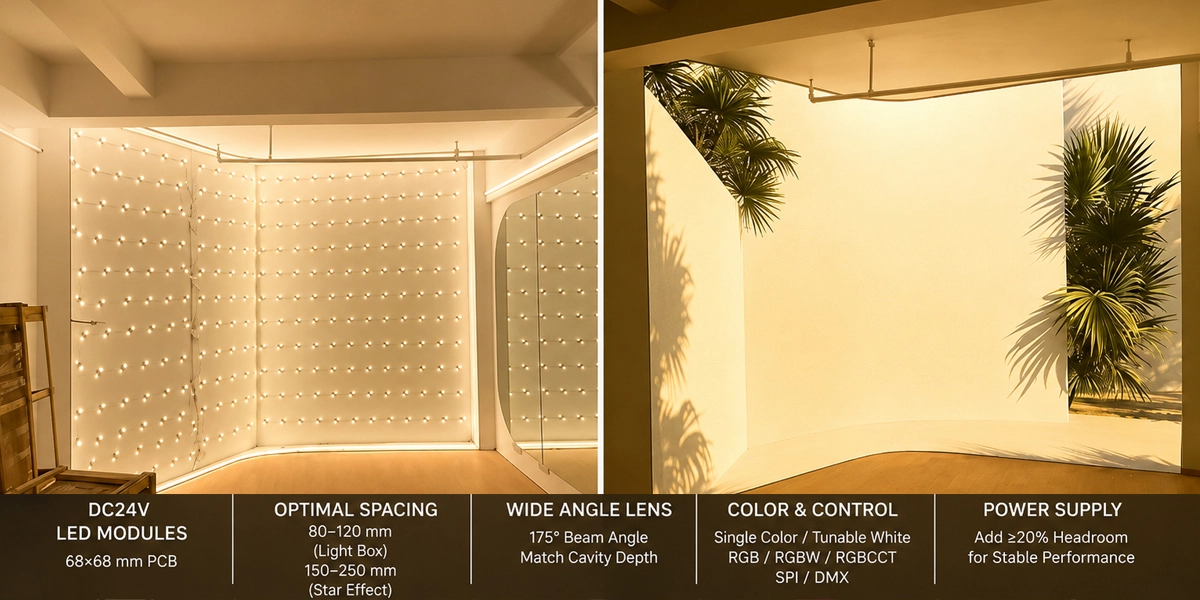
Het juiste kiezen LED-modules Voor lichtbakken en plafondverlichting komt neer op vijf technische beslissingen: hoeveel modules moeten worden geïnstalleerd, welke straalhoek uw holtediepte toelaat, welk kleur- en besturingssysteem de ruimte nodig heeft en hoe de stroomvoorziening moet worden aangepast. Het korte antwoord voor de meeste projecten is dit: gebruik een DC24V-lensmodule op een 68 × 68 mm PCB, plaats de modules ongeveer 80-120 mm uit elkaar voor een gelijkmatig lichtbakvlak (of 150-250 mm uit elkaar als het doel een plafondstereffect is), match de 175° groothoeklens met de holtediepte en voeg ten minste 20%-hoofdruimte toe wanneer u de driver kiest. Deze gids doorloopt elke beslissing stap voor stap met reële getallen, zodat u een compleet systeem kunt specificeren - modules, controller en stroomvoorziening - zonder giswerk en zonder overbestelling.
Waarom lichtbakken en plafonds speciale modules nodig hebben
Lichtbakken en plafonds zijn meedogenloze oppervlakken. Een lightbox-gezicht dat zou moeten gloeien als één even paneel zal elke hotspot en donkere band verraden als het moduleraster verkeerd is; een plafond dat een vloeiende ster of kleureffect moet hebben, zal flikkeren, afvlakken of strobe als de besturing verkeerd is gespecificeerd. De marge voor de fout is klein en het resultaat is zichtbaar vanaf de andere kant van de kamer.
Voor precies deze klus zijn LED-modules ontworpen. verschillend LED-strip, dat continu en lineair is, een module is een discrete lichte motor - meestal 4-6 LED's op een stijve 68 × 68 mm PCB met een eigen 175 ° lens - die je vrij over het oppervlak positioneert. Die vrijheid maakt twee heel verschillende resultaten mogelijk: een dicht, gelijkmatig raster dat een lichtbakgezicht verandert in een uniform paneel, en een schaars, pixel-adresseerbaar raster dat een plafond verandert in een sterveld of een vloeiende lichtshow. Op het Signlitetled-bereik deelt elke module dezelfde 68 × 68 × 5,5 mm voetafdruk en DC24V-ingang, zodat u kleuren en typen in één installatie kunt mengen terwijl de lay-out en bedrading identiek blijven. Voordat u een bestelling plaatst, moet u de zes onderstaande stappen doorlopen.

Stap 1 — Meet het gebied en plan het moduleraster
Het eerste nummer dat u nodig heeft, is het totale lichtgevende gebied. Voor een lichtbak is dat gewoon het verlichte gezicht in vierkante meter. Voor een plafond is het het plafondgebied dat de modules zal ontvangen - meet het volledige paneel of het hangende rastergedeelte, niet alleen de zichtbare tegels.
Hoeveel modules heb je nodig?
Modules per oppervlak = totaal oppervlak ÷ (afstand × afstand).
De afstand is de afstand tussen de centra van aangrenzende modules en de juiste waarde hangt volledig af van wat het oppervlak zou moeten doen. Een lichtbak en een plafondstereffect zitten aan tegenovergestelde uiteinden van de dichtheidsschaal:
| Type oppervlakte | Typische afstand | resulterende dichtheid | doelwit |
| Ondiepe lichtbak (50-80 mm diep) | 80-100 mm | 100–156 modules/m² | Zelfs paneel, geen hotspots |
| Diepe lichtbak (100 mm+ diep) | 100-120 mm | 69–100 modules/m² | Zelfs paneel, licht heeft ruimte om te verspreiden |
| Plafond zelfs achtergrondverlichting | 100-120 mm | 69–100 modules/m² | Uniforme gloed over het plafond |
| Plafondstereffect (puntbron) | 150–250 mm | 16–44 modules/m² | Elke module leest als een discrete "ster" |
Uitgewerkt voorbeeld — Lichtbak: Een lichtbak van 1 m × 2 m is 2 m². Op een afstand van 100 mm heb je 2 ÷ (0,1 × 0,1) = 200 modules nodig. Op 80 mm afstand die stijgt tot 312 modules, wat helderder is, maar ook 56% meer stroomverbruik. De juiste dichtheid is afhankelijk van het acryl, de afstand tot het gezicht en de vereiste helderheid - 200 modules van een 4 W-eenheid (800 W in totaal) leveren al ongeveer 5.000-6.000 lumen per vierkante meter bij 120 lm/W, wat comfortabel is voor de meest verlichte lichtbakken.
Uitgewerkt voorbeeld - Plafondstereffect: Hetzelfde 2 m² plafond op een afstand van 200 mm heeft slechts 2 ÷ (0,2 × 0,2) = 50 modules nodig. Een stereffect is opzettelijk schaars - elke module is bedoeld om te worden gezien als een individueel lichtpunt, niet vermengd tot een paneel. Ga dichter dan 150 mm en de sterren versmelten tot een wasbeurt; ga spaarder dan 250 mm en het plafond ziet er onderbevolkt uit. DMX of SPI-besturing is wat die 50 punten verandert in een vloeiend, fonkelend of achtervolgend patroon.
Eén detail dat het waard is om te markeren voordat u meet: de twee plafondtoepassingen hierboven hebben tegengestelde doelen. Een plafond-even-achterlicht maakt gebruik van een dicht raster en een brede lens om de afzonderlijke modules te verbergen; een plafondstereffect maakt gebruik van een schaars raster en laat elke module als zichtbaar punt zien. Vertel de leverancier welk resultaat u wilt - het aantal modules, de lens en de besturingsaanbeveling veranderen allemaal mee.
Bestel 3–5% extra modules als reserveonderdelen; een beschadigde module mid-install is veel goedkoper om uit voorraad te vervangen dan om opnieuw te bestellen en te wachten op verzending.
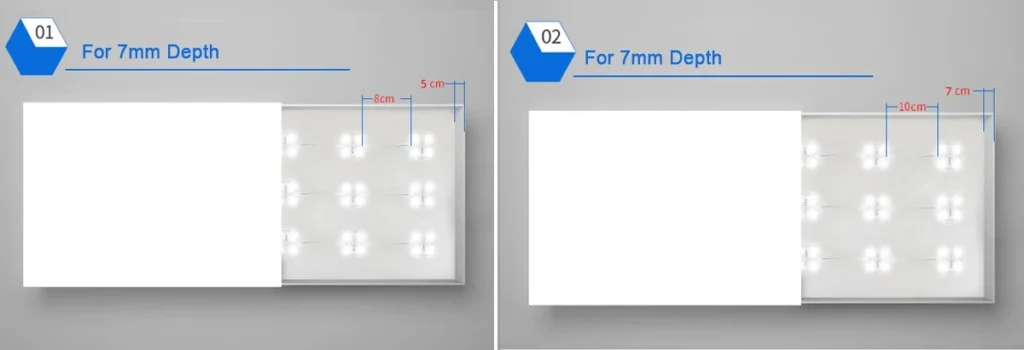
LED-moduleafstand lay-out voor lichtbakvlakken: 80 mm voor 5 mm dikke panelen, 100 mm voor 7 mm dikke panelen
Stap 2 — Stem de straalhoek af op de holtediepte
Dit is de beslissing die een professioneel resultaat scheidt van een fragmentarisch besluit. De straalhoek van de lens bepaalt hoe ver het licht zich direct onder elke module verspreidt. Te smal voor de diepte, en je krijgt heldere cirkels met donkere ringen ertussen - 'hot spotting' genoemd. te breed, en het licht stroomt voorbij het beoogde gebied en spoelt uit. Dezelfde logica is van toepassing, of de holte nu een lichtbakbehuizing is of de leegte boven een verlaagd plafond.
| holtediepte | Aanbevolen stralingshoek | Waarom |
| 50–80 mm (ondiepe lichtbak / lage plafondruimte) | 175° groothoeklens | Licht verspreidt zich voordat het het gezicht bereikt en vult de openingen tussen modules |
| 80–120 mm (standaard doos / standaard plafondleeg) | 160–175° | Groothoek houdt het gezicht uniform zonder te overschrijden |
| 120 mm+ (diepe box / hoog plafond leegte) | 160° of smaller optie | De diepere holte maakt het mogelijk om scherpere hoeken te maken; zeer groothoeken verliezen intensiteit op afstand |
De Signliteled-modules worden standaard geleverd met een 175 ° groothoeklens - dat is de goede plek voor de 50-120 mm holtediepten die in de overgrote meerderheid van lichtbakken en plafondinstallaties worden gebruikt. Als uw project een specifieke spreiding vraagt, zoals een smallere lens voor een zeer diepe lichtbak of een aangepaste hoek voor een stereffectplafond, is dat een maatwerk dat de fabriek kan maken tijdens PCB en lensselectie, dus vraag ernaar wanneer u een offerte aanvraagt in plaats van ervan uit te gaan dat de standaardlens hetzelfde zal doen.
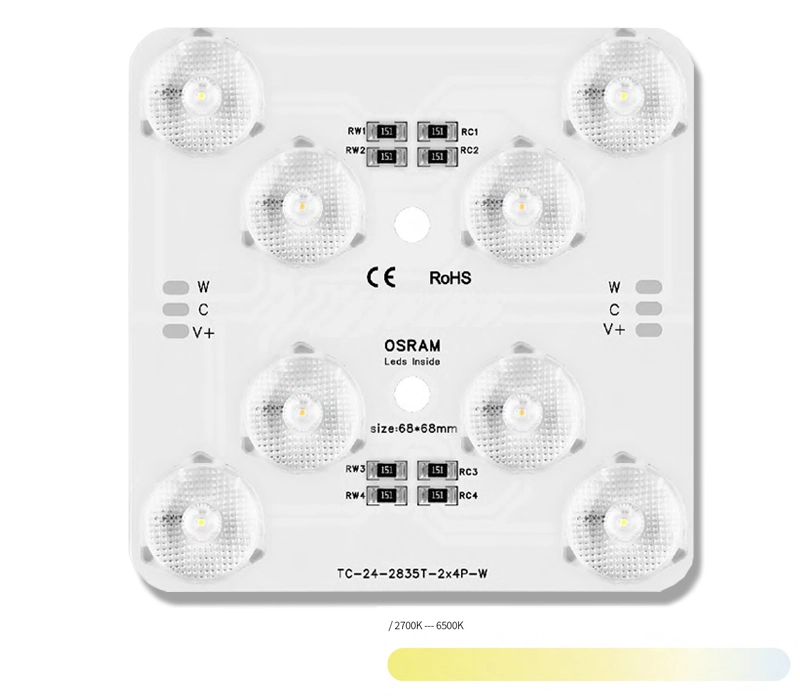
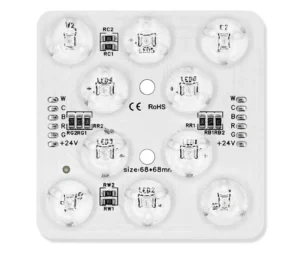
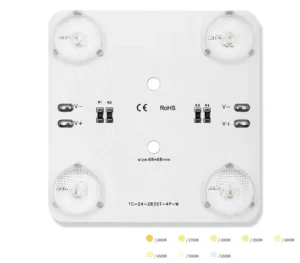
Tunable witte LED-modules
- LED-type: 2835 SMD
- LED-aantal: 2 × 4 stuks
- Vermogen 4+4W
- Efficiëntie: 100lm/W of 150 lm/W
- Kleur: 2700K-6500K
- CRI: RA90+
- Grootte: 68×68×5,5 mm
- Eén kleur BIN, 3 stappen SDCM beschikbaar
Pro-tip - de 3:1 uniformiteitsregel. De geaccepteerde maatstaf voor een "even" lightbox-achtergrondverlichting is ongeveer een helderheidsverhouding van 3: 1: het helderste punt mag niet meer dan drie keer het zwakste punt zijn. U kunt dit in het veld verifiëren met een goedkope luxmeter voordat u zich aan een volledige lay-out toelegt - loop over het oppervlak, noteer de hoge en lage metingen en pas de afstand of lenshoek aan totdat de verhouding onder de 3:1 blijft. Het opvangen van een hot-spotting-probleem in de mock-up-fase kost een dag; het opvangen op een afgewerkt, geïnstalleerd plafond of bord kost een herlamp. (Voor een plafond met sterreneffect is de 3:1-regel niet van toepassing - u vereisen Zichtbare puntbronnen, dus uniformiteit is de verkeerde statistiek.)
Stap 3 — Kies het kleurensysteem
Zodra het raster en de lens zijn vastgezet, bepaal je wat het oppervlak zal laten zien. Dit is een product-familiebeslissing, omdat het kleurensysteem bepaalt welke module u koopt:
| kleur stelsel | Wat het doet | Geschikt voor |
| Enkele kleur (3000K / 4000K / 6500K) | Een vaste CCT, statische output | Standaard lichtbakken, zelfs plafondverlichting, kostengevoelige projecten |
| Tunable wit (2700K-6500K) | Pas warm tot koel wit aan | Kantoor- en hotelplafonds die de stemming door de dag heen veranderen |
| RGBW | RGB-kleurenmixing + een speciaal wit kanaal | Plafondlamp laat zien dat ook schoon wit omgevingslicht nodig is |
| RGBCCT | RGB + warm wit + koel wit in één eenheid | Full-color plafondeffecten plus verstelbaar wit in één module |
Elke module in dit bereik draait op RA90+, wat belangrijker is dan de meeste kopers verwachten. Een 90+ CRI betekent de rode tinten in een merklogo, de huidskleuren in een gedrukte afbeelding en de verfkleuren in een winkelruimte worden nauwkeurig weergegeven in plaats van er vervaagd uit te zien. Op een light-box-gezicht - waar de lichtbron direct achter gekleurde afbeeldingen zit - is Low CRI onmiddellijk zichtbaar. Als uw lichtbak merkkleuren draagt, doe dan geen concessies aan CRI.
Welke witte temperatuur? 6500K Cool White is de standaard voor de meeste commerciële lichtbakken - het leest helder en helder en past bij de blauw-witte look van moderne winkelverlichting. 4000K Neutraal Wit is de veiligere keuze voor plafonds die ook de ruimte eronder verlichten, zoals open kantoren of lobby's, omdat het dicht bij daglicht zit zonder de klinisch blauwe worp. 3000K Warm White hoort thuis in gastvrijheid, boetieks en premium plafondomgevingen die een warm, high-end gevoel willen. Als u niet ter plaatse kunt beslissen, verwijdert de Tunable-White-module het risico volledig: installeer het en de klant kan de temperatuur instellen van 2700K tot 6500 K nadat het plafond is gestegen.
Stap 4 — Bepaal hoe de verlichting wordt bediend
Controle is waar projectbudgetten stilletjes exploderen als je het verkeerd raadt, dus definieer het gedrag voordat je bestelt. Dit is ook de beslissing die een plafondinstallatie in twee totaal verschillende producten splitst: een statische plafondverlichting maakt gebruik van één module, een stereffect of een vloeiend plafond gebruikt een andere. Er zijn drie families en ze zijn niet uitwisselbaar:
| Besturingstype | Hoe het werkt | adressering | Typisch gebruik |
| Statisch (geen controller) | Altijd-aan, of eenvoudige dimmer / PWM | Geen — Hele circuit op één kanaal | Lichtbakken, zelfs plafondverlichting, statische merkpanelen |
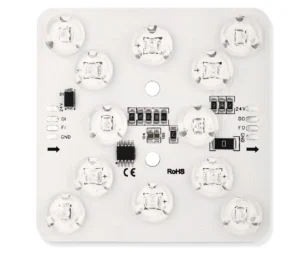
| SPI-adresseerbaar | Elke module is een pixel op een databus | Elke module individueel adresseerbaar | Programmeerbare plafondpatronen, jagende effecten, stervelden op middelgrote schaal |
| DMX512 | Industrie-standaard protocol, professionele controllers | DMX-universes, per slede of per kanaal | Gesynchroniseerde plafonds met meerdere zones, architecturale projecten, grote stershows |
Statische modules zijn de juiste oproep voor de meeste lichtbakken en zelfs plafondverlichting - ze zijn eenvoudiger, goedkoper en hoeven niet te worden geprogrammeerd. Kies SPI als u het plafond zelf wilt animeren, module voor module, op kleinere schaal. Kies DMX512 wanneer meerdere zones gesynchroniseerd moeten blijven over een gebouw, of wanneer de klant de verlichting zal bedienen vanuit een verlichtingsdesk of gebouwbeheersysteem - zo voert een hotellobbyplafond een gecoördineerde ster-en-wasshow over enkele honderden modules. Voor een diepere protocolachtergrond, zie onze DMX LED-systeemgids en de SPI Adresseerbare LED-uitleg in het kennishub en ons begeleidende artikel over DMX RGB LED-modules voor gevels, bewegwijzering en plafonds.
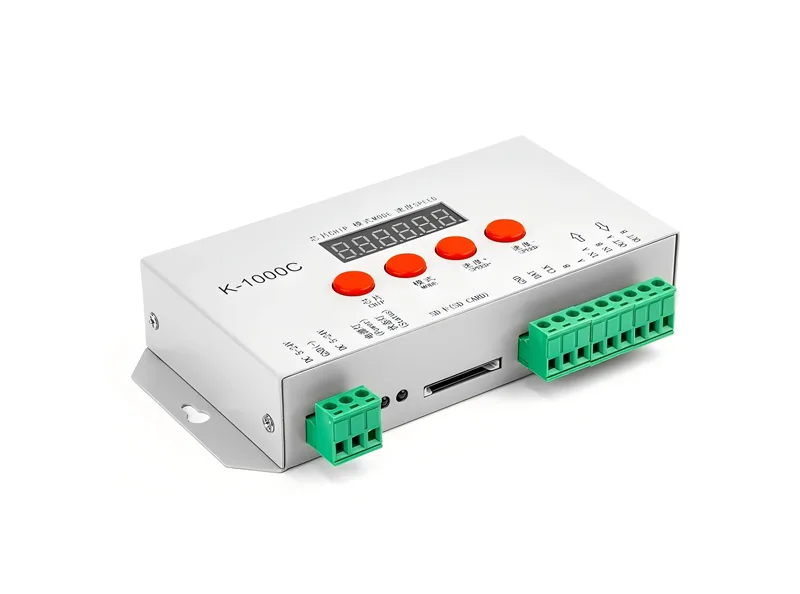
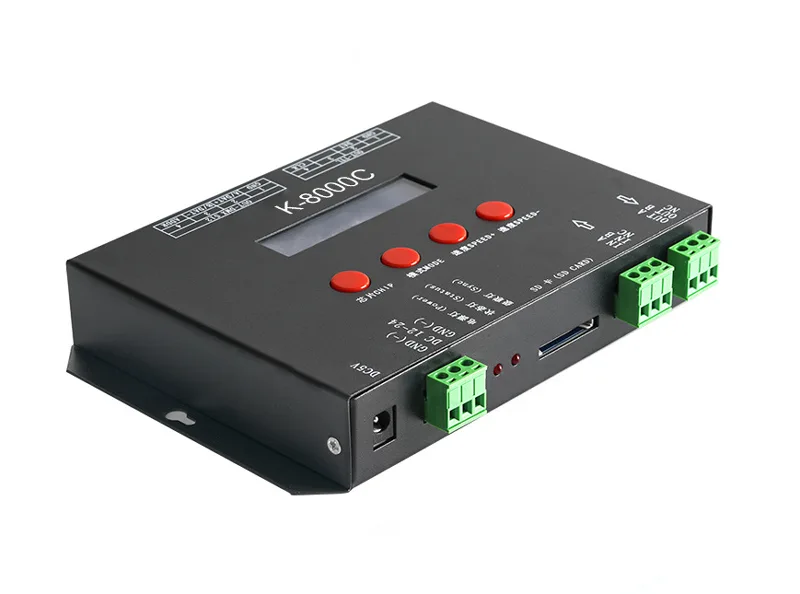
Een opmerking over individueel regelbare modules: Als de opdracht zegt "elke module moet afzonderlijk en dimbaar zijn," is dat een SPI- of DMX-specificatie, geen statische. DMX512 verwerkt het netjes - elke module (of groep) beslaat zijn eigen adres, zodat u elke eenheid onafhankelijk van één controller kunt dimmen, kleuren en op een rij kunt zetten. Dit is precies hoe een ster-effect plafond is gebouwd: elke module is een pixel en een DMX-programma drijft ze in fonkelende, vloeiende of achtervolgende patronen. Vraag voor een DMX-gestuurde taak specifiek om DMX-modules in plaats van ervan uit te gaan dat een statische eenheid later met een controller kan worden gemonteerd; de modulehardware is anders.
Bedrading voor gestuurde modules. SPI- en DMX-modules DAISY-CHAIN: Elke eenheid geeft gegevens door en data uit, met de controller aan de kop van de keten. Houd de gegevens kort en netjes - lange, niet-afgeschermde datakabels zijn waar signaalproblemen beginnen - en volg het bedradingsschema van de module voor de exacte in/uitvolgorde en voor de afzonderlijke DC24V-feed. Houd voor DMX elk universum als een afgesloten madeliefjesketting; een plafond dat verschillende universums overspant, voegt gewoon een andere ketting toe van de controller.
Stap 5 — Grootte van de voeding
Totaal wattage = aantal modules × wattage per module
Voedingswaarde = totaal wattage × 1,2 (minimaal 20%)
(Als u ook de chauffeur inkoopt, onze DC24V LED-voedingsbereik Behandelt de gemeenschappelijke 60 W-400 W constante spanningsuitgangen die in de voorbeelden van deze gids worden gebruikt.)
| Systeem | rekening | uitkomst |
| 200 × 4 W eenkleurige lightbox-module | 200 × 4 W | 800 W |
| Met 20% hoofdruimte | 800 × 1,2 | 960 W → Selecteer een 1000 W driver |
| 50 × 6 W DMX RGBW Plafondstermodules | 50 × 6 W | 300 W → 360 W → één driver van 400 W |
| 300 × 4 W-modules | 300 × 4 W | 1200 W → 1440 W → Twee 720 W+ drivers |
Maak een driver niet tot precies 100% van de belasting. Modules tekenen iets meer bij koud en bij het dimmen van volledige uitvoer in sommige configuraties; een bestuurder die aan zijn limiet draait, wordt heet en faalt vroeg. De 20%-regel is de basislijn van de industrie - 30% als de installatie in een warm klimaat of in een afgedichte plafondspoiler zonder luchtstroom wordt uitgevoerd.
Nog twee bedradingspunten. Houd allereerst alle stroom binnen de huidige classificatie van de kabel en de uitgangskanalen van de bestuurder - spreid grote lay-outs over twee of meer stuurprogramma's in plaats van het hele plafond of de lichtbak op één paar draden te dichten. Ten tweede, volg het bedradingsschema van de fabrikant voor de specifieke module: de DC24V-ingang en de datalijn (voor SPI/DMX) zijn afzonderlijke circuits, en het mengen ervan is de meest voorkomende veldfout die we zien.
Als de installatie zal dimmen, zeg dat dan wanneer u de driver op maat maakt. Niet elke bestuurder dimt soepel met elke module en het koppelen van een constante-spanningsdriver met de juiste diminterface - PWM, 0-10V of DALI - maakt deel uit van de systeemspecificatie, geen bijzaak. Een driver die in zichtbare stappen dimt, is een van de meest voorkomende klachten over retrofit-werkzaamheden waarbij de dimmer werd vastgeschroefd nadat de modules al waren gekozen.
Stap 6 — Denk aan de omgeving
- Binnenlichtkasten & plafonds — Standaard modules zijn prima, geen extra bescherming nodig achter een acrylvlak of boven een verlaagd plafond.
- Buitenlichtkasten — Als de doos kan lekken of condenseren, specificeer dan waterdichte modules en gepotte of verzegelde drivers. Condensatie in een afgedichte buitendoos is een echte faalmodus, geen theoretische.
- Warmte — Modules zijn het gelukkigst onder de 50°C omgevingstemperatuur. In tropische installaties, of in een leegte in het plafond vol met andere diensten, voeg ventilatie toe of derate het aantal modules per bestuurder.
- Spanningsval — Houd voor lange runs de voedingskabelmeter dik genoeg zodat het verre uiteinde nog steeds dicht bij 24V ziet; modules dimmen zichtbaar onder ~21V.
Stuur bij twijfel de installatielocatie en het klimaat naar de leverancier als onderdeel van de offerte - de juiste behuizing, IP-classificatie en driverkeuze zijn ervan afhankelijk. Voor een volledige handleiding van montage, bedrading en inbedrijfstelling, zie de LED-systeemontwerp en installatie sectie van onze kennishub.
Snelle referentie: de 9-module familie in één oogopslag
Alle modules delen de 68 × 68 × 5,5 mm voetafdruk, DC24V-invoer en RA90+-kleurweergave, dus elke combinatie hieronder past op hetzelfde rooster en bedradingsplan:
| modulus | LED-lay-out | Stroom | Kleur | Controle |
| enkele kleur | 4×2835 | 4 W | 3000K / 4000K / 6500K | statisch |
| Afstembaar Wit | 2×4×2835 | 4+4 W | 2700K-6500K | Statisch (CCT-controller) |
| RGBW | 6×4 (3030+2835) | 4+4 W | RGB + wit | Statisch (RGBW-controller) |
| RGBCCT | 6×4 (3030+2835) | 4+4 W | RGB + WW + CW | Statisch (RGBCCT-controller) |
| spits rgbw | 6×6 (3030+2835) | 4 W | RGB + wit | SPI, individueel adresseerbaar |
| SPI RGBCCT | 6×6 (3030+2835) | 6 met | RGB + WW + CW | SPI, individueel adresseerbaar |
| DMX Tunable Wit | 2×4×2835 | 2×4 W | 2700K-6500K | DMX512 |
| DMX RGBW | 6×4 (3030+2835) | 6+4 W | RGB + wit | DMX512 |
| DMX RGBCCT | 6×4 (3030+2835) | 6+4 W | RGB + WW + CW | DMX512 |
Blader door het volledige assortiment met specificaties op de LED-modulelicht Productpaginaen springt recht naar de DMX-gecontroleerde serie Als uw plafondproject gesynchroniseerde of individueel regelbare modules vereist.
Drie fouten die installateurs geld kosten
- Bestellen per module in plaats van per lux per vierkante meter. Een goedkopere module met een strakkere lens of een lagere output betekent vaak dat meer modules dezelfde helderheid bereiken - de "goedkope" optie is vaak de dure 1 nadat de telling opnieuw is berekend.
- Het negeren van de holtediepte bij het kiezen van een lens. Het kopen van een 160°-lens voor een 60 mm ondiepe lichtbak, of voor een lage plafondruimte, is een belangrijke oorzaak van hot spotting; de fix is niet meer modules, het is de bredere 175°-lens.
- De chauffeur dimensioneren zonder hoofdruimte. Een bestuurder die met 100%-belasting draait, faalt veel vaker in het garantievenster dan één maat bij 120% - en een dode bestuurder betekent een donker plafond of lichtbak terwijl u wacht op een vervanging.
FAQ
Conclusie: specificeer het hele systeem, niet alleen de modules
Een lichtbak of plafondinstallatie is een systeem: modules, lenzen, controller en driver moeten het allemaal eens zijn. Als u de oppervlakteafmetingen, holtediepte, het vereiste kleur- en controlegedrag naar het SignLiteLed-team stuurt, krijgt u een volledige aanbeveling terug - modulefamilie, afstandsplan en vermogensgrootte - die overeenkomen met uw project. Dat is sneller en goedkoper dan raden, bestellen en opnieuw bestellen.
Stuur ons uw lightbox- of plafondafmetingen en ontvang een modulesysteemaanbeveling →
geschreven door: Elaine Zhu, algemeen directeur bij SignliteLED
Technische beoordeling: Jason Chen, R&D-leider bij Signlitetled
E-mailadres: info@signliteled.com
Gerelateerde berichten