Português
  English
  简体中文
简体中文  Deutsch
  Español
  Français
  Italiano
  日本語
日本語  한국어
한국어  Polski
  Русский
  Türkçe
  Nederlands
  Tiếng Việt
  ไทย
ไทย 
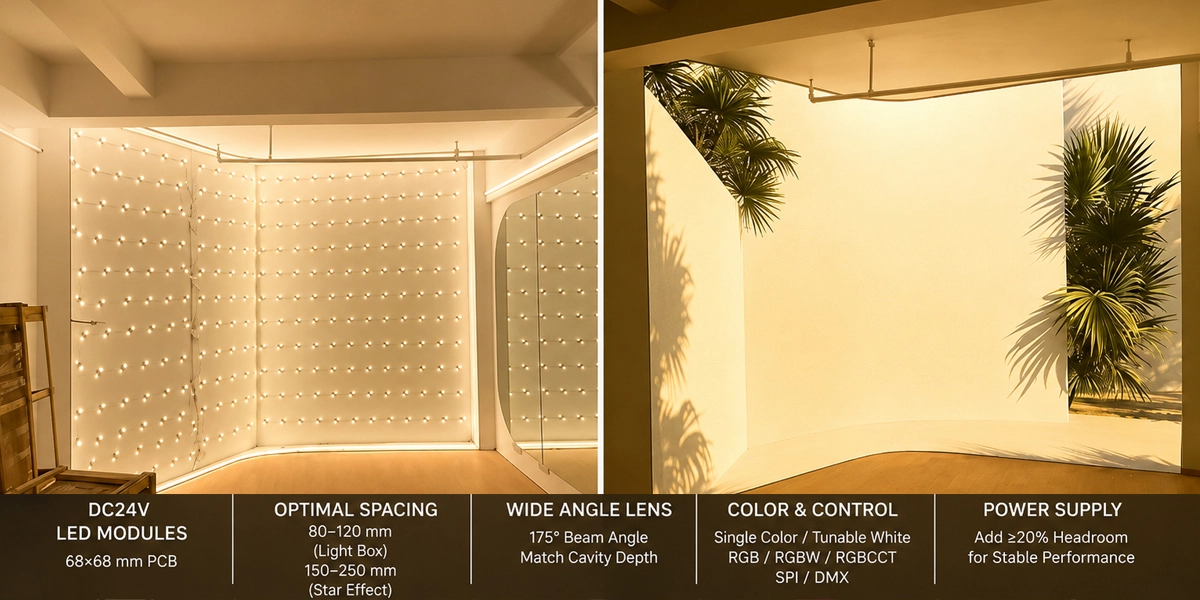
Escolhendo o certo módulos de led Para caixas de luz e iluminação do teto, são cinco as decisões de engenharia: quantos módulos instalar, qual ângulo de feixe sua profundidade de cavidade permite, qual cor e sistema de controle o espaço precisa e como dimensionar a fonte de alimentação. A resposta curta para a maioria dos projetos é esta: use um módulo com lente DC24V em uma PCB de 68×68 mm, espaça os módulos com aproximadamente 80 a 120 mm de distância para uma face uniforme da luz (ou 150 a 250 mm de distância se a meta for um efeito de estrela de teto), combine a lente de 175° com a profundidade da cavidade e adicione pelo menos 20% Headroom quando você seleciona o motorista. Este guia percorre cada decisão passo a passo com números reais, para que você possa especificar um sistema completo - módulos, controlador e fonte de alimentação - sem adivinhações e sem pedidos excessivos.
Por que as caixas de luz e os tetos precisam de módulos dedicados
Caixas de luz e tetos são superfícies implacáveis. Uma face de caixa de luz que deve brilhar como um painel uniforme trairá todos os pontos quentes e bandas escuras se a grade do módulo estiver errada; um teto que carrega uma estrela fluindo ou um efeito de cor irá piscar, achatar ou estrobo se o controle for especificado incorretamente. A margem de erro é pequena e o resultado é visível em toda a sala.
Os módulos de LED foram projetados exatamente para este trabalho. ao contrário fita LED, que é contínuo e linear, um módulo é um motor leve discreto - normalmente de 4 a 6 LEDs em uma PCB rígido de 68 × 68 mm com sua própria lente de 175° - que você posiciona livremente na superfície. Essa liberdade é o que torna possível dois resultados muito diferentes: uma grade densa e uniforme que transforma uma face de caixa de luz em um painel uniforme e uma grade esparsa e endereçada por pixels que transforma um teto em um campo de estrela ou em um show de luzes fluindo. Na faixa de sinalização, cada módulo compartilha o mesmo tamanho de 68×68×5,5 mm e entrada DC24V, para que você possa misturar cores e tipos de controle em uma instalação, mantendo o layout e a fiação idênticos. Antes de fazer um pedido, trabalhe nas seis etapas abaixo.

Passo 1 — Meça a área e planeje a grade do módulo
O primeiro número que você precisa é a área luminosa total. Para uma caixa de luz, é simplesmente o rosto iluminado em metros quadrados. Para um teto, é a área do teto que receberá os módulos — meça o painel completo ou a seção de grade suspensa, não apenas os azulejos visíveis.
De quantos módulos você precisa?
Módulos por superfície = área total ÷ (espaçamento x espaçamento).
O espaçamento é a distância entre os centros dos módulos adjacentes, e o valor certo depende inteiramente do que a superfície deve fazer. Uma caixa de luz e um efeito de estrela do teto ficam nas extremidades opostas da escala de densidade:
| Tipo de superfície | espaçamento típico | densidade resultante | meta |
| Caixa de luz rasa (50–80 mm de profundidade) | 80–100 mm | 100–156 módulos/m² | Painel uniforme, sem pontos quentes |
| Caixa de luz profunda (100 mm + profundidade) | 100–120 mm | 69–100 módulos/m² | Painel uniforme, a luz tem espaço para se espalhar |
| Teto uniforme da luz de fundo | 100–120 mm | 69–100 módulos/m² | Brilho uniforme no teto |
| Efeito de estrela de teto (fonte de pontos) | 150–250 mm | 16–44 módulos/m² | Cada módulo é lido como uma “estrela” discreta |
Exemplo trabalhado — caixa de luz: Uma caixa de luz de 1 m × 2 m é de 2 m². Com espaçamento de 100 mm, você precisa de 2 ÷ (0,1 × 0,1) = 200 módulos. Com espaçamento de 80 mm que sobe para 312 módulos, o que é mais brilhante, mas também 56% mais consumo de energia. A densidade correta depende do acrílico, da distância até a face e da luminância necessária — 200 módulos de uma unidade de 4 W (total de 800 W) já oferecem cerca de 5.000 a 6.000 lúmens por metro quadrado a 120 lm/W, o que é confortável para a maioria das caixas de luz iluminadas.
Exemplo trabalhado — efeito estrela do teto: O mesmo teto de 2 m² com espaçamento de 200 mm precisa de apenas 2 ÷ (0,2 × 0,2) = 50 módulos. Um efeito estrela é deliberadamente esparso - cada módulo deve ser visto como um ponto de luz individual, não misturado em um painel. Vá mais denso que 150 mm e as estrelas se fundem em uma lavagem; vá com menos de 250 mm e o teto parece subopulento. O controle DMX ou SPI é o que transforma esses 50 pontos em um padrão de fluxo, cintilante ou perseguidor.
Um detalhe que vale a pena sinalizar antes de medir: as duas aplicações de teto acima têm objetivos opostos. Um teto, mesmo com luz de fundo, usa uma grade densa e uma lente ampla para ocultar os módulos individuais; um efeito de estrela no teto usa uma grade esparsa e permite que cada módulo apareça como um ponto visível. Informe ao fornecedor qual resultado você deseja – a contagem do módulo, a lente e a recomendação de controle mudam com ele.
Peça módulos extras 3–5% como peças de reposição; um módulo danificado no meio da instalação é muito mais barato para substituir do estoque do que reordenar e aguardar o envio.
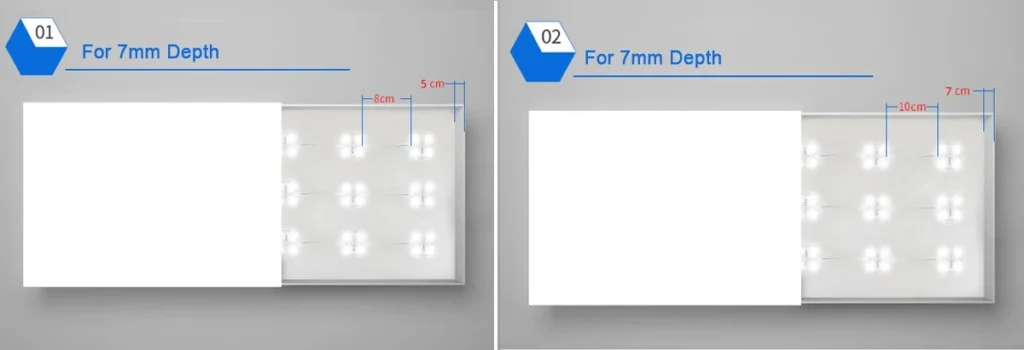
Layout de espaçamento do módulo de LED para faces de caixa clara: 80 mm para painéis de 5 mm de espessura, 100 mm para painéis de 7 mm de espessura
Passo 2 — Combine o ângulo do feixe com a profundidade da cavidade
Esta é a decisão que separa um resultado profissional de um desigual. O ângulo do feixe da lente determina o quão longe a luz se espalha diretamente sob cada módulo. Muito estreito para a profundidade, e você obtém círculos claros com anéis escuros entre eles – chamados de “pontos quentes”. Muito largo, a luz passa pela área pretendida e lava. A mesma lógica se aplica se a cavidade é uma caixa de luz ou o vazio acima de um teto suspenso.
| profundidade da cavidade | Ângulo de feixe recomendado | Porquê |
| 50–80 mm (caixa de luz rasa / vazio no teto baixo) | Lente grande angular de 175 ° | A luz se espalha antes de atingir o rosto, preenchendo as lacunas entre os módulos |
| 80–120 mm (caixa padrão / vazio no teto padrão) | 160–175° | A angular larga mantém o rosto uniforme sem over-espaçamento |
| 120 mm+ (caixa profunda / vazio no teto alto) | 160° ou opção mais estreita | Cavidade mais profunda permite ângulos mais apertados; ângulos muito largos perdem intensidade à distância |
Os módulos com sinal significam que são fornecidos com uma lente grande angular de 175° como padrão - esse é o ponto ideal para as profundidades de cavidade de 50 a 120 mm usadas na grande maioria das caixas de luz e instalações de teto. Se o seu projeto exige um spread específico, como uma lente mais estreita para uma caixa de luz muito profunda ou um ângulo personalizado para um teto com efeito de estrela, essa é uma personalização que a fábrica pode fazer durante a seleção de PCB e lentes, então peça-a quando solicitar uma cotação em vez de assumir que a lente padrão se comportará da mesma forma.
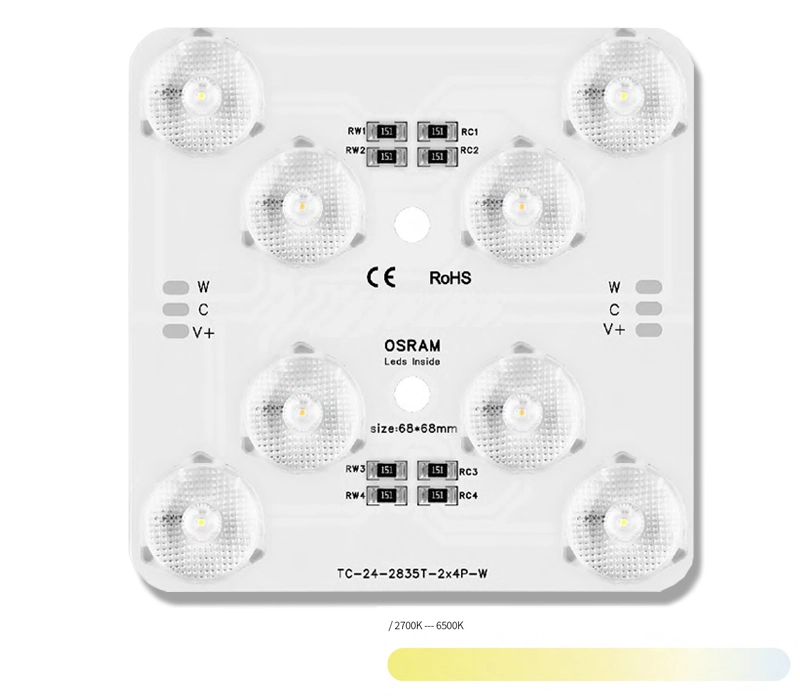
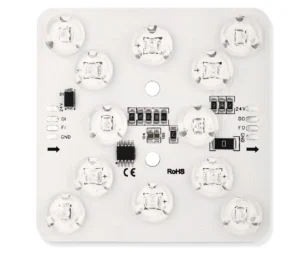
módulos de led branco ajustáveis
- Tipo de LED: 2835 SMD
- Quantidade LED: 2 x 4 peças
- Potência 4+4W
- Eficiência: 100 lm/p ou 150 lm/p
- Cor: 2.700K–6500K
- CRI: RA90+
- Tamanho: 68×68×5,5 mm
- BIN de uma só cor, SDCM de 3 passos disponível
Dica profissional — a regra de uniformidade 3:1. A referência aceita para uma face de luz ou teto “e par” é aproximadamente uma taxa de brilho de 3:1: o ponto mais brilhante não deve ser mais que três vezes o ponto mais escuro. Você pode verificar isso em campo com um medidor de Lux barato antes de se comprometer com um layout completo - ande pela superfície, observe as leituras altas e baixas e ajuste o espaçamento ou o ângulo da lente até que a proporção permaneça abaixo de 3:1. Pegar um problema de detecção de hot-spotting no estágio de maquete custa por dia; pegá-lo em um teto ou placa acabado, instalado, custa uma re-lâmpada. (Para um teto de efeito estrela, a regra 3:1 não se aplica - você carência Fontes de pontos visíveis, portanto, a uniformidade é a métrica errada.)
Passo 3 — Escolha o sistema de cores
Depois que a grade e a lente estiverem fixas, decida o que a superfície mostrará. Esta é uma decisão da família produto, porque o sistema de cores determina qual módulo você compra:
| sistema de cores | O que ele faz | Melhor para |
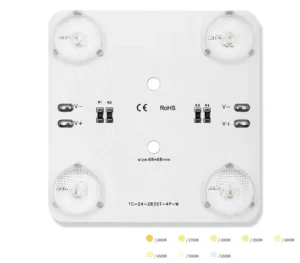
| Cor única (3000K/4000K/6500K) | Um CCT fixo, saída estática | Caixas de luz padrão, até mesmo retroiluminação de teto, projetos sensíveis ao custo |
| Branco ajustável (2700K–6500K) | Ajuste o branco quente a frio | Tetos de escritório e hotel que mudam o humor ao longo do dia |
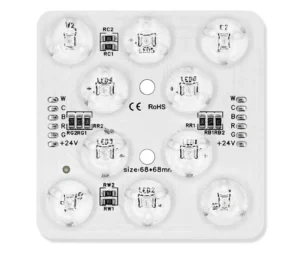
| RGBW | Mistura de cores RGB + um canal branco dedicado | Luzes de teto mostram que também precisam de luz ambiente branca limpa |
| RGBCCT | RGB + branco quente + branco frio em uma unidade | Efeitos de teto coloridos mais branco ajustável em um único módulo |
Cada módulo dessa faixa é executado no RA90+, o que importa mais do que a maioria dos compradores espera. Um CRI de mais de 90 anos significa que os vermelhos de uma marca, os tons de pele em um gráfico impresso e as cores de tinta em um espaço de varejo rendem com precisão, em vez de parecer desbotadas. Em uma face de caixa de luz - onde a fonte de luz fica diretamente atrás de gráficos coloridos - o CRI baixo é imediatamente visível. Se a sua caixa de luz carrega cores da marca, não comprometa o CRI.
Qual temperatura branca? 6500K Cool White é o padrão para a maioria das caixas de luz comerciais - parece nítida e brilhante e combina com a aparência azul-branca da iluminação de varejo moderna. 4000K Neutral White é a escolha mais segura para tetos que também iluminam o espaço abaixo, como escritórios abertos ou lobbies, porque fica perto da luz do dia sem o elenco azul clínico. 3000K branco quente pertence à hospitalidade, boutiques e ambientes premium de teto que desejam uma sensação quente e sofisticada. Se você não conseguir decidir sobre o site, o módulo Tunable-White remove totalmente o risco: instale-o e o cliente pode definir a temperatura de 2700 a 6.500 mil após o teto.
Passo 4 — Decida como a iluminação será controlada
O controle é onde os orçamentos do projeto explodem silenciosamente se você adivinhar errado, então defina o comportamento antes de fazer o pedido. Esta é também a decisão que divide a instalação do teto em dois produtos completamente diferentes: uma luz de fundo estática usa um módulo, um teto com efeito estrela ou de cor fluida usa outro. Existem três famílias, e não são intercambiáveis:
| Tipo de controle | Como funciona | endereçamento | Utilização típica |
| Estático (sem controlador) | Sempre ligado ou simples dimmer / PWM | Nenhum — circuito inteiro em um canal | Caixas de luz, até mesmo retroiluminação de teto, painéis estáticos de marca |
| SPI endereçável | Cada módulo é um pixel em um barramento de dados | Cada módulo individualmente endereçável | Padrões de teto programáveis, efeitos de perseguição, campos de estrela de média escala |
| DMX512 | Protocolo padrão da indústria, controladores profissionais | Universos DMX, por fixação ou por canal | Tetos multi-zonas sincronizados, projetos arquitetônicos, grandes shows de estrelas |
Os módulos estáticos são a escolha certa para a maioria das caixas de luz e até mesmo as luzes de fundo do teto - eles são mais simples, mais baratos e não precisam de programação. Escolha SPI quando deseja que o próprio teto seja animado, módulo por módulo, em uma escala menor. Escolha DMX512 quando várias zonas devem permanecer sincronizadas em um prédio ou quando o cliente operará a iluminação de uma mesa de iluminação ou sistema de gerenciamento de edifícios - é assim que o teto de um lobby de hotel executa um show coordenado de estrelas e lava em várias centenas de módulos. Para obter informações detalhadas sobre o protocolo, consulte nosso Guia de sistemas de LED DMX e o explicador led endereçável do spi No Centro de Conhecimento e nosso artigo complementar sobre Módulos de LED DMX RGB para fachadas, sinalização e tetos.
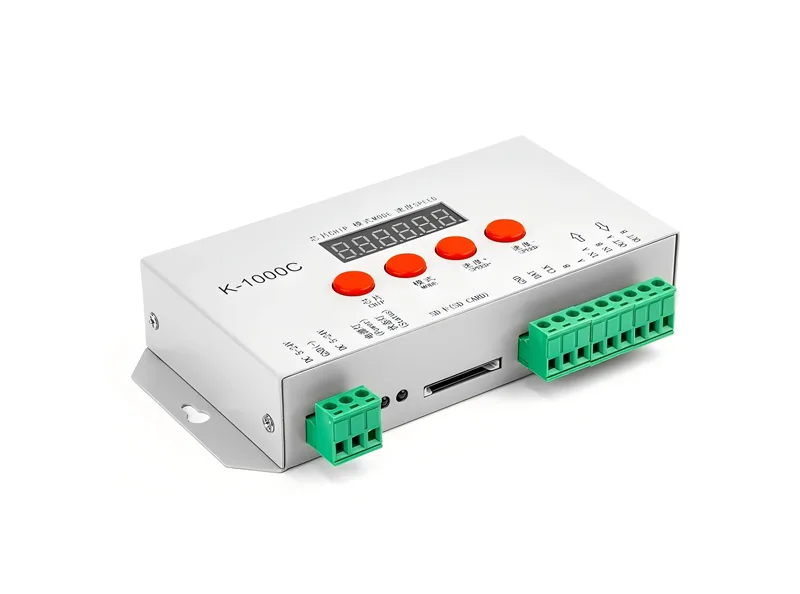
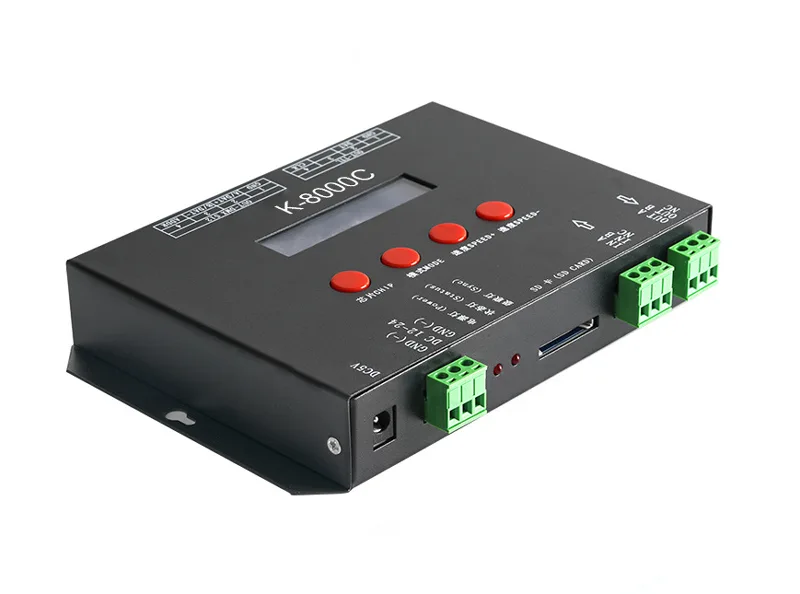
Uma nota sobre módulos controláveis individualmente: Se o briefing diz “cada módulo deve ser controlável e regulável separadamente”, ou seja, uma especificação SPI ou DMX, não estática. O DMX512 lida com isso de forma limpa — cada módulo (ou grupo) ocupa seu próprio endereço, para que você possa escurecer, misturar cores e sequenciar cada unidade independentemente de um controlador. É exatamente assim que um teto de efeito estrela é construído: cada módulo é um pixel e um programa DMX os leva a padrões cintilantes, fluindo ou perseguindo. Para um trabalho orientado por DMX, peça especificamente módulos DMX, em vez de assumir que uma unidade estática pode ser adaptada com um controlador posteriormente; o hardware do módulo é diferente.
Fiação para módulos controlados. Módulos SPI e DMX Daisy-chain: Cada unidade transfere dados para dentro e para fora, com o controlador à frente da rede. Mantenha os dados executados curtos e organizados — cabos de dados longos e sem blindagem são onde começam os problemas de sinal — e siga o diagrama de fiação do módulo para a ordem exata de entrada/saída e para o feed DC24V separado. Para DMX, mantenha cada universo como uma cadeia margarida encerrada; um teto que abrange vários universos apenas adiciona outra cadeia do controlador.
Etapa 5 — dimensione a fonte de alimentação
Potência total = número de módulos × potência por módulo
Classificação da fonte de alimentação = potência total × 1,2 (mínimo de 20% Headroom)
(Se você também está fornecendo o driver, nosso Faixa de fonte de alimentação LED DC24V Abrange as saídas comuns de 60 W a 400 W de tensão constante usadas nos exemplos deste guia.)
| Sistema | cálculo | conseqüência |
| Módulos de caixa clara de uma cor única de 200 × 4 W | 200 × 4 W | 800 W |
| Com 20% Headroom | 800 × 1,2 | 960 W → Selecione um driver de 1000 W |
| Módulos de estrela de teto 50 × 6 W DMX RGBW | 50 × 6 W | 300 W → 360 W → Um driver de 400 W |
| Módulos de 300 × 4 W | 300 × 4 W | 1200 W → 1440 W → Dois drivers 720 W+ |
Não dimensione um driver para exatamente 100% da carga. Os módulos são um pouco mais atrativos quando frios e quando diminui a saída total em algumas configurações; um driver em execução no limite funciona quente e falha no início. A regra 20% é a linha de base da indústria — 30% se a instalação for executada em clima quente ou dentro de um vazio no teto selado sem fluxo de ar.
Mais dois pontos de fiação. Primeiro, mantenha cada energia funcionando na classificação atual do cabo e dos canais de saída do driver - espalhe grandes layouts em dois ou mais drivers em vez de colocar margaridas em todo o teto ou caixa de luz em um par de fios. Em segundo lugar, siga o diagrama de fiação do fabricante para o módulo específico: a entrada DC24V e a linha de dados (para SPI/DMX) são circuitos separados, e misturá-los é o erro de campo mais comum que vemos.
Se a instalação escurecer, diga quando você dimensionar o driver. Nem todos os drivers ficam mais escurecendo com cada módulo, e emparelhar um driver de tensão constante com a interface de escurecimento correta – PWM, 0–10V ou DALI – faz parte das especificações do sistema, não é uma reflexão tardia. Um driver que escureça as etapas visíveis é uma das reclamações mais comuns em trabalhos de retrofit, onde o dimmer foi aparafusado depois que os módulos já foram escolhidos.
Passo 6 — Considere o ambiente
- Caixas de luz e tetos internos — Módulos padrão são bons; nenhuma proteção extra é necessária atrás de uma face de acrílico ou acima de um teto suspenso.
- Caixas de luz externas — Se a caixa pode vazar ou condensar, especifique módulos à prova d'água e drivers em vasos ou selados. A condensação dentro de uma caixa externa selada é um modo de falha real, não teórico.
- Calor — os módulos são mais felizes abaixo de 50°C. Em instalações tropicais, ou em um vazio no teto, embalado com outros serviços, adicione ventilação ou despedir a contagem de módulos por motorista.
- Queda de tensão — para corridas longas, mantenha o medidor do cabo de alimentação com espessura suficiente para que a extremidade oposta ainda seja próxima a 24 V; módulos escurecem visivelmente abaixo de ~21 V.
Em caso de dúvida, envie o local de instalação e o clima para o fornecedor como parte da cotação — o gabinete correto, a classificação IP e a escolha do motorista dependem disso. Para um passo a passo completo de montagem, fiação e comissionamento, consulte o Projeto e instalação do sistema de LED Seção do nosso hub de conhecimento.
Referência rápida: a família de 9 módulos em resumo
Todos os módulos compartilham a área de 68×68×5,5 mm, entrada DC24V e renderização de cores RA90+, portanto, qualquer combinação abaixo se adapta à mesma rede de grade e fiação:
| módulo | layout de led | Potência | Cor | Controlo |
| única cor | 4×2835 | 4 W | 3000K/4000K/6500K | estático |
| Branco sintonizável | 2×4×2835 | 4+4 W | 2700K–6500K | Estático (controlador CCT) |
| RGBW | 6×4 (3030+2835) | 4+4 W | RGB + branco | Estático (controlador RGBW) |
| RGBCCT | 6×4 (3030+2835) | 4+4 W | RGB + WW + CW | Estático (controlador RGBCCCT) |
| SPI RGBW | 6×6 (3030+2835) | 4 W | RGB + branco | SPI, endereçável individualmente |
| spi rgcct | 6×6 (3030+2835) | 6 W | RGB + WW + CW | SPI, endereçável individualmente |
| DMX ajustável branco | 2×4×2835 | 2×4 W | 2700K–6500K | DMX512 |
| DMX RGBW | 6×4 (3030+2835) | 6+4 W | RGB + branco | DMX512 |
| DMX RGBCCCT | 6×4 (3030+2835) | 6+4 W | RGB + WW + CW | DMX512 |
Navegue por toda a gama com as especificações do Página do produto do módulo de luz do LED, e pule direto para o Séries controladas por DMX Se o seu projeto de teto exigir módulos sincronizados ou individualmente controláveis.
Três erros que custam dinheiro aos instaladores
- Pedidos por preço por módulo em vez de por lux por metro quadrado. Um módulo mais barato com uma lente mais apertada ou saída inferior geralmente significa mais módulos para atingir o mesmo brilho - a opção “barato” é frequentemente cara após a contagem ser recalculada.
- Ignorando a profundidade da cavidade ao escolher uma lente. Comprar uma lente de 160° para uma caixa de luz rasa de 60 mm ou para um vazio no teto baixo, é uma das principais causas de manchas a quente; a solução não é mais módulos, é a lente mais larga de 175°.
- Dimensionando o motorista sem espaço livre. Um driver que funciona com 100% Load falha na janela de garantia com muito mais frequência do que um tamanho em 120% - e um driver morto significa um teto escuro ou uma caixa clara enquanto você espera por uma substituição.
FAQ
Conclusão: especificar todo o sistema, não apenas os módulos
Uma instalação de caixa de luz ou teto é um sistema: módulos, lentes, controlador e driver devem concordar. Se você enviar as dimensões da superfície, a profundidade da cavidade, a cor necessária e o comportamento de controle para a equipe de sinalização, você receberá uma recomendação completa — família de módulos, plano de espaçamento e tamanho de potência — correspondido ao seu projeto. Isso é mais rápido e barato do que adivinhar, encomendar e reordenar.
Envie-nos suas dimensões de caixa de luz ou teto e obtenha um módulo de recomendação do sistema →
Escrito por: Elaine Zhu, gerente geral da SignliteLED
Revisão Técnica: Jason Chen, líder em P&D na Signliteld
E-mail: info@signliteled.com
Postagens relacionadas