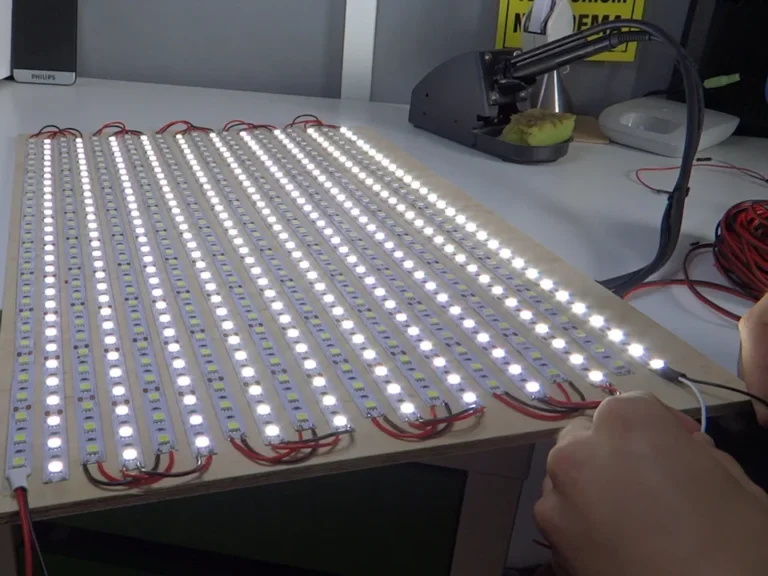
LED light strips are a common decorative lighting fixture, often used for indoor and outdoor decoration. The lighting and the atmosphere. Indoors, it can be used for ceilings. Decoration of walls, columns, furniture, etc.; Outside, it can be used for architecture. Bridges, billboards and other decoration. Some led strips can also be adjusted by remote control. Brightness and patterns are used to create different atmospheres. The led strip has energy saving and high brightness. Long life and other advantages, so more and more people love and use.
Understanding LED Strip and LED Connectors
What is an LED Strip Light?
Led light strip is a new type of multi-functional lighting form.The PCB of the LED strip light gives the fixture a tape or rope-like structure. In addition to having a variety of colors, in most cases, they share the following characteristics:
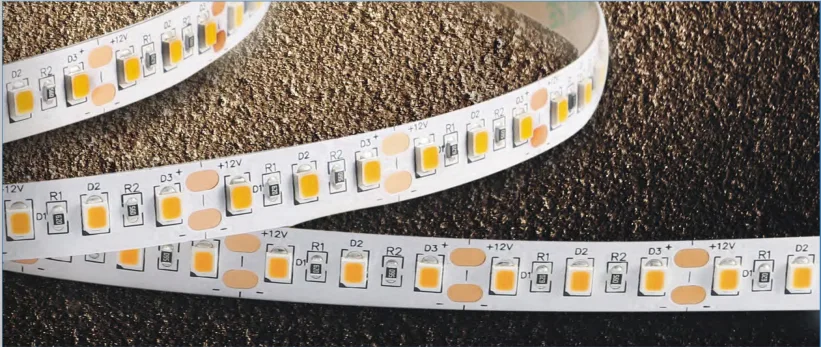
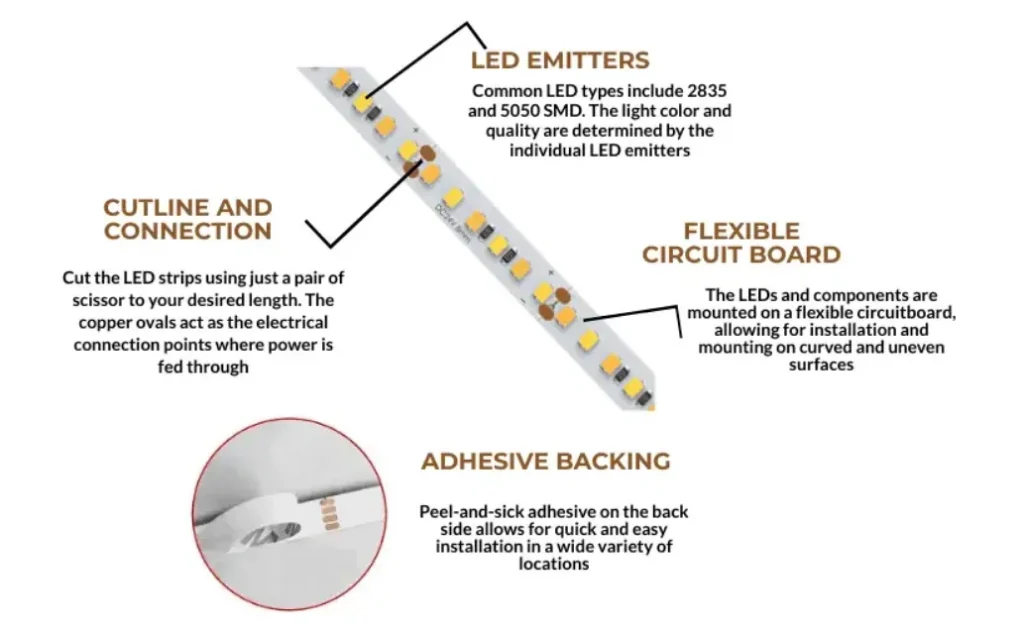
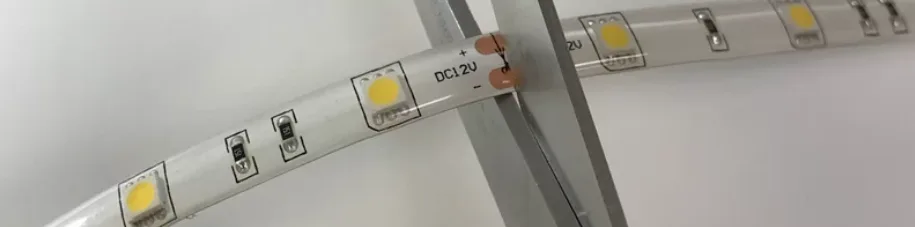
· It consists of a plurality of LED chips in series and parallel, and adds a current-limiting resistor, which is mounted on a narrow flexible circuit board. The most commonly used lamp beads are 2835, 5050 and so on.
· Use low voltage DC power supply, supply voltage DC5V, 12V, 24V. Of course, there are also high-voltage power supply silicone sealed LED lights, power supply voltage 120V, 230V.
· Transported in long rolls (usually 16 feet / 5 meters) that can be cut to length when used, the back of the lamp strip is covered with 3M double-sided backing tape for installation
· A variety of fixed and variable colors and brightness are available: in addition to white light and warm white light, a variety of other colors can be customized, the most common red. Blue, green and other colors are made in a light belt, which can be changed and combined into various colors through the controller.
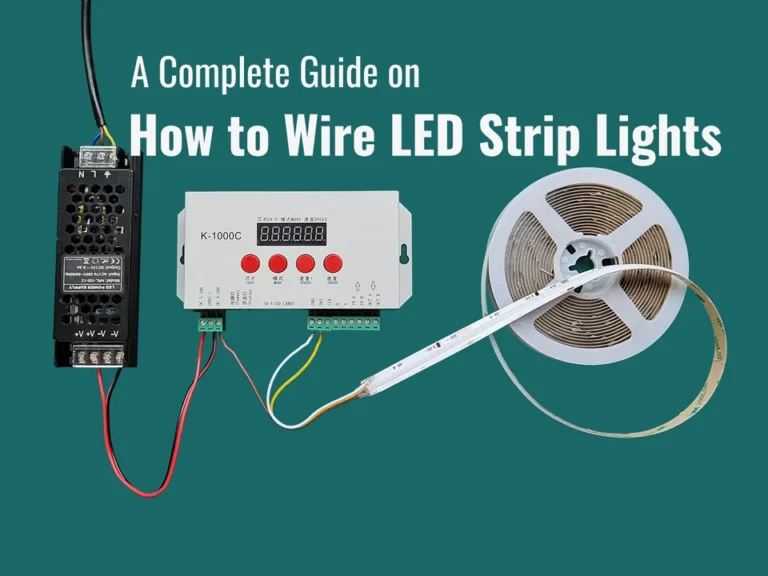
How to Wire LED Strip Lights?
Because of the variable color of LED Strip, dimmable, can control the color change, it is often used in the decorative role of home improvement.At resent, the types of LED light strips on the market are generally: monochromatic led strips, two-color temperature led strips, RGB led strips…Let’s talk about how these lights are wired and operated.
I. How to Wire Single Color LED Strip Lights?
- The led strip is connected to the power supply in parallel to prevent uneven lighting caused by voltage drop.

2. Both ends of the power supply, add two power lines, reduce the voltage drop.
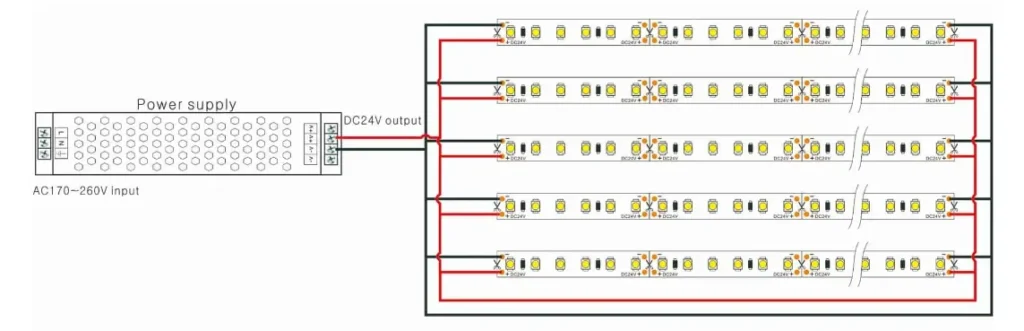
3. Multiple lamp belts are connected in series, and the power supply needs to be increased according to the length, usually a power supply with a length of 10 meters to prevent the brightness of the light from dimming.

Caution: Please note that the power of the total LED strip lights should not exceed 80% of the power supply power, which is the principle of 80% of the power supply power.
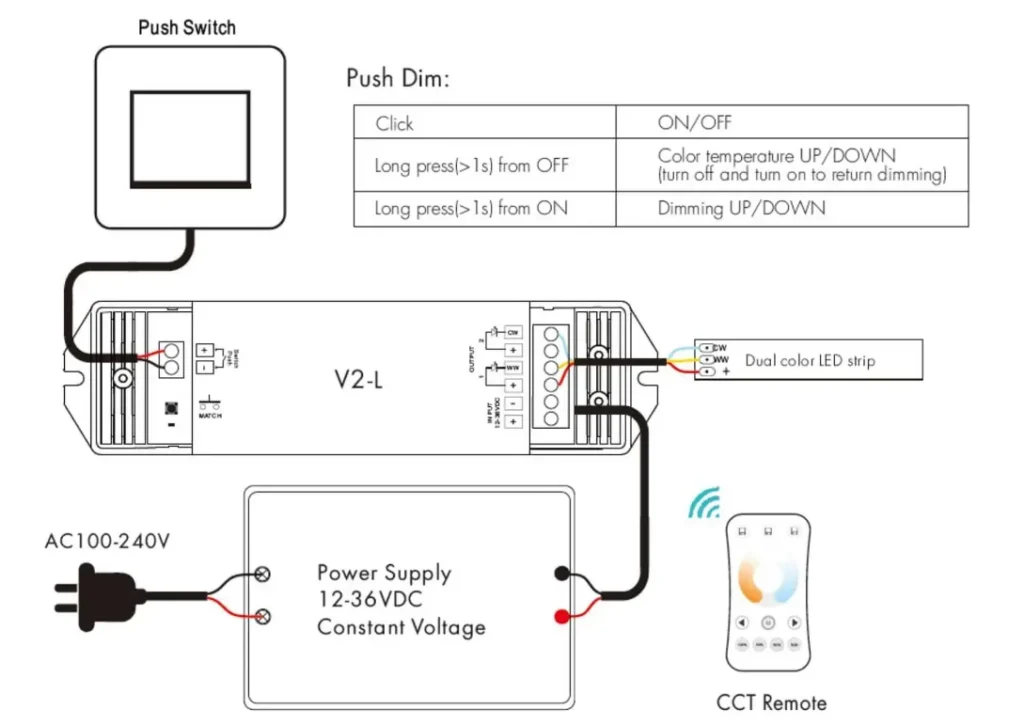
II .How to wire CCT tunnable strip?
Also called CCT adjustable LED strip light, usually has three wires and two different color temperature LEDs. You can adjust the brightness of these two different CCT LEDs to change the mixed CCT.
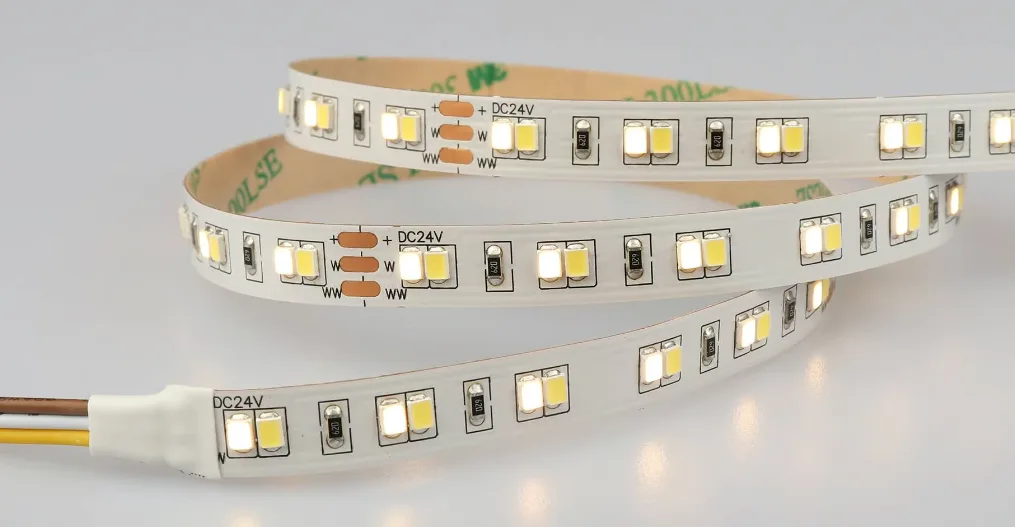
PWM dimming mode:The constant voltage power supply is connected to the power supply input of the color temperature controller, and the output end of the controller is connected to the three-wire color temperature lamp strip. Remote control can control the change of light brightness and color temperature.
The following figure is the connection mode of color temperature,Only a tunable white LED controller is required for a small number of adjustable color temperature LED strips. If the number is large, then a PWM amplifier is needed.
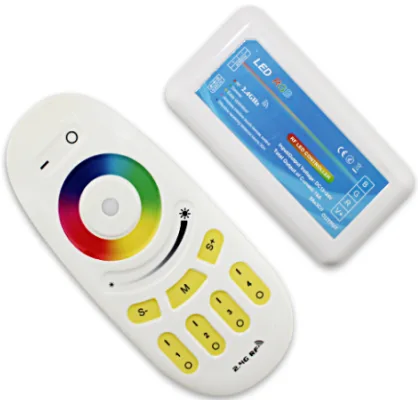
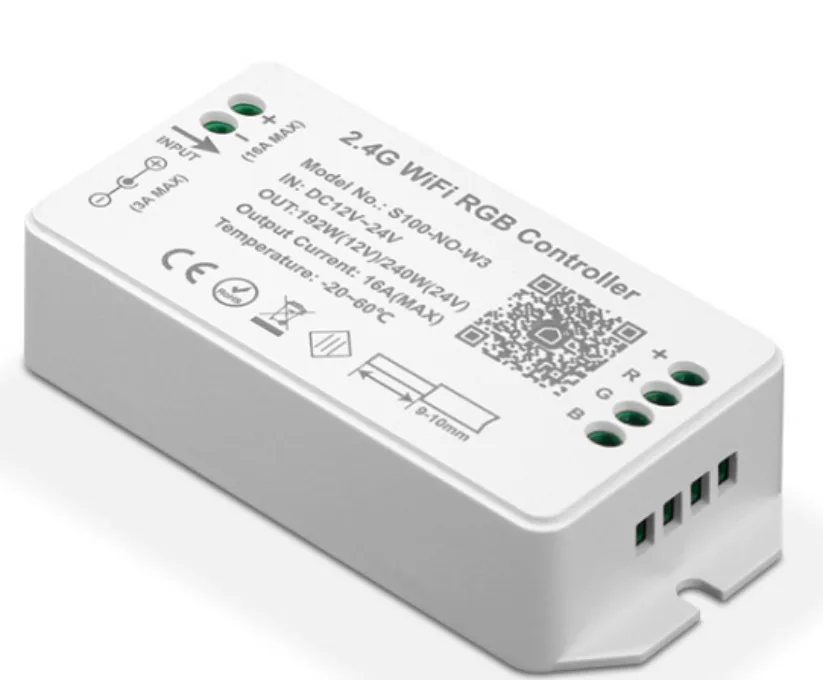
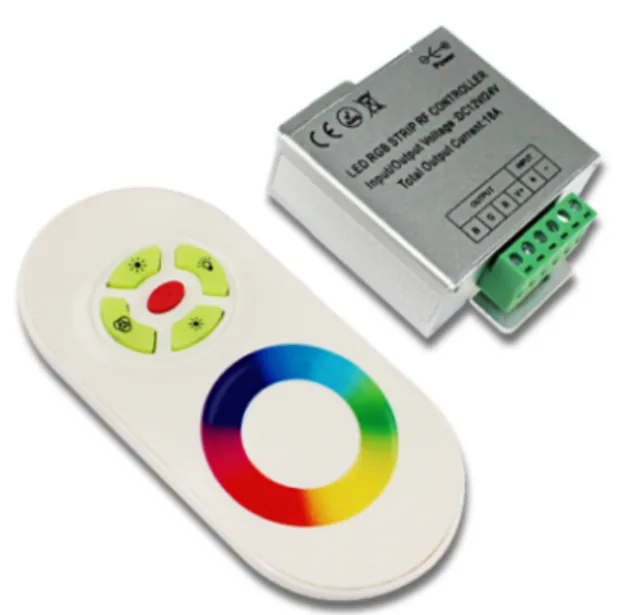
III.How to Wire RGB LED Strip Lights
RGB LED strip lights require three connections for red, green, and blue LEDs. Connect these to a three-channel controller or driver that supports RGB control, allowing for color mixing and effects.
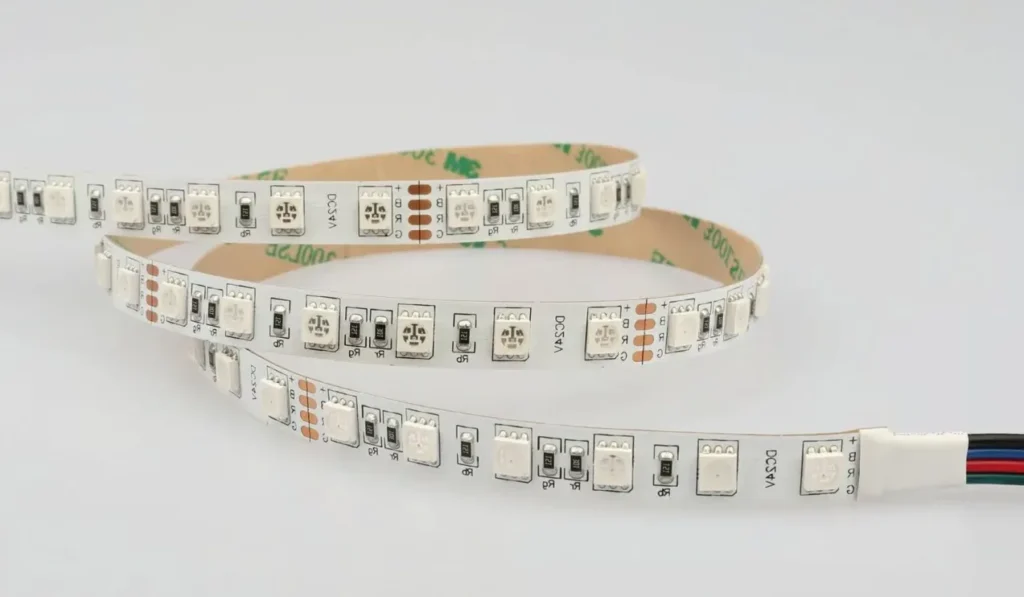
Direct connection to an RGB controller allows for basic color mixing and control. This is suitable for shorter strips or installations where signal strength is not an issue.
Without PWM Amplifier:
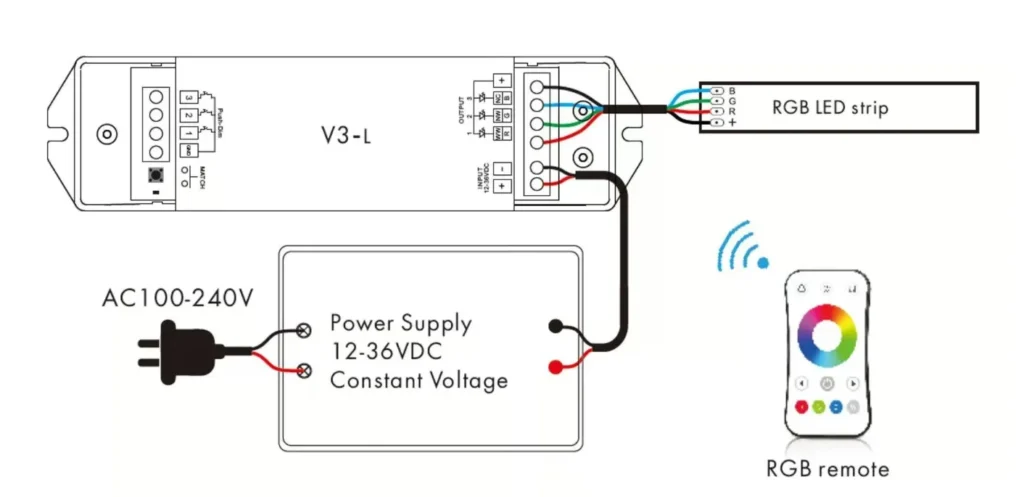
For RGB, RGBW, RGBIC, RGBCCT connection, Signlite company has a complete solution, customers can choose different controllers according to their needs.

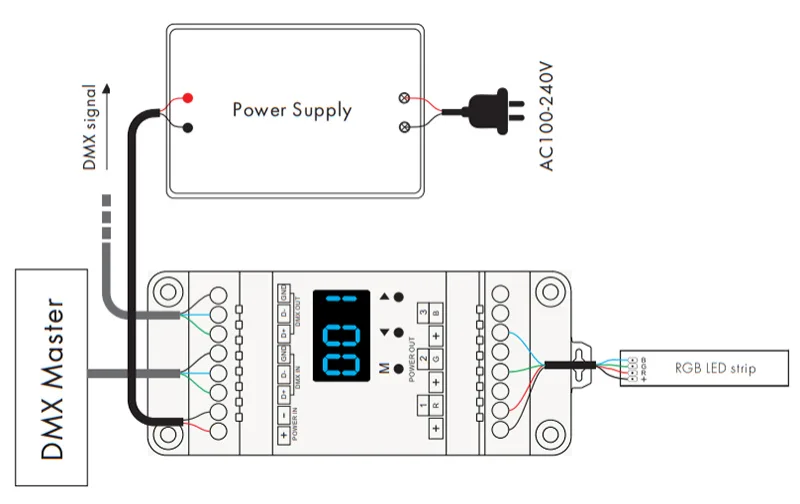
Wiring RGB LED Strip Lights with DMX512 Decoder
RGB LED strip light A DMX decoder is used to convert the DMX512 control signal to a constant-voltage PWM signal to control the color and brightness change of the RGB LED strip light. This dmx decoder can control the three basic colors of red, green, and blue LEDs at the same time and achieve color mixing and brightness adjustment by adjusting the current and PWM frequency.
DMX to RGB LED Strip Wiring Diagram:
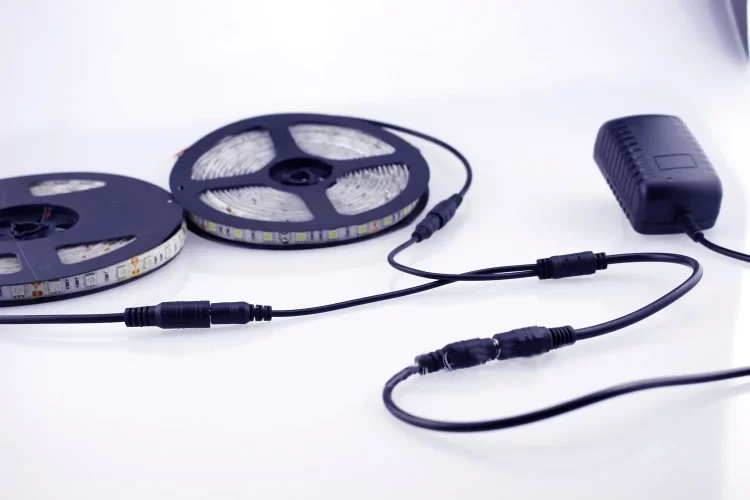
How to Connect LED Strip Lights?
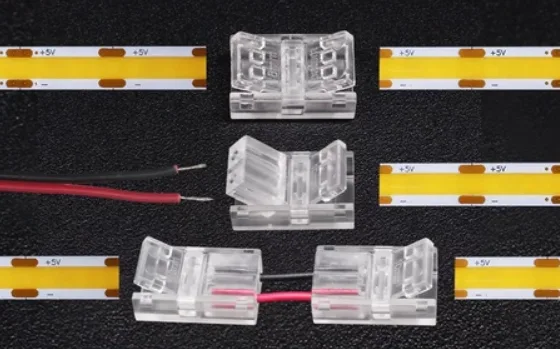
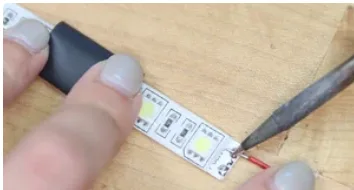
To connect LED strips, you can use connectors to make it easier to connect, or you can solder wires to the strips, which can carry more current and create a more stable connection. Whichever method you choose, make sure you cut the strip along the specified cutting point to ensure your lamp will work if necessary. By using a bar connector or welding tool, you will be lit with LED lights in no time!
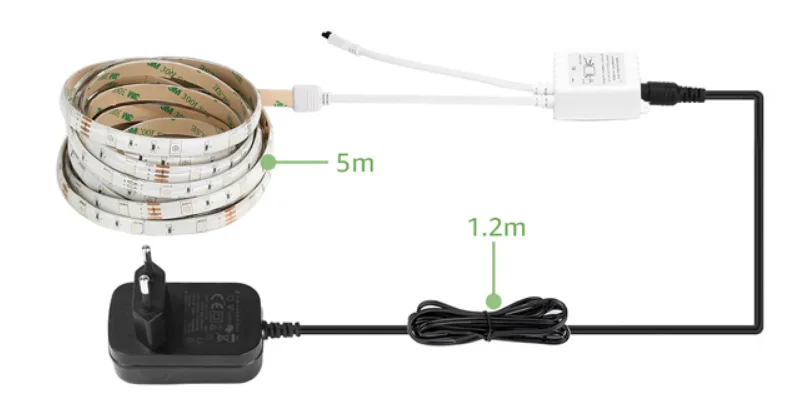
1. Preparations: Prepare all necessary tools and materials, including LED strips, power adapters, connectors, electrical tape, scissors, and screwdrivers. Whether you’re decorating a room with leds, lighting a dresser, or decorating a window, you’ll need to use a tape measure to measure the perimeter of the area where you plan to place them, and write down the measurements so you’ll know exactly how much you need to buy. If the measurement length is less than 1 meter, it is recommended to keep it longer to avoid subsequent feeding.
2. Determine the installation location: according to your lighting needs and design scheme, choose the appropriate installation location. LED lights can be installed on the ceiling, walls, the bottom of the cabinet and other locations.
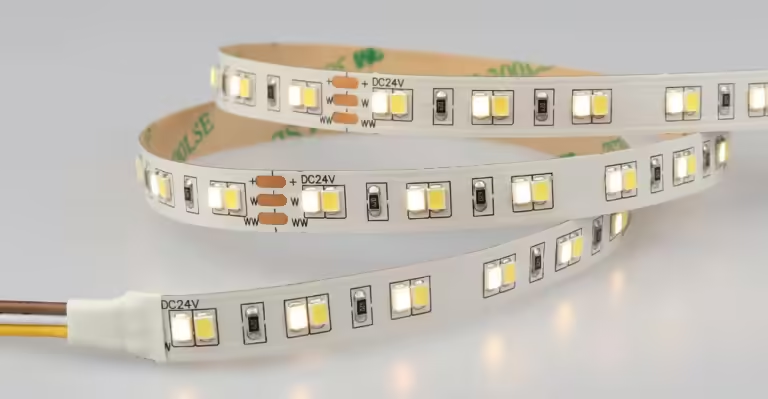
3. Cut the led strip: cut the led striip as required. Take care to cut along the cut mark to ensure that you do not damage the circuit,When cutting the led strip , make sure to cut from the mark, avoid cutting the copper wire, otherwise the led strip will not work .
4. Connection wire: Use the connector to connect the wire and the positive and negative poles of the led strip. Make sure the connection is strong, and do not connect the positive and negative terminals in reverse.Signliteled Optoelectronics connection accessories complete, want to get more connection accessories information please click:
5. Insulation treatment: Use insulation tape or electrical tape to wrap the wiring to prevent short circuit and electric shock.
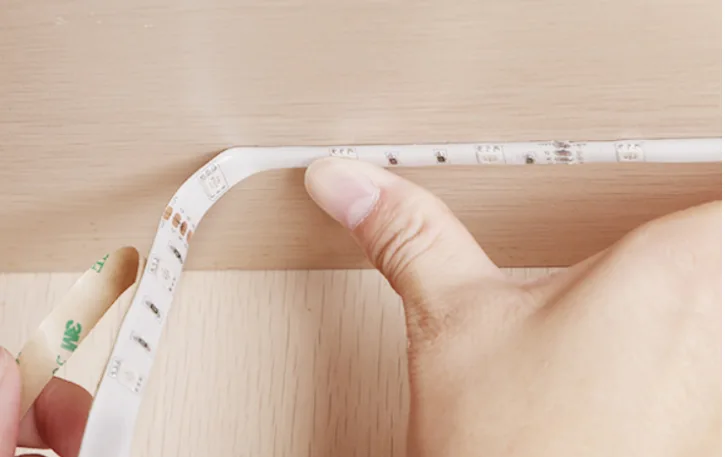
6. Fixed light belt: Use double-sided tape or special fixing clip to fix the LED light belt on the selected position. Ensure that the lamp strip is flat and does not twist or fold.The back of each LED light strip is affixed with self-adhesive 3M double-sided tape, which can be directly removed from the surface of the 3M double-sided tape when installing, and then the light strip is fixed in the place where it needs to be installed, and is pressed flat by hand.
7. Power connection: Plug the power adapter into the power outlet and check that the light belt is on normally. Make sure all leds are on and flicker-free.
By following these steps, you can safely and efficiently connect LED strips using connectors and leads to add bright colors to your home or work environment.
Please watch the installation video of the light belt connection:
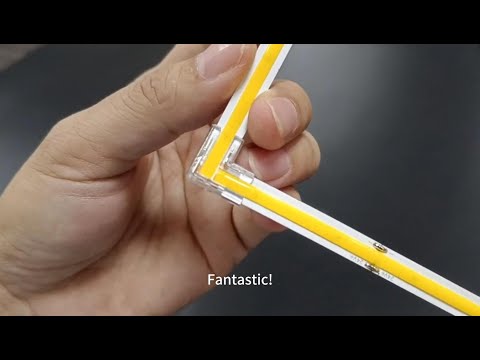
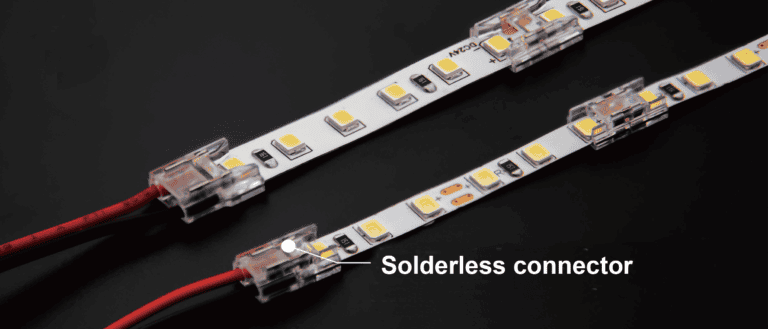
How to install Solderless connectors for LED strip lighting:
1. Cut along the mark line, and tear a little bit of 3M backing tape from the mark. If 3M tape is not peeled off a little, it will be harder to insert the strip into the connector.
2. Lightly pull the black plastic lock out from the solderless connector. Pulling too hard may damage the LED solderless connector.
3. Insert strip into the solderless connector. There are two sides to the connecting tray – make sure the wider of the white sides faces up. This is the top.
4. Make sure the soldering pads fully touch the conjunction metal.
5. Push the plastic lock back towards the middle into the lock position. Be gentle and make sure the mounting tray is securely closed or the lights will not light up. Double check the markings of (+) and (-) to make sure which color wire corresponds to each.
6. For long term use, try and use liquid tape or a bonding material to make sure the connector does not become loose.
Common Issues and Troubleshooting
LED strip does not light up at all:
1) Confirm that your power supply’s voltage and current rating are compatible with your LED strip.
If, for example, your power supply is 12V DC, it will not work with a 24V LED strip. Check the back of the power supply unit, which will have the output voltage marked. Then, check the LED strip itself, which will have its input voltage marked at the LED strip connection points.
2) Confirm that your power supply is working correctly.
A quick test using a multimeter to verify the voltage across the two output wires, or voltage between the DC plug’s inner pin and outer barrel should indicate a voltage differential. If it shows a voltage less than its rated voltage, you may have a malfunctioning power supply.
3) Check and isolate other accessories on the same circuit.
Remove any optional dimmers and controllers from the circuit, and determine if you can get the LED strip to illuminate without the extra accessories. If the LED strip works, that means you have a problem with the dimmer or controller, or the connection leading up to or from those accessories.
4) Check for any visible loose connections.
Make sure all of your connectors and wires are in place and have not fallen out. Try tightening screws on DC adapters, and re-inserting LED strips into solderless connectors, which are common contact failure points.
5) Check for any visible signs of short circuits.
Especially if you are soldering your own wires instead of using solderless accessories, you may have inadvertently created a short circuit by allowing the positive and negative wires to come in contact.
Perform a quick visual check of your entire LED strip connections and ensure that these wires are sufficiently separated.
LED strip has sections that do not light up:
If you have an entire LED strip segment illuminated but notice a section of 3 LEDs (or 6 LEDs for 24V) that remain dark, you may have an “open circuit” in one of the sections.
What this means is that due to a manufacturing flaw or some mechanical damage during shipping or installation, one of the LEDs or components for a single section has come loose, resulting in a complete electrical disjoint for just that section of LEDs.
If you are familiar with how to solder, you may want to try reheating the solder joints for each of the LEDs and components along that dead section. If not, your best bet would be to ask your supplier for a replacement (if they provide a warranty) or simply remove the failed section by cutting along the cut-lines and rejoining the two segments together using connector clips.
Colour Inconsistencies:
Sometimes, the light strips display different colours along their length, causing a rainbow-like effect. This colour inconsistency can be attributed to uneven voltage distribution or faulty LED chips. Reset the LED strip and the controller. If the problem persists, there could be a defective chip that needs replacing, which might require replacing the entire LED strip.
Adhesive Failure:
The adhesive on the LED strips may fail, leading them to fall off from the surface they were attached to. This can happen due to improper installation, exposure to heat and humidity, or simply poor-quality adhesive. Clean and dry the surface thoroughly before applying the strip. If the problem persists, consider using a stronger adhesive or additional mounting clips.
Conclusion: This article mainly brings about how to wire the led light belt and installation precautions, through the above learning, I believe you have a deeper understanding of the connection and installation of the led strip, you can safely and effectively use connectors and leads to connect the led strip, for your home or work environment to add bright color; Even if you encounter some problems, you can easily solve them.
Related Posts