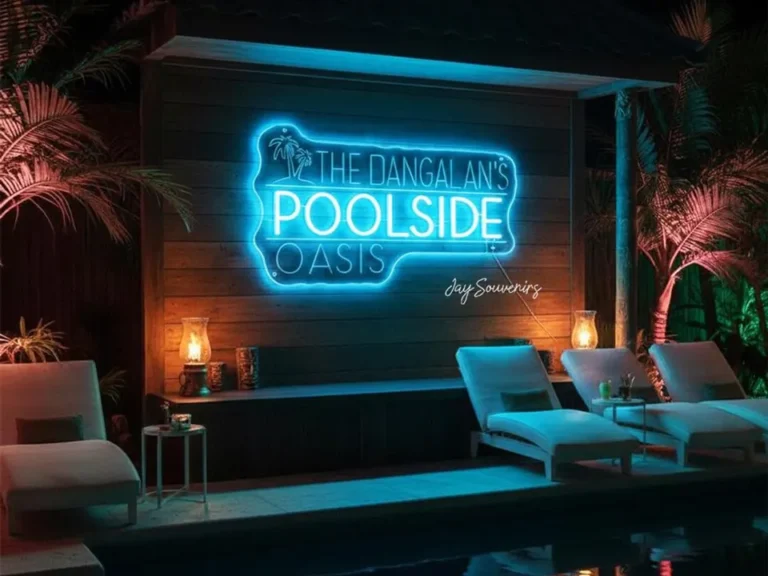
Outdoor LED neon signs are designed to withstand various weather conditions—but only if they are installed correctly. The signs themselves rarely fail first. The first components to fail are almost always wiring points with the wrong connectors, driver enclosures without gaskets, or back panels installed directly against the wall (without a drainage gap).
This article provides a comprehensive guide to the safe installation of LED-Neonschilder im Freien, covering everything from pre-installation planning and tool preparation to installation methods, waterproof wiring, driver placement, drainage, and ventilation, as well as common mistakes that lead to early failures. For businesses and installers seeking reliable outdoor signage, this article serves as your technical manual.
Plan Ahead Before Starting Installation

Setting aside 15 minutes for a pre-installation inspection before drilling can save hours of rework. Before mounting the sign on the wall, be sure to verify the mounting surface, power supply, the sign’s weight, and its IP protection rating. The vast majority of installation failures stem from skipping the pre-installation check, rather than from quality issues with the sign itself.
Required Tools and Hardware
Outdoor installations have strict specifications for every component. Professional installers use the following configuration:
| Werkzeug / Gegenstand | Required Spec or Type | Warum es wichtig ist |
| Bohrer + Mauerwerk | 6mm für M6 — 8mm für M8-Anker | Unterdimensionierte Löcher reduzieren die Auszugsfestigkeit des Ankers im Mauerwerk |
| RAWL-Schraubanker | M6 unter 10kg — M8 für 10–20kg | Falsche Grade lockert sich unter anhaltender Windvibration |
| Abstandhalter für Laufstandoff | 20–25mm Länge | Kein Abstand = kein Entwässerungsspalt = Kondenswasser hinter der Platte eingeschlossen |
| Wasserdichte IP68-Anschlüsse | Gel gefüllt oder Schrumpftyp | Jeder Außenspleißpunkt ohne IP68-Dichtung ist ein zukünftiger Fehler |
| UV-bewertete Wellrohr | Polypropylen – nicht Standard-PVC | Standard-Schwarz-PVC-Risse unter UV-Strahlung innerhalb von 2–3 Jahren |
| GFCI-geschützte Außensteckdose | Wetterbewertete Außensteckdose | Erforderlich für jeden Stromkreis im Nassbereich — nicht optional |
Additionally, you will need: a level (600 mm or longer), wire strippers (for 12–24 AWG), self-fusing tape, and clear exterior silicone sealant.
Checkliste vor der Installation
| Was zu überprüfen | WAS ZU SUCHEN | Risk of Skipping |
| IP rating of neon flex | Minimum IP67 silicone-jacketed | Wasser erreicht interne Lötstellen — LED-Fehler |
| IP-Bewertung von Anschlüssen | IP68 an jeder Außenstelle | Niedrigere Stecker korrodieren innerhalb einer Regenzeit |
| Gesamtleistung | Streifen B/m × Gesamtmeter + 20% Kopffreiheit | Untergroßer Fahrer überhitzt und schlägt fehl, bevor das Schild tut |
| Montagefläche | Ziegel, Mauerwerk, Metallbolzen mit Unterlage, Bauholz | Falscher Ankertyp löst sich unter Last |
| Näherungsstelle für GFCI-Outle | Innerhalb der geplanten Kabelstrecke | Ungeschützte lange Läufe erzeugen Schockrisiko und Spannungsabfall |
| Anforderung der örtlichen Genehmigung | Schaufenster- oder kommerzielle Fassadenbeschilderung | Unzulässige Handelsschilder können nach unten bestellt werden |
| Vor dem Montieren unterschreiben | Laufen Sie 15–20 Minuten im Boden | Fehler nach der Montage bedeutet eine vollständige Neuinstallation |
Understand Your Sign Specifications
Before using an electric drill, please confirm the following four parameters—they determine all subsequent hardware and wiring decisions.
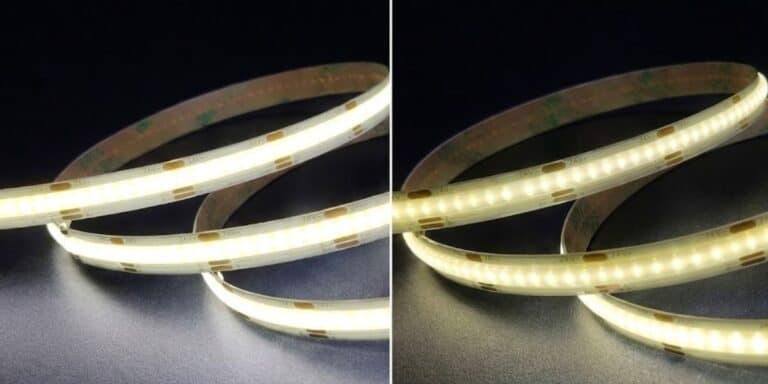
- Minimum outdoor flexible tube rating: IP67 silicone-sheathed SMD2835, 120 LEDs/meter.
- Eingangsspannung: DC 12V or DC 24V—It is strictly prohibited to connect the LED flexible tube directly to AC mains power.
- Power consumption: Approximately 10W/meter (8×16 mm silicone neon tube).
- Backplate: Pre-drilled acrylic sheet—Do not drill holes yourself near the LED channels.
To ensure quality, the IP67-rated waterproof neon strip and its materials possess the necessary protective properties to meet the demands of long-term outdoor use in rain, snow, and humid coastal environments.
Wall-Mounted vs. Suspended Installation: Which Option Is Right for Your Outdoor Installation

Choosing between wall-mounted and suspended installation affects structural requirements, weather resistance, and long-term reliability.
The table below compares the two methods:
| Faktor | Wandhalterung | Hanging / Suspended Mount |
| Am besten für | Permanent facade signage, storefronts, brick/masonry walls | Under-eave installations, awnings, covered walkways, interior-adjacent outdoor spaces |
| Structural requirement | Solid wall surface with appropriate anchor type | Ceiling joists, beam, or reinforced overhead structure |
| Weather protection | Sign exposed to direct rain and sun — requires full IP67/IP68 rating | Natural overhang provides some shielding — but full outdoor rating still required |
| Wind load resistance | Excellent — sign fastened directly to structure | Moderate — hanging hardware must be rated for wind-induced sway |
| Drainage requirement | Critical — must use standoff spacers (20–25mm) to create air gap | Gravity assists drainage, but sign body still needs weep holes |
| Installation complexity | Moderate — drill, anchors, standoffs | Higher — requires overhead access, load rating verification |
| Aesthetic effect | Clean, flush appearance with subtle floating look via standoffs | “Floating” effect — sign appears suspended in space |
Wall-Mounted Installation: Recommended for Most Outdoor Settings
Wall-mounted installation is the preferred method for permanent outdoor signs on brick walls, concrete, or metal-framed exterior walls of commercial buildings. It offers superior resistance to wind loads, which is critical for unobstructed locations. Be sure to use barrel-shaped standoffs (20–25 mm) to create an air gap between the acrylic backplate and the wall—without this gap, condensation will become trapped and seep into the LED channels.
Suspended Installation: Suitable for Sheltered Outdoor Locations
Suspended installation is suitable for locations such as canopies, porches, recessed entrance porches, or covered balconies. Overhead shelter reduces direct moisture intrusion, but the sign itself must still have a protection rating suitable for humidity and splashing water. Please consider using heavy-duty suspension cables with sufficient load-bearing capacity (at least twice the weight of the sign) and stainless steel hardware.
If you wish to achieve a “floating” aesthetic under a canopy, porch, or covered outdoor setting (such as a beer garden or a hotel driveway canopy), a suspended installation can deliver the desired effect without compromising durability. Be sure to verify the load-bearing capacity of the overhead structure before installation. For coastal environments with high humidity, specify stainless steel suspension hardware rather than standard galvanized hardware.
Waterproof Wiring: This Is the Step Most People Get Wrong

This is the step most people skip, and it is precisely the root cause of condensation problems that occur within the first year.
Why Standard PVC Conduit Fails
Standard black PVC conduit is not treated with UV stabilizers. After 2–3 years of exposure to direct sunlight, it becomes brittle and cracks, exposing the internal cables to moisture. Please use UV-resistant polypropylene (PP) corrugated tubing for all external cable runs.
Connector Water Resistance: IP67 Is Insufficient for Outdoor Connections
IP67 connectors can withstand temporary submersion (1 meter underwater for 30 minutes). However, for permanent outdoor connections subjected to repeated cycles of rain, condensation, and thermal expansion and contraction, IP68 connectors are the minimum acceptable standard.
Two proven and reliable methods:
| Methode | Anmeldung | Leistung |
| Gel-filled IP68 connectors | Pre-terminated factory assemblies | Highest reliability — gel self-heals around conductors |
| Heat-shrink with adhesive lining + silicone sealant | Field splices and repairs | Requires heat gun and clean prep — apply silicone at both ends of tubing |
Connector seal failure accounts for approximately 70% of electrical faults in outdoor signage. For every outdoor connection point, use self-fusing tape + UV-resistant electrical tape during installation, or use an IP68-rated waterproof junction box with a cable gland.
Safe Power Cable Installation
Use UV-resistant polypropylene corrugated tubing to route power cables—cables left unprotected and directly exposed on exterior walls will age rapidly. Use cable glands at all entry points into the sign’s backplate or driver enclosure. The conduit path should slope slightly toward the exit to prevent water accumulation.
Key Electrical Safety Requirements: All outdoor wiring must be protected by a GFCI (ground fault circuit interrupter) outlet or circuit breaker—this is a requirement of NEC (National Electrical Code) Article 600 for signs in damp locations.
Driver Placement: Where to Place the Power Supply for Longer Lifespan

Der Fahrer (LED-Stromversorgung) is the component in outdoor neon signs that is most sensitive to heat. Proper placement can significantly extend the lifespan of the entire system.
Golden Rule
Please place the driver in a well-ventilated location, avoid direct exposure to harsh weather conditions, and avoid direct sunlight.
Driver Placement Options — Comparison
| Placement Location | Profis | Nachteile | am besten für |
| Inside building (through-wall) | No weather exposure, excellent heat dissipation | Requires wall penetration and conduit | Commercial storefronts, any climate |
| Ventilated outdoor enclosure (shaded wall) | Keeps AC/DC conversion close to sign | Enclosure must be IP65/IP66 rated with ventilation | Moderate climates |
| Inside sign backboard (sealed) | Cleanest appearance, no external box | Traps heat — shortens driver life significantly | NOT recommended for outdoor use |
Heat Dissipation Requirements
LED drivers generate a significant amount of heat during operation. The standard operating temperature range for power supplies is -40°C to +55°C; however, if the operating temperature exceeds the optimal range by 10°C, the driver’s service life will be reduced by approximately 50%.
- To ensure adequate ventilation: Install the power supply without an additional enclosure whenever possible.
- Never install the driver inside a sealed metal enclosure mounted on a wall exposed to direct sunlight.
- When using a light-sensitive switch or timer, ensure the power is cut off during daylight hours—higher daytime temperatures and unnecessary operation will shorten the driver’s lifespan.
Best Practices for Thermal Management
When the driver must be placed outdoors, use an IP65 or IP66 ventilated enclosure and install it in a shaded location (under a canopy, on a north-facing wall, or inside a lockable electrical cabinet). For high-temperature environments (desert climates, areas with severe western exposure), consider using enclosures with active cooling or thermoelectric cooling.
Power Capacity Guidelines
Select a driver with a rated power that is at least 20% higher than the calculated total power (LED tube power in W/m × total length in meters × 1.2). For tubes longer than 10 meters, use dual-end or parallel power feeding to prevent voltage drops—voltage drops over long DC lines can cause dimming at the far end.
Drainage and Ventilation: Two Easily Overlooked Design Requirements

Condensation is the silent killer of outdoor signs. When a warm sign cools down at night, any moisture trapped inside the backplate cavity condenses into liquid water. Without proper drainage and ventilation, this water accumulates, corrodes connectors, and travels into the LED tubing via capillary action, leading to premature failure.
Drainage—The Necessity of Spacer Stands
The most common drainage mistake: installing the backplate flush against the wall. Never do this. Use barrel-shaped spacer stands that are at least 20–25 mm long, and install them between the backplate and the mounting surface.
Drainage Holes—Requirements of Electrical Codes
NEC Article 600.9(D) stipulates that signs and outline lighting systems installed in damp locations must be weatherproof and must have drainage holes. For any sign enclosure installed outdoors—even under a canopy or roof—drainage holes with a diameter of 1/4 to 1/2 inch (6–12 mm) must be provided at each lowest point or isolated low-lying area.
Drainage hole checklist:
- Locate drainage holes at the lowest points of the backplate cavity.
- Ensure no external objects (mounting hardware, sealant, or trim) block the drainage path.
- Include at least 2 drainage holes; increase the number for large signs or those with multiple low-lying areas.
- Avoid placing drainage holes directly above electrical components or exposed conductors.
Ventilation—Preventing Heat-Induced Damage
Heat accelerates LED lumen depreciation, silicone sheath ageing, and damage to driver capacitors. Avoid using sealed enclosures that trap heat, and ensure adequate ventilation. For acrylic backplate designs without ventilation slots, consider incorporating (mesh-covered) vents at the top and bottom to promote convective cooling.
Ventilation best practices:
- Maintain an air gap behind the sign (achieved using spacer columns).
- Avoid mounting the sign on heat-absorbing dark-coloured surfaces (dark-coloured bricks and black metal panels).
- Provide vents at the top to allow hot air to escape.
- For large or high-power signs (500W or more), consider forced ventilation.
UV Protection and Maintenance
Silicone sleeves are more UV-resistant than PVC, but all plastics exposed to the outdoors will age over time.
Annual inspection checklist:
- Check the silicone sleeves for surface cracking or chalking.
- Check the corrugated tubing for UV-induced brittleness—replace it if cracked.
- Confirm that the spacer columns are secure and that drainage paths are unobstructed.
- Clear debris and insect nests from drainage holes.
Common Installation Errors Leading to Early Failures

Professional installers repeatedly encounter the same failures. The following eight errors are the primary causes of failures in outdoor neon signs within the first year:
| irren | Why It Fails | Die Lösung |
| Skipping GFCI protection | Outdoor wet-location circuit without GFCI creates electrocution hazard | Use GFCI-protected outlet or breaker — code required |
| Flush mounting (no standoffs) | Condensation trapped behind sign → water ingress → corrosion | 20–25mm barrel standoffs on all mounting points |
| Using standard PVC conduit outdoors | Black PVC cracks under UV in 2–3 years → exposed wiring | UV-rated polypropylene conduit only |
| Undersized driver (no headroom) | Driver runs at 100% continuously → overheats → premature failure | Add 20% headroom to calculated wattage |
| No drain holes in backboard | Accumulated water has no exit path → pooling and connector failure | Add weep holes at all low points (1/4–1/2″) |
| Using indoor-rated connectors outdoors | Non-IP68 connectors corrode within one wet season | IP68 gel-filled or heat-shrink connectors at every splice |
| Drilling new holes in acrylic backboard | Cracks propagate from drill points → structural failure → sign falls | Use factory pre-drilled mounting holes only |
| Hanging sign from LED tubing directly | Tubing not load-bearing → splits at silicone jacket | Always mount via acrylic backboard or chassis |
Supplementary Notes on Electrical Codes
For installations in North America, NEC Article 600 (Electric Signs and Contour Lighting) specifies the following key requirements:
- The branch circuit supplying power to the sign must not exceed a rated current of 30A.
- All outdoor conduit must be weatherproof.
- Transformers and power supplies must be equipped with overcurrent protection.
- All outdoor electrical connections must use listed weatherproof enclosures.
For installations in Europe, equivalent requirements follow IEC 60529 (IP Protection Ratings) and local building codes—please consult your electrical inspector before finalizing your installation plan.
Guide to Outdoor Environmental Protection Ratings
When selecting, purchasing, or inspecting outdoor neon signs, it is crucial to fully understand IP protection ratings:
| IP-Bewertung | Staubschutz | Gewässerschutz | geeignet für |
| IP44 | Protected >1mm solids | Splashing water from any direction | Covered patios, indoor-adjacent areas only — NOT fully outdoor |
| IP65 | staubdicht | Niederdruckwasserstrahlen | Wall-mounted under eaves, limited direct rain exposure |
| IP67 | staubdicht | Temporary immersion (1m for 30 min) | Most outdoor signage — rain, snow, hose-directed cleaning |
| IP68 | staubdicht | Kontinuierliches Eintauchen (über 1m) | Extreme exposure — fountains, coastal splash zones, submerged applications |
For permanent outdoor signs exposed to rain, snow, and significant seasonal temperature fluctuations, IP67-rated silicone-sheathed flexible neon light strips are the industry’s minimum standard; if the application involves a risk of water accumulation, requires direct cleaning with a high-pressure water jet, or is located in a coastal environment, IP68-rated products are recommended.
Post-Installation Maintenance Schedule
Once installation is complete, please follow the annual maintenance schedule below to maximize the product’s service life:
- Monatszeit: Visual inspection—check for dimming, flickering, or dead LED sections.
- Vierteljahres-: Clean silicone jacket with mild soap and water — remove accumulated dirt that traps heat.
- Biannually: Inspect drain holes—clear any debris or insect nests. Check conduit for UV damage.
- jährlich: Verify standoff spacer torque; inspect sealant around all entry points; check driver enclosure for water ingress.
Abschluss
Installing outdoor LED neon signs safely isn’t complicated—but it is a technical task. Whether a sign lasts five years or breaks down after six months depends on a few key details: the correct protection rating (minimum IP67 for neon tubing and IP68 for connectors), barrel-shaped isolation columns to create a drainage air gap, UV-resistant corrugated tubing, careful placement of drivers to ensure ventilation and protection from direct sunlight, and the installation of drainage holes in every low-lying area.
For project managers, facilities professionals, and business owners who need to purchase outdoor neon signs, these technical requirements should be clearly confirmed before purchase, rather than improvising solutions during installation. Be sure to ask your supplier:
- What is the IP rating of the neon tubing itself? What is the rating of the pre-assembled connectors?
- Based on the total length of the sign, what is the recommended power margin for the driver?
- Does the sign include factory-pre-drilled mounting holes and provisions for isolation posts?
- Are drainage holes already incorporated into the backplate design?
When you receive specific answers to these questions backed by technical documentation—rather than general verbal assurances—you are working with a supplier who truly understands outdoor sign engineering—not just a vendor selling illuminated tubing.
Für custom outdoor LED neon signs that meet IP67/IP68 standards, feature factory-tested driver matching, and incorporate pre-designed drainage structures, SignliteLED can provide technical documentation and direct project consultation for commercial installation projects worldwide.
FAQ
Verwandte Artikel