Français
  English
  简体中文
简体中文  Deutsch
  Español
  Italiano
  日本語
日本語  한국어
한국어  Polski
  Português
  Русский
  Türkçe
  Nederlands
  Tiếng Việt
  ไทย
ไทย 
Les enseignes au néon à LED extérieures sont conçues pour gérer les intempéries, mais uniquement si l'installation derrière elles est effectuée correctement. Le signe lui-même est généralement la dernière chose qui échoue. Ce qui ne va pas en premier, c'est toujours la jonction de câblage scellée avec le mauvais connecteur, le conducteur assis dans une boîte sans joint ou le panneau arrière monté au ras du mur sans écart de drainage.
Ce guide couvre l'intégralité Enseigne au néon LED extérieure Processus d'installation à partir des outils et des contrôles préalables, au montage, à l'étanchéité, au placement du conducteur, au drainage, à la maintenance des UV et aux erreurs qui causent des défaillances précoces. Suivez-le dans l'ordre et le signe survivra à la garantie d'une année.
Planifiez votre installation de néons extérieurs avant toute autre chose
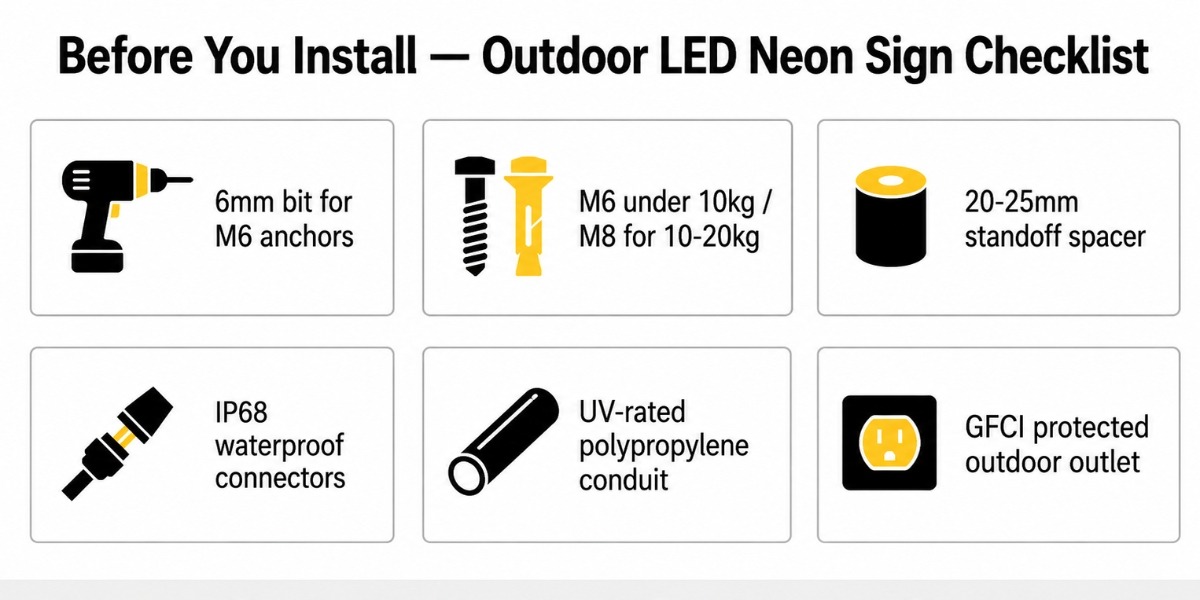
Quinze minutes de pré-vérifications avant le forage permet d'économiser des heures de retouche. Confirmez votre surface, votre source d'alimentation, votre poids de signe et vos cotes IP avant que quoi que ce soit ne se passe sur le mur. La plupart des échecs d'installation remontent aux vérifications ignorées, et non au signe lui-même.
Outils et matériel dont vous avez besoin en premier
Ce sont les éléments que la plupart des gens oublient ou remplacent par la mauvaise alternative. En utilisant la bonne spécification sur chacun, compte à l'extérieur.
| Outil / élément | Spécification ou type | Pourquoi c'est important |
| Forage + foret de maçonnerie | 6mm pour M6 — 8mm pour les ancres M8 | Les trous sous-dimensionnés réduisent la résistance à l'arrachement dans la maçonnerie |
| Ancres de boulons Rawl | M6 moins de 10 kg — M8 pour 10 à 20 kg | Une mauvaise qualité se desserre sous une vibration soutenue du vent |
| Entretoises de baril | 20–25mm de longueur | Pas de contre-interruption = pas d'espace de drainage = condensation emprisonnée derrière le panneau |
| Connecteurs étanches IP68 | Type de gel ou thermorétractable | Chaque point d'épissure extérieure sans étanchéité IP68 est un défaut futur |
| Conduit ondulé UV | Polypropylène – Non PVC standard | Fissures de PVC noir standard sous UV dans les 2 à 3 ans |
| Prise extérieure protégée par GFCI | Prise extérieure pour les intempéries | Nécessaire pour tout circuit électrique dans la zone humide — non optionnel |
Également nécessaire mais simple : niveau à bulle (600 mm+), dénude à fil (12–24 AWG), ruban adhésif auto-amalgamant, mastic de silicone extérieur transparent.
Liste de vérifications avant l'installation
| Quoi vérifier | Que rechercher | Risque s'il est ignor |
| Classement IP de la bande | Minimum IP67 néon Flex en silicone | L'eau atteint les joints de soudure internes — Défaut LED |
| Indice IP des connecteurs | IP68 à chaque jonction extérieure | Les connecteurs moins bien notés se corrodes en une seule saison humide |
| puissance totale | Bande W/m × mètres totaux + 20% | Le conducteur sous-dimensionné surchauffe et échoue avant que le signe ne |
| surface de montage | Brique, maçonnerie, goujon métallique avec support, bois de construction | Un mauvais type d'ancrage se desserre sous charge |
| GFCI Proximité de sortie | Dans le cadre du passage de câbles de conduit prévu | Les longues courses non protégées créent un risque de choc et une chute de tension |
| Exigence de permis locale | Règles de signalisation de façade ou de façade commerciale | Les panneaux commerciaux non autorisés peuvent être commandés |
| Test de signe avant le montage | Courez pendant 15 à 20 minutes au niveau du sol | Défaut détecté après le montage signifie une réinstallation complète |
Connaissez les spécifications de votre signe
Vérifiez ces quatre chiffres avant de toucher une perceuse, ils déterminent chaque décision de matériel et de câblage qui suit.
- Classement minimal de bandes extérieures : IP67 à vessie en silicone SMD2835, 120 LED/m
- Tension d'entrée : DC 12V ou 24V DC — Ne connectez jamais les bandes de LED directement sur le secteur CA
- Puissance d'attraction : ~10W par mètre (8×16mm bande de silicone au néon)
- Panneau arrière : Acrylique pré-percé - N'ajoutez pas de nouveaux trous à proximité des canaux LED
Avant l'installation, il est également utile de comprendre comment les bandes néons à LED en silicone de haute qualité sont réellement fabriquées - le processus d'extrusion et d'étanchéité affecte directement les performances d'imperméabilisation et la durabilité à long terme en extérieur.

Support mural vs. Support suspendu : quelle méthode fonctionne pour votre configuration
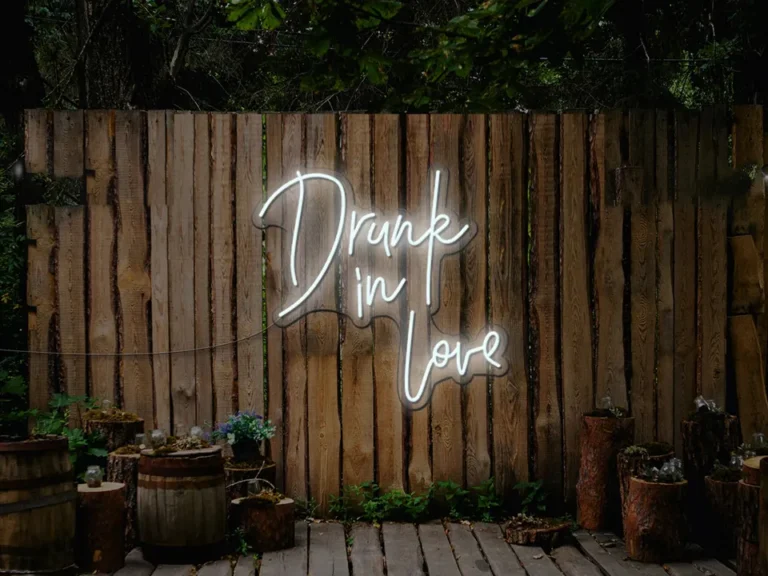
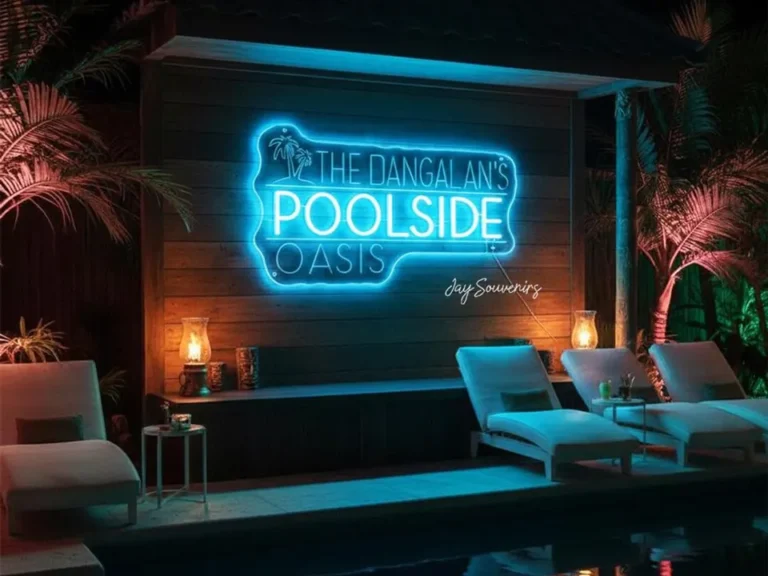
Le montage mural convient aux installations commerciales permanentes sur des surfaces solides, en particulier pour Enseignes de néon en plein air commerciaux pour restaurants, bars, façades Où la stabilité du vent et l'accès à l'entretien sont importants. Travaux suspendus pour les patios couverts, les pergolas et les configurations temporaires ou semi-permanentes. Le choix affecte le matériel, le routage des câbles et le comportement du vent, choisissez en fonction de votre surface et du poids de votre signe, et non de l'esthétique.
| Facteur | fixation murale | pendaison de fer à |
| Meilleur type de surface | Brique, maçonnerie enduite, béton, goujon métallique avec plaque de support | Poutre de plafond structurelle, poutre de pergola, cadre en acier recouvert |
| Matériel nécessaire | Ancres M6/M8 Rawl, appuis-cylindrées, vis inoxydables | Câble en acier inoxydable de 3 mm, viroles serties, boulons à œil nominaux |
| Poids du signe maximum | Jusqu'à 20 kg avec des ancrages de maçonnerie corrects | Meilleur moins de 15 kg sans ingénieur en structures. Capacité de faisceau |
| résistance au vent | Élevé - le signe se déplace avec le mur, pas indépendamment | Inférieur — Le pivotement latéral augmente le câble et la contrainte de connexion dans les rafales |
| Gestion des câbles | Conduite dans le mur ou la route de surface soignée | Conduit groupé fixé le long du passage du câble de suspension |
| Accès à la maintenance | Retirez les impasses pour atteindre le conducteur ou la bande | Les câbles doivent être abaissés pour toute inspection |
| Meilleur pour | Signalisation de devanture, murs extérieurs ou cafés, installations permanentes | Patios, pergolas, jardins à bière, espaces événementiels en plein air |
Avant le montage, il est utile de voir comment une enseigne au néon à LED personnalisée est assemblée et préparée. Comprendre comment le panneau acrylique, le néon flex et le routage des câbles sont réunis facilitent le suivi des étapes d'installation ci-dessous.

Pas à pas : montage mural
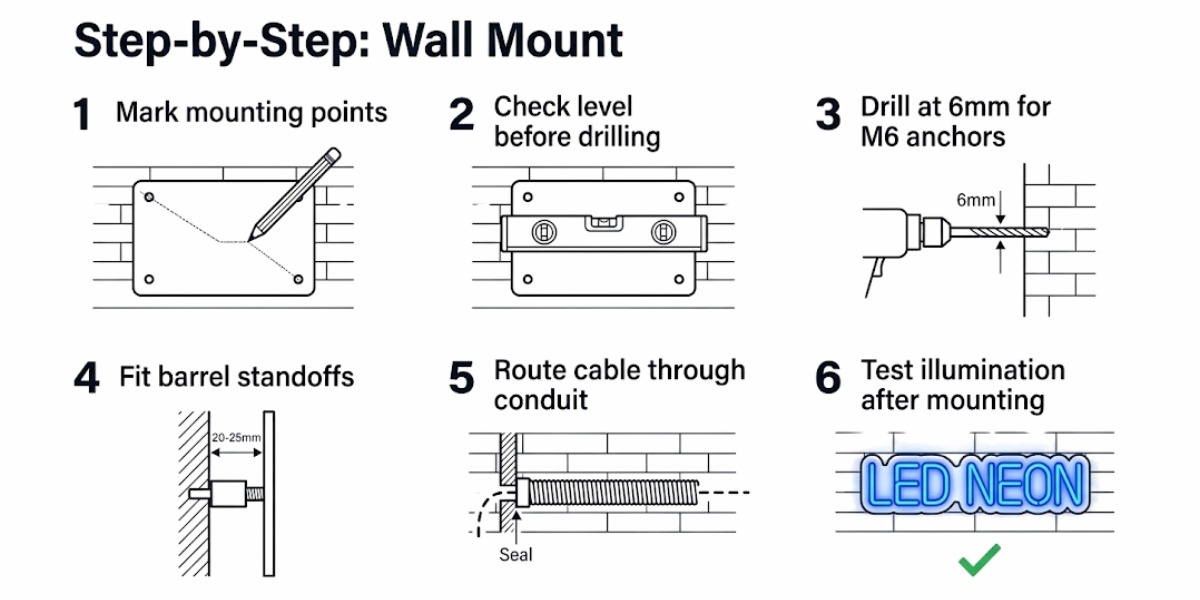
- Marquer les points de montage à travers les trous de panneau arrière pré-percés — Le poids se répartit correctement sur l'acrylique et les fissures de contrainte sont évitées.
- Vérifiez le niveau avant le perçage — Un panneau éclairé hors niveau se lit immédiatement à quiconque le regarde à distance.
- Perceuse à 6 mm pour les ancres M6 — Les trous sous-dimensionnés provoquent la liaison de l'ancrage ; les trous surdimensionnés réduisent la résistance à l'arrachement dans la maçonnerie.
- Monter les barres de fixation avant de serrer complètement — C'est l'étape que la plupart des gens sautent, et c'est celle qui cause des problèmes de condensation au cours de la première année.
- Acheminer le câble d'alimentation dans le conduit en polypropylène aux UV — Le câble exposé sur un mur extérieur sans conduit se dégradera. Cette étape n'est pas négociable pour savoir comment accrocher des enseignes au néon à l'extérieur de manière permanente.
- Testez l'éclairage après le montage — Les vibrations d'installation desserrent occasionnellement une borne ou un connecteur qui était bien au cours de l'essai au sol.

Pas à pas : support suspendu
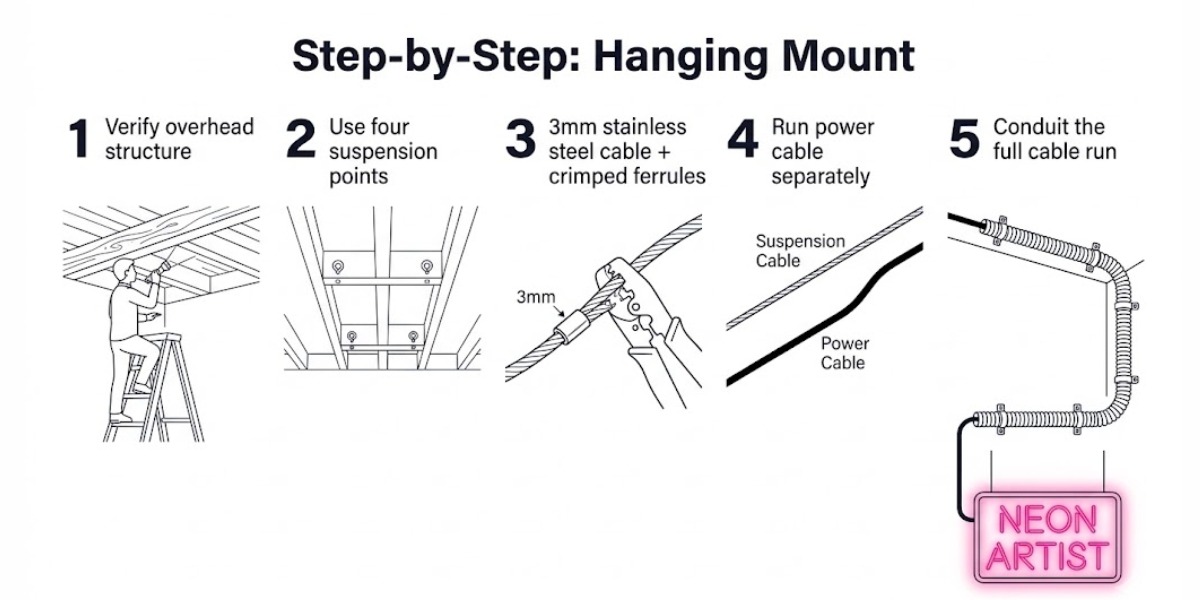
- Vérifiez que la structure de plafond est porteuse — Les poutres décoratives de pergola ne sont souvent pas conçues pour les charges suspendues permanentes.
- Utilisez quatre points de suspension pour des panneaux de plus de 60 cm — Deux points suspendus à un signe large créent une contrainte de torsion qui craque au fil du temps.
- Spécifiez le câble en acier inoxydable de 3 mm avec les embouts sertis — Les crochets ou la chaîne standard d'une quincaillerie feront surface en deux saisons à l'extérieur.
- Exécutez le câble d'alimentation séparément des câbles de suspension — Le câble électrique n'est pas un support mécanique, car les combiner risque de tirer les bornes desserrants sous charge.
- Conduite du câble de puissance à pleine puissance — Le mouvement du vent sur un panneau suspendu transfère les vibrations le long du câble non sécurisé et fonctionne des connexions desserrées au fil du temps.
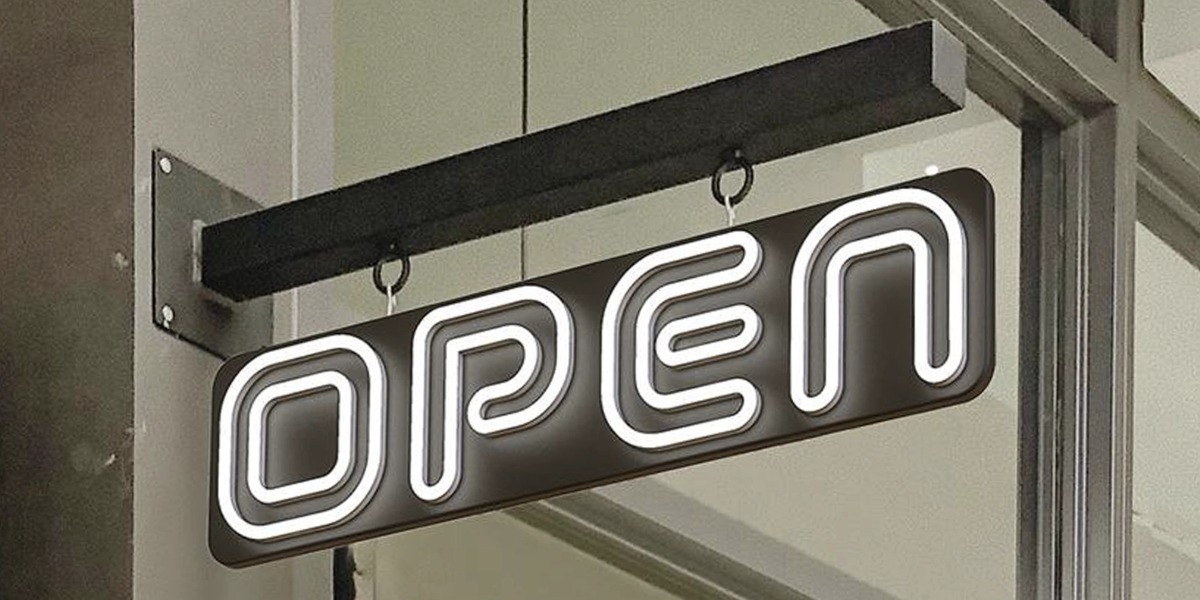
Un support suspendu en pratique signe suspendu à un support mural via des anneaux en acier. Remarque Le support est structurellement fixé au-dessus; le panneau lui-même n'a pas de contact avec le mur.
Si vous décidez toujours de la taille, de la tension, du style acrylique ou des options de montage, notre Guide de néon LED personnalisé Explique les différences avant le début de l'installation.
Imperméabilisation du câblage : l'étape que la plupart des gens se trompent
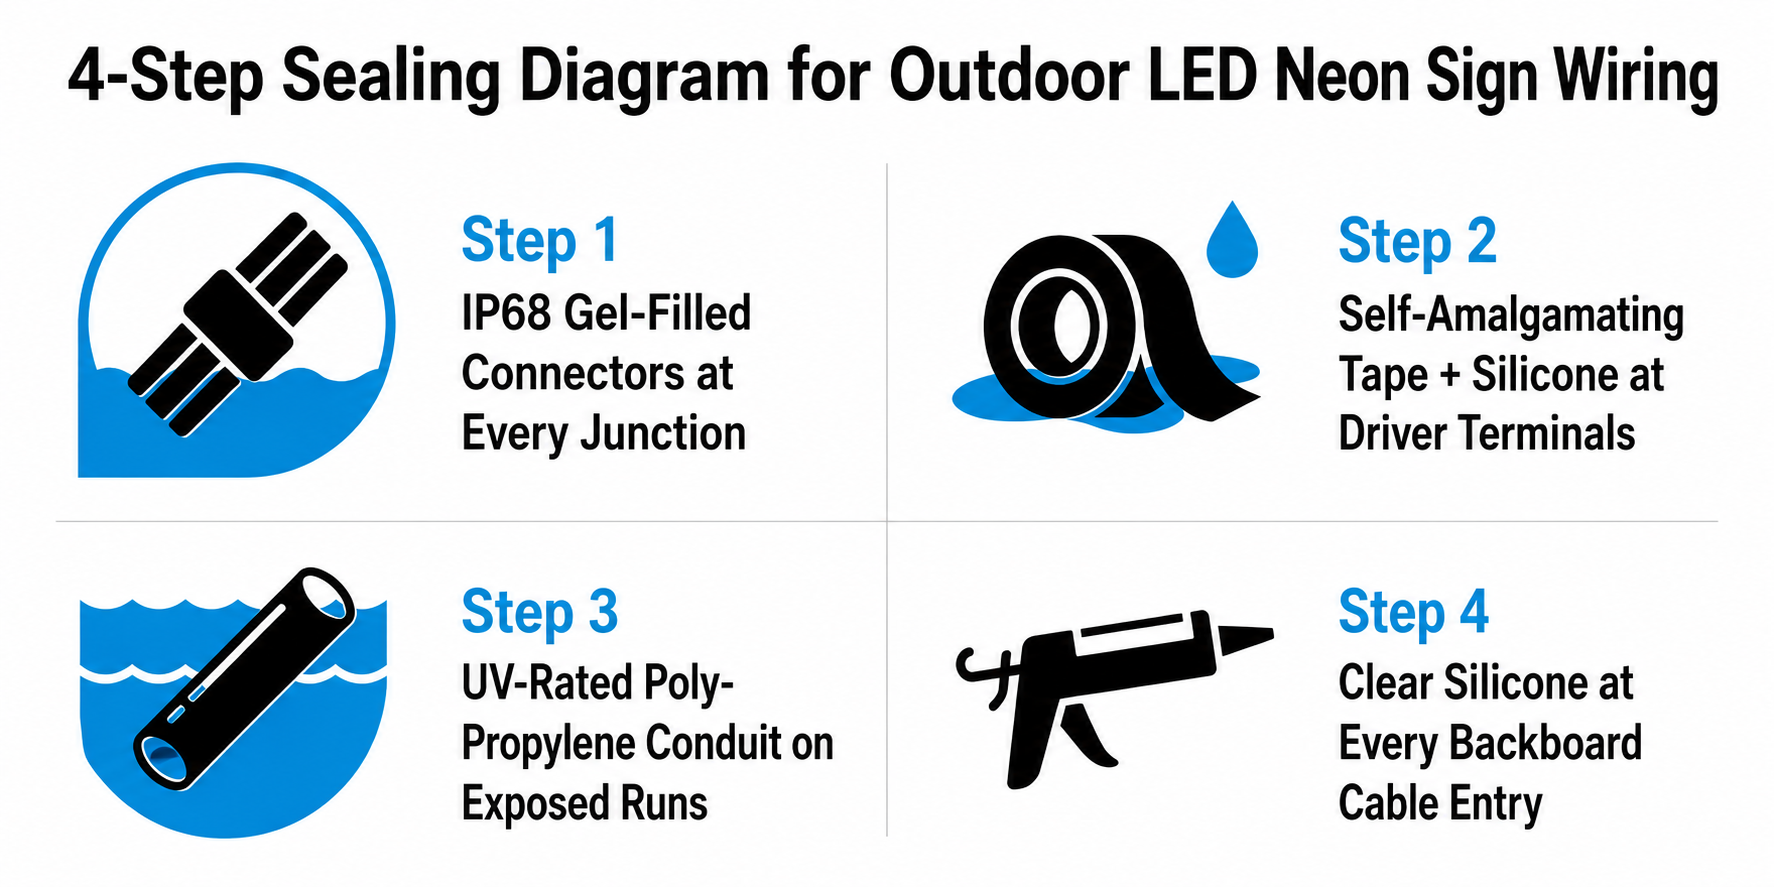
La bande de néon en silicone s'adapte aux intempéries. Chaque jonction, connecteur et point de borne du câblage ne le fait pas, à moins que vous ne scelliez chacun correctement. C'est là que la plupart des installations extérieures échouent au cours de la première année.
Si vous vous demandez comment les panneaux extérieurs fonctionnent réellement par temps fort, lisez : Les enseignes au néon à LED sont-elles en sécurité sous la pluie et la neige ?
Référence rapide IP
| Indice de protection IP | Ce qu'il gère | Convient pour le néon en plein air ? |
| IP20 | Protection de base contre la poussière, aucune résistance à l'humidité | Intérieur uniquement - échoue dans n'importe quelle position extérieure |
| IP44 | Résistant aux éclaboussures de toutes les | Non évalué pour la signalisation extérieure exposée ou la pluie |
| IP65 | Protection contre les poussières, étanche à la poussière et à basse pression | Espaces extérieurs couverts uniquement – pas de pluie directe |
| IP67 | Submersion temporaire étanche à la poussière à 1 m/30 min | Norme minimale pour les bandes de signalisation au néon extérieurs |
| IP68 | étanche à la poussière, contact continu à l'eau | Meilleur choix pour tous les connecteurs et jonctions d'extérieur |
Règle clé : Votre circuit est aussi étanche que son composant le moins bien noté. Une bande IP67 connectée avec des connecteurs IP20 est une installation IP20.
Vous comparez toujours les notes ? Notre ventilation des enseignes néon à LED en plein air IP65 vs IP67 vs IP68 explique où chaque évaluation fonctionne et où elle échoue à l'extérieur.
Comment sceller chaque point de connexion
Connecteurs IP68 à chaque jonction Pas une mise à niveau une exigence. Chaque point d'épissure ouvert à l'extérieur devient un point d'entrée d'eau lors de la première forte pluie. Les connecteurs remplis de gel ou thermorétractables sont les seuls types de jonctions extérieures permanentes.
Ruban adhésif auto-amalgamant + silicone aux bornes du conducteur Ces deux-là fonctionnent ensemble, pas séparément. Le ruban adhésif crée une couche fusionnée étanche sur le bornier. Le silicone recouvre ensuite les bords de transition auxquels le ruban ne peut pas se conformer. Utiliser un seul laisse des lacunes.
Conduit en polypropylène UV sur toutes les câbles exposés Le conduit de PVC noir standard durcit et développe des fissures de surface après 2 à 3 ans d'exposition directe aux UV. Une fois fissuré, il ne protège rien. Le polypropylène conserve sa flexibilité et son intégrité nettement plus longues à l'extérieur.
Silicone extérieur transparent à chaque entrée de câble de panneau arrière L'eau traque le gainage des câbles par une action capillaire - elle n'a pas besoin d'un espace pour entrer. Sceller chaque point où un câble traverse le panneau acrylique empêche l'humidité d'atteindre les canaux LED.
Où placer le pilote LED (alimentation électrique)
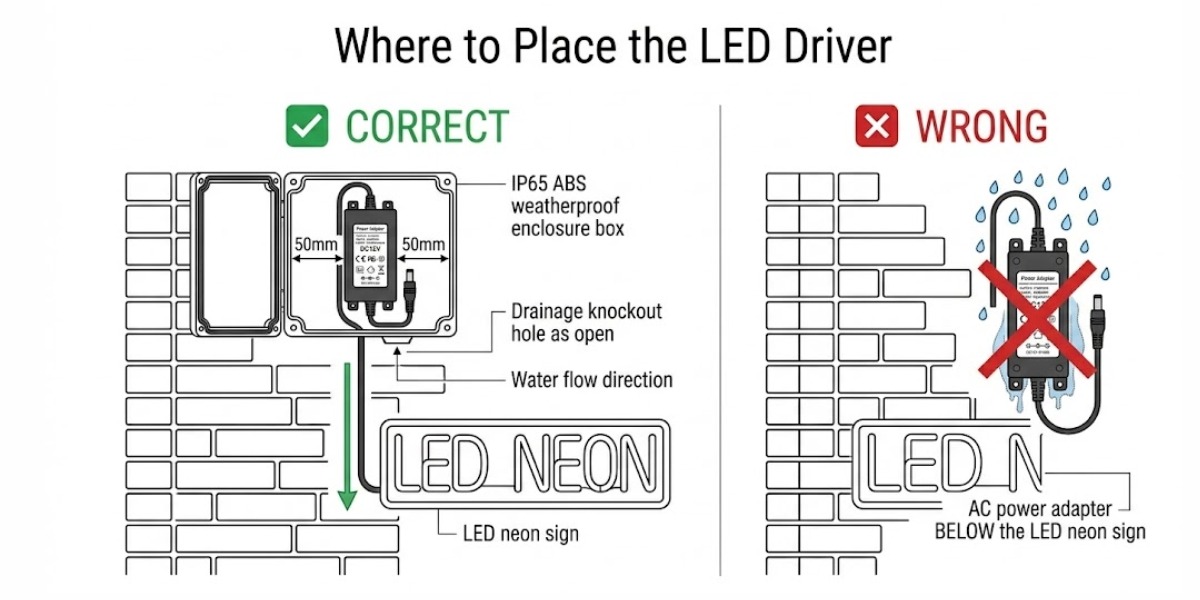
La plupart des pilotes LED sont IP20, ils n'ont aucune protection contre l'humidité. Un conducteur assis dans une boîte non accouplée sur un mur extérieur échouera à cause de la condensation seule d'ici un an, même s'il ne pleut jamais directement.
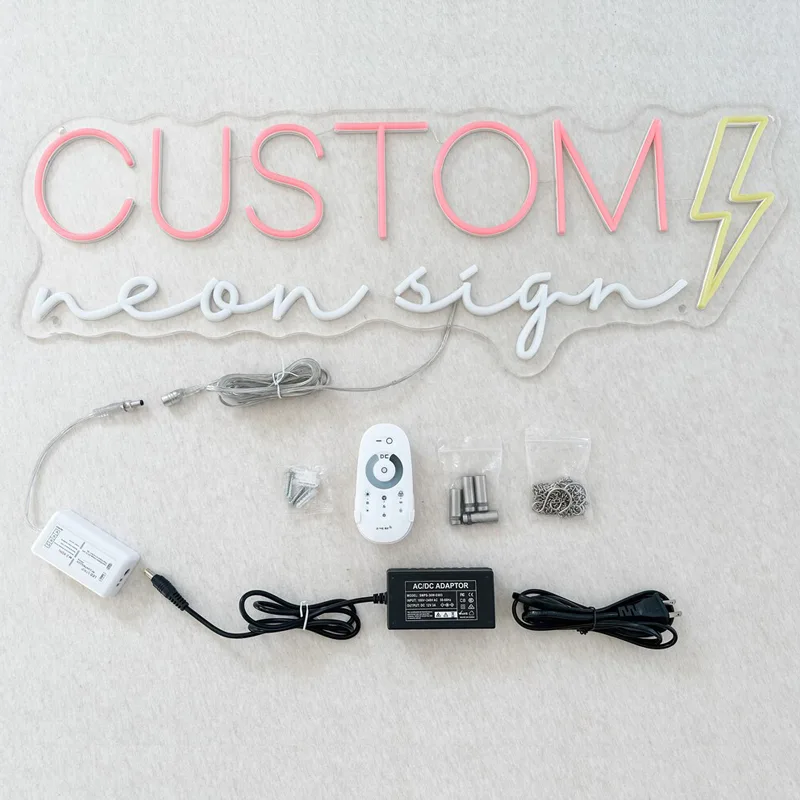
Adaptateur/alimentation LED avec port DC (DC12V/24V)
- Tension d'entrée : AC100-240V
- Tension de sortie : DC12V/DC24V
- Courant de sortie : 3A/4A/5A/6A/8A/10A
- Watt : 72W/96W/120W
- Dimensions : 120x55x30mm
- Certification : US CE ROHS AU
- Classe IP : IP20
- Garantie: 2 ans
Placement des pilotes - À faire et à ne pas faire
| faire décorer | ne |
| Chauffeur de maison dans un boîtier ABS IP65+ avec un couvercle en caoutchouc | Laisser le conducteur sur un mur extérieur ouvert sans aucune enceinte |
| Positionnez le conducteur au-dessus du panneau pour que l'eau s'écoule vers le bas et l | Montez le conducteur directement sous le signe où le ruissellement de pluie s'accumule |
| Laissez un dégagement de 50 mm autour du conducteur à l'intérieur de l'enceinte pour un flux d'air | Pack Boîtier avec câble excédentaire — La chaleur piégée raccourcit la durée de vie du conducteur |
| Évaluez le conducteur à 120–150% de la puissance totale des signes | Exécuter le pilote à sa charge nominale maximale en continu |
| Gardez la base de l'enceinte de drainage ouverte | Trous de drainage des joints — Formes de condensation à l'intérieur, quelle que soit la qualité du joint du couvercle |
| Étiquetez le boîtier avec une charge totale de charge pour l'entretien futur | Laisser l'enceinte sans papiers — crée des problèmes lors de toute visite de maintenance |
À quelle distance le conducteur peut-il s'asseoir du panneau ?
C'est là que la plupart des gens devinent faux. La logique est simple :
Puissance supérieure = plus de courant attiré = plus de chute de tension par mètre de câble = distance de course de sécurité plus courte.
La plupart des gens supposent qu'un plus gros conducteur peut conduire un câble plus long. C'est le contraire. Un conducteur de 30 W à 12 V peut parcourir 5 mètres en toute sécurité. Un driver de 100 W à la même tension ne doit pas dépasser 2 mètres sur un fil standard de 1,5 mm².
| puissance du conducteur | Course maximale à 12 V (fil de 1,5 mm²) | Course maximale à 24 V (fil de 1,5 mm²) |
| 30w | 5m | 10m |
| 60W | 3M | 6m |
| 100W | 2m | 4m |
| 150 W+ | 1,5 m — passer au fil de 2,5 mm² | 3M |
Si l'emplacement du conducteur est fixe et que le passage du câble dépasse ces distances, passez à un système 24V. Il réduit de moitié le courant à la même puissance et réduit la chute de tension proportionnellement.
Drainage et ventilation : pourquoi le montage encastré tue les signes tôt
Le montage encastré d'un panneau arrière directement contre un mur extérieur crée une poche d'air scellée. La température chute la nuit provoque l'humidité de cette poche à la condensation à l'arrière de l'acrylique et du matériel de montage. Au fil des mois, cela corrode les vis, affaiblit les points d'ancrage et trouve son chemin dans les joints d'entrée de câble. Le montage avec un drainage ouvert résout complètement ce problème.
Gap de décalage et spécifications de drainage par taille de signe
moins de 50 cm Démontage : 15 mm — Drainage inférieur : 8 mm Écart ouvert — Évent supérieur : 8 mm ouvert
50cm – 100cm Démontage : 20 mm — Drainage inférieur : 10 mm ouvert ou un trou de pleurs de 10 mm par 30 cm – Évent supérieur : 10 mm ouvert
100cm – 150cm Démontage : 25 mm — Drainage inférieur : deux trous de pleurs de 10 mm, régulièrement espacés — Évent supérieur : 15 mm ouvert
Plus de 150 cm Démontage : 30 mm + — Drainage inférieur : trois ou plus de pleurs ou un canal inférieur complètement ouvert — Ventilation supérieure : 20 mm ouvert + bouches latérales
Ne siliconez jamais le bord inférieur du panneau arrière au mur. Cet écart est le drain de condensation. Scellez uniquement le bord supérieur et les points d'entrée du câble, jamais le bas.
Dimensionnement du matériel de mise en garde
Les barres de barres M6 se détachent correctement à 20 à 25 mm pour couvrir la plupart des panneaux extérieurs et s'aligner sur les positions standard des trous en acrylique pré-percés. Les signes de plus de 10 kg sur les surfaces de maçonnerie nécessitent des points d'ancrage M8 avec des ancrages à vis M8 Rawl - le diamètre d'ancrage accru offre une résistance nettement meilleure à l'extraction sous une charge de vent soutenue.
Protection contre les UV et entretien extérieur à long terme
IP67 gère l'eau. Il n'empêche pas la dégradation du silicone sous une exposition prolongée aux UV. Sur les murs orientés au sud ou les positions complètement non ombragées, la lumière directe du soleil décompose lentement la couche d'imperméabilisation et l'adhésif en dessous, créant des micro-fissures qui laissent l'humidité dans une bande qui semble toujours scellée de l'extérieur. Les dégâts sont invisibles jusqu'à ce que l'eau atteigne les LED.
Risque UV par position d'installation
Mur orienté au nord Exposition minimale aux UV. La norme IP67 est suffisante, mais aucune action supplémentaire n'est requise.
Sous patio ou auvent couvert Peu ou pas de soleil direct. La norme IP67 gère cette position sans mesures supplémentaires.
Au niveau du sol ou à proximité de drainage Faible contact avec l'humidité des UV mais élevé. Utilisez des connecteurs IP68 partout et vérifiez les intervalles de drainage tous les 6 mois.
Mur orienté sud - non ombragé 6–8 heures de soleil direct par jour. Montez un auvent ou un surplomb de protection contre les UV au-dessus du signe et inspectez la couche de silicone chaque année pour les fissures précoces.
Signalisation de toit entièrement exposée position à risque le plus élevé. Spécifiez le revêtement en silicone résistant aux UV directement du fabricant lors de la commande. La mise à niveau n'est pas efficace. L'inspection professionnelle annuelle n'est pas négociable ici.
Calendrier annuel de maintenance
Regroupez vos vérifications selon la fréquence à laquelle elles doivent se produire, tout n'est pas nécessairement la même attention.
Tous les 3 mois
- Testez la prise GFCI — appuyez sur le bouton de test, il doit se déclencher et se réinitialiser proprement à chaque fois.
Tous les 6 mois
- Vérifiez les vis de la rouille pour la rouille – la rouille de surface signifie remplacer la quincaillerie; la rouille structurelle signifie le remontage complet.
- Nettoyez la surface du panneau avec un chiffon doux et du savon doux - la saleté bloque l'espace de ventilation derrière la planche.
Tous les 12 mois
- Inspectez l'état de la silicone de la bande - recherchez le jaunissement, les fissures de surface ou la fragilité aux points de pliage.
- Vérifiez les joints d'entrée de conduit et de câble - Le corps de conduit fissuré ou un cordon de silicone rétrécis doivent être refermés immédiatement.
- Vérifiez le joint de l'enceinte du conducteur - Un joint comprimé ou fissuré doit être remplacé avant la prochaine saison des pluies, pas après.
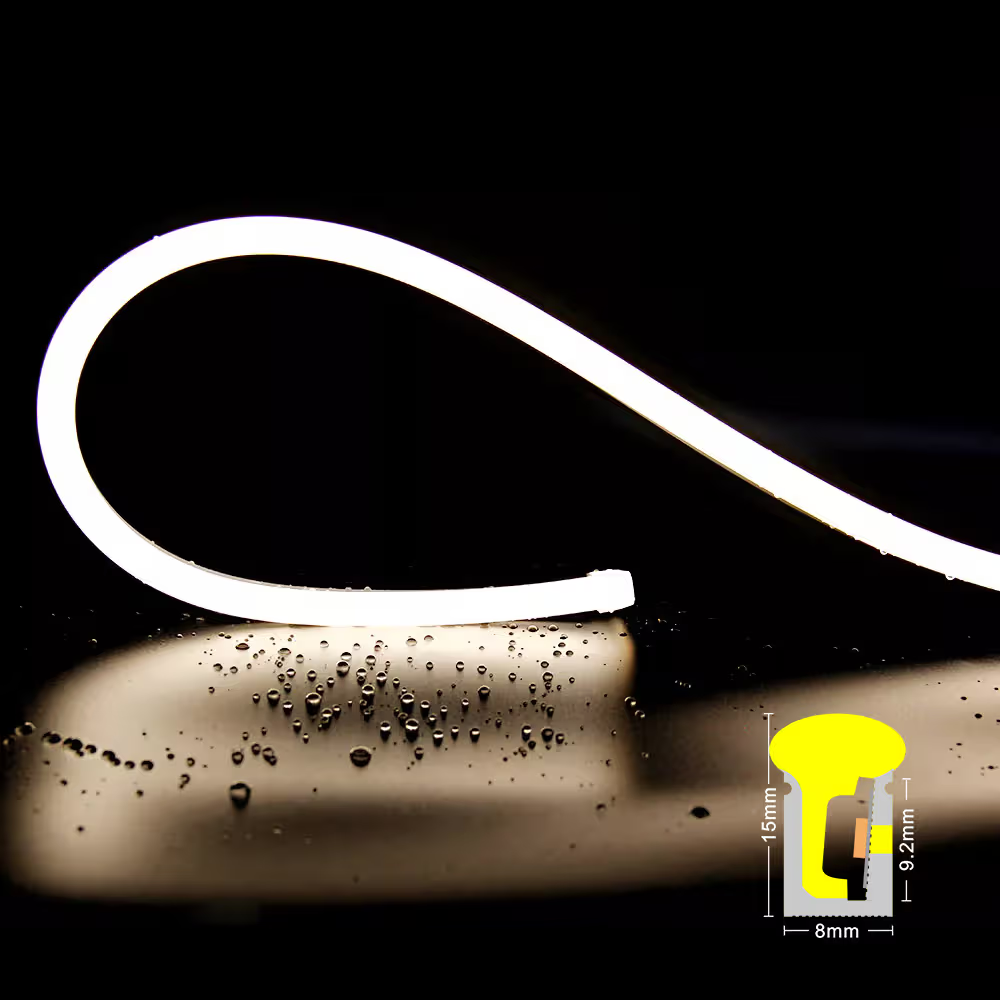
Side Bend S0815 Silicone LED Neon Flex Light
- Tension d'entrée : DC24V
- Watt : 9,6 W/m
- LED QTÉ : SMD2835 120 LEDs/m
- Température de couleur : 2700K/3000K/4000K/5000K/6500K/customizable
- IRC : >80
- Lumen : >330lm/m
- Classe IP : IP65/IP67
- Entrée par câble : Avant/côté/inférieur pour les options
- Diamètre de pliage min : 100mm
- Longueur découpable : 50 mm
- Longueur : 5 mètres/rouleau
Erreurs d'installation courantes et comment les corriger
La plupart des pannes de signalisation au néon à LED en plein air ne sont pas des défaillances du produit, ce sont des défaillances d'installation. Ce sont les neuf plus courants.
- Connecteurs IP20 aux jonctions extérieures L'eau pénètre dans chaque point d'épissure non scellée lors de la première saison humide - signer des scintillements ou des sections meurent. Correction : Remplacez par des connecteurs IP68 remplis de gel ou thermorétractables à chaque jonction extérieure.
- Pilote dans un boîtier non accouplé La condensation corrode les terminaux de l'intérieur - généralement dans les 6 à 12 mois suivant l'installation. Correction : Déplacez-vous vers un boîtier ABS IP65+ avec un couvercle de joint en caoutchouc et un drainage ouvert.
- Le câble fonctionne trop longtemps à 12 V Chutes de tension sur la distance — La variation visible apparaît à l'extrémité du signe dès le premier jour. → Correction : Raccourcissez la configuration ou passez la configuration complète à un pilote 24V et à une bande.
- Flush monté sur le panneau arrière - pas de contre-pied Aucun flux d'air derrière la carte signifie que la condensation reste coincée et que le matériel se corrode pendant des mois. Correction : Réinstallez-les avec des barres de 20 à 25 mm et laissez le bord inférieur complètement ouvert.
- Outlet extérieur non GFCI Aucune protection contre les défauts de terre dans des conditions humides — Les fuites de courant n'ont pas de coupure automatique. → Correction : Remplacez-le par une prise GFCI classée météo pour une utilisation en extérieur.
- Ne pas tester avant le montage Un terminal lâche trouvé après une installation complète signifie que le signe redescend. Correction : Courez au niveau du sol pendant 15 à 20 minutes avant le début de tout travail de montage.
- Bord de panneau inférieur scellé avec du silicone Bloque le seul drain de condensation — l'humidité s'accumule en permanence derrière l'acrylique. Correction : Retirez le joint inférieur. Seuls les points d'entrée du bord supérieur et du câble doivent être scellés.
- Conduite standard en PVC noir sur les pistes exposées Les UV décompose le PVC à l'extérieur - Les fissures de surface apparaissent dans les 2 à 3 ans et le câblage est laissé exposé. Correction : Remplacez par un conduit en polypropylène onduleux UV sur chaque course exposée.
- Signe alimenté par une rallonge partagée Une charge soutenue sur un cordon non évalué provoque une accumulation de chaleur aux connecteurs ou déclenche le circuit. Correction : Dédiez une prise extérieure protégée contre les intempéries correctement évaluée au panneau.
La durée de vie de 30 000 heures sur une enseigne au néon à LED extérieures de qualité n'est réalisable que si l'installation en dessous est valable. La bande LED échoue rarement en premier - le boîtier du conducteur, les jonctions de câbles et les espaces de drainage le font. Obtenez ces trois bons et le signe prend soin de lui-même.
FAQ
Articles Similaires