English
  简体中文
简体中文  Deutsch
  Español
  Français
  Italiano
  日本語
日本語  한국어
한국어  Polski
  Português
  Русский
  Türkçe
  Nederlands
  Tiếng Việt
  ไทย
ไทย 
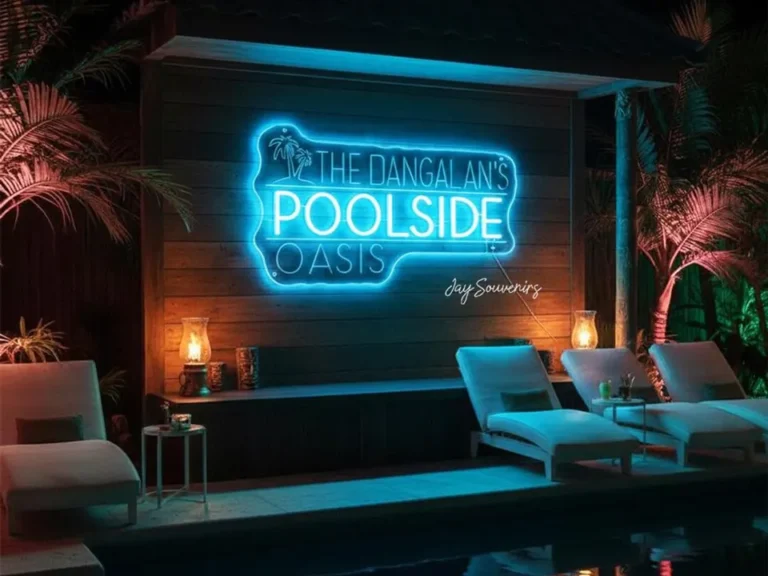
Outdoor LED neon signs are built to handle weather, but only if the installation behind them is done correctly. The sign itself is usually the last thing that fails. What goes wrong first is always the wiring junction sealed with the wrong connector, the driver sitting in a box with no gasket, or the backboard mounted flush against a wall with no drainage gap.
This guide covers the full Outdoor LED Neon Sign installation process from tools and pre-checks, through mounting, waterproofing, driver placement, drainage, UV maintenance, and the mistakes that cause early failures. Follow it in order and the sign will outlast the warranty by years.
Plan Your Outdoor Neon Sign Installation Before Anything Else
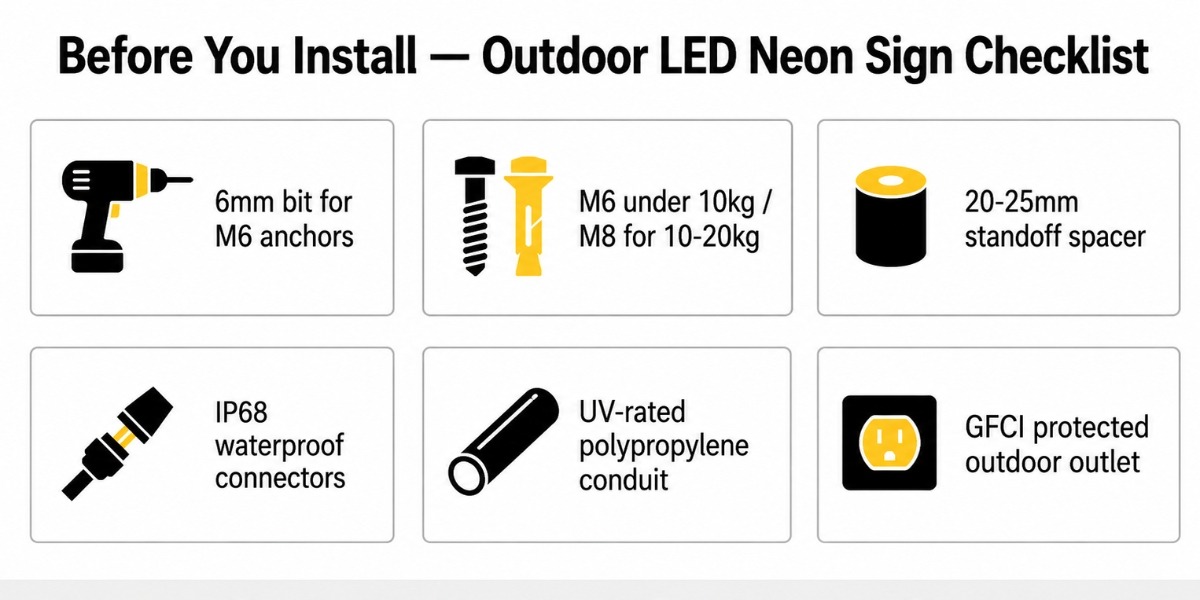
Fifteen minutes of pre-checks before drilling saves hours of rework. Confirm your surface, power source, sign weight, and IP ratings before anything goes on the wall. Most installation failures trace back to skipped checks not the sign itself.
Tools & Hardware You Need First
These are the items most people either forget or substitute with the wrong alternative. Using the correct spec on each one matters outdoors.
| Tool / Item | Spec or Type | Why It Matters |
| Drill + masonry bit | 6mm for M6 — 8mm for M8 anchors | Undersized holes reduce anchor pull-out strength in masonry |
| Rawl bolt anchors | M6 under 10kg — M8 for 10–20kg | Wrong grade loosens under sustained wind vibration |
| Barrel standoff spacers | 20–25mm length | No standoff = no drainage gap = condensation trapped behind board |
| IP68 waterproof connectors | Gel-filled or heat-shrink type | Every outdoor splice point without IP68 sealing is a future fault |
| UV-rated corrugated conduit | Polypropylene — not standard PVC | Standard black PVC cracks under UV within 2–3 years |
| GFCI-protected outdoor outlet | Weather-rated exterior socket | Required for any wet-area electrical circuit — not optional |
Also needed but straightforward: spirit level (600mm+), wire stripper (12–24 AWG), self-amalgamating tape, clear exterior silicone sealant.
Pre-Installation Checklist
| What to Check | What to Look For | Risk If Skipped |
| IP rating of strip | Minimum IP67 silicone-jacketed neon flex | Water reaches internal solder joints — LED failure |
| IP rating of connectors | IP68 at every outdoor junction | Lower-rated connectors corrode within one wet season |
| Total wattage | Strip W/m × total meters + 20% headroom | Undersized driver overheats and fails before the sign does |
| Mounting surface | Brick, masonry, metal stud with backing, structural timber | Wrong anchor type loosens under load |
| GFCI outlet proximity | Within planned conduit cable run | Unprotected long runs create shock risk and voltage drop |
| Local permit requirement | Storefront or commercial facade signage rules | Unpermitted commercial signs can be ordered down |
| Sign test before mounting | Run for 15–20 minutes at ground level | Fault found after mounting means a full reinstall |
Know Your Sign’s Specs
Check these four numbers before touching a drill, they determine every hardware and wiring decision that follows.
- Minimum outdoor strip rating: IP67 silicone-jacketed SMD2835, 120 LEDs/m
- Input voltage: DC 12V or DC 24V — never connect LED strips directly to AC mains
- Power draw: ~10W per meter (8×16mm silicone neon strip)
- Backboard: Pre-drilled acrylic — do not add new holes near the LED channels
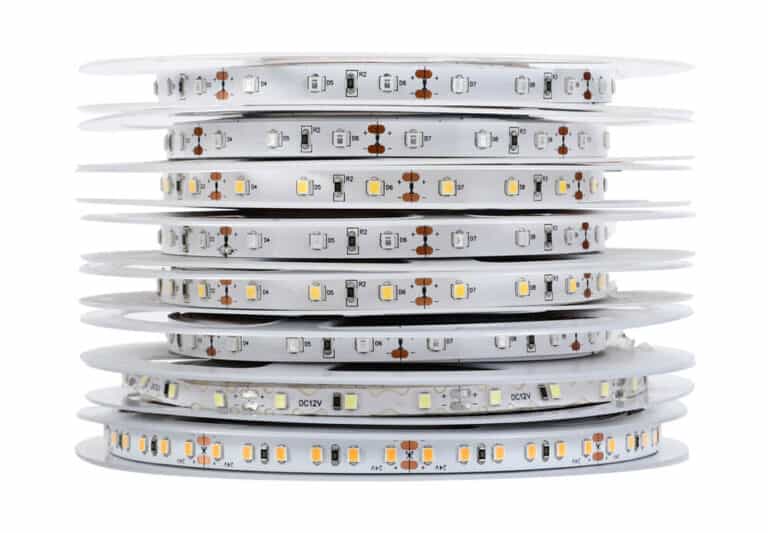
Before installation, it also helps to understand how high-quality silicone LED neon strips are actually made — the extrusion and sealing process directly affects waterproof performance and long-term outdoor durability.

Wall Mount vs. Hanging Mount: Which Method Works for Your Setup
Wall mounting suits permanent commercial installs on solid surfaces, especially for commercial outdoor neon signs for restaurants, bars, facades where wind stability and maintenance access matter. Hanging works for covered patios, pergolas, and temporary or semi-permanent setups. The choice affects hardware, cable routing, and wind behaviour — pick based on your surface and sign weight, not aesthetics.
| Factor | Wall Mount | Hanging Mount |
| Best surface type | Brick, rendered masonry, concrete, metal stud with backing plate | Structural ceiling beam, pergola beam, covered steel frame |
| Hardware needed | M6/M8 rawl anchors, barrel standoffs, stainless screws | 3mm stainless steel cable, crimped ferrules, rated eye bolts |
| Max sign weight | Up to 20kg with correct masonry anchors | Best under 15kg without structural engineer sign-off on beam capacity |
| Wind resistance | High — sign moves with the wall, not independently | Lower — lateral swing increases cable and connection stress in gusts |
| Cable management | Conduit into wall or neat surface route | Bundled conduit secured along the suspension cable run |
| Maintenance access | Remove standoffs to reach driver or strip | Cables must be lowered for any inspection |
| Best for | Storefront signage, exterior bar or cafe walls, permanent installs | Covered patios, pergolas, beer gardens, outdoor event spaces |
Before mounting, it helps to see how a custom LED neon sign is assembled and prepared. Understanding how the acrylic backboard, neon flex, and cable routing come together makes the installation steps below easier to follow.

Step-by-Step: Wall Mount
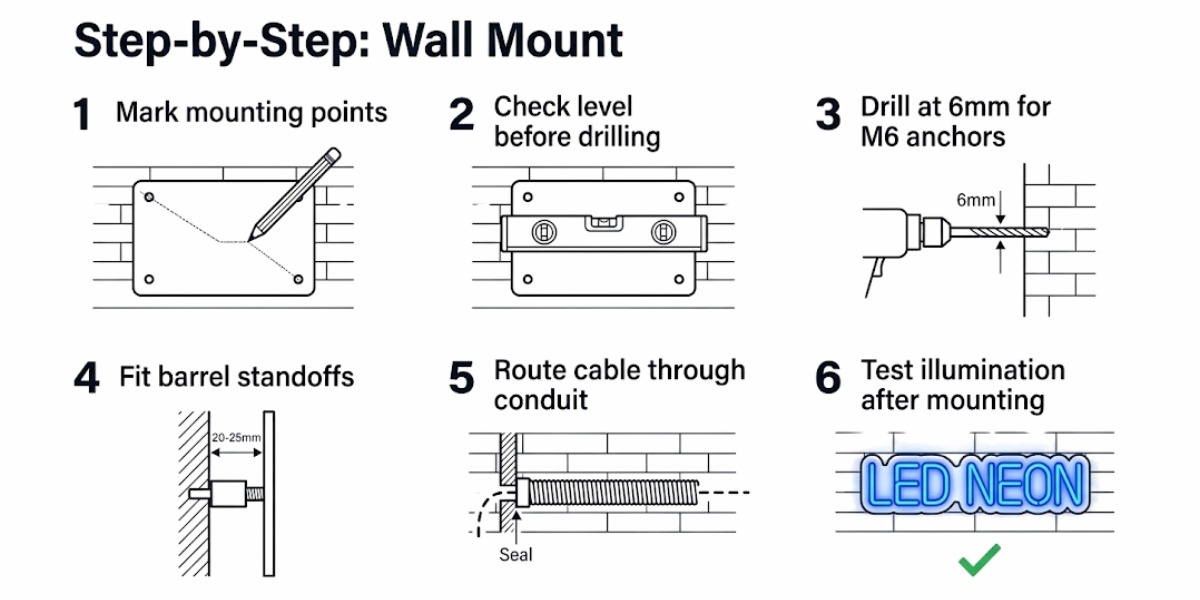
- Mark mounting points through the pre-drilled backboard holes — weight distributes correctly across the acrylic and stress cracks are avoided.
- Check level before drilling — an off-level illuminated sign reads immediately to anyone looking at it from a distance.
- Drill at 6mm for M6 anchors — undersized holes cause the anchor to bind; oversized holes reduce pull-out strength in masonry.
- Fit barrel standoffs before tightening fully — this is the step most people skip, and it is the one that causes condensation problems within the first year.
- Route power cable through UV-rated polypropylene conduit — exposed cable on an exterior wall without conduit will degrade. This step is non-negotiable for how to hang neon signs outside permanently.
- Test illumination after mounting — installation vibration occasionally loosens a terminal or connector that was fine during the ground test.

Step-by-Step: Hanging Mount
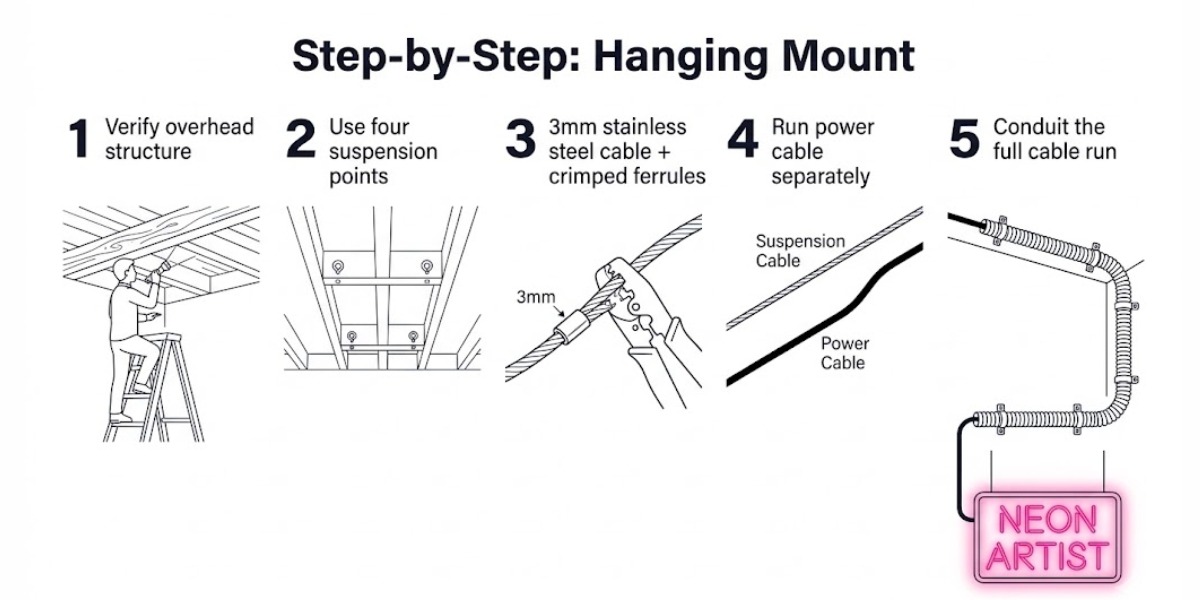
- Verify the overhead structure is load-bearing — decorative pergola beams are often not rated for permanent suspended loads.
- Use four suspension points for signs wider than 60cm — two-point hanging on a wide sign creates twisting stress that cracks acrylic over time.
- Specify 3mm stainless steel cable with crimped ferrules — standard wire hooks or chain from a hardware store will surface-rust within two seasons outdoors.
- Run power cable separately from suspension cables — electrical cable is not mechanical support; combining them risks pulling terminals loose under load.
- Conduit the full power cable run — wind movement on a hanging sign transfers vibration along unsecured cable and works connections loose over time.
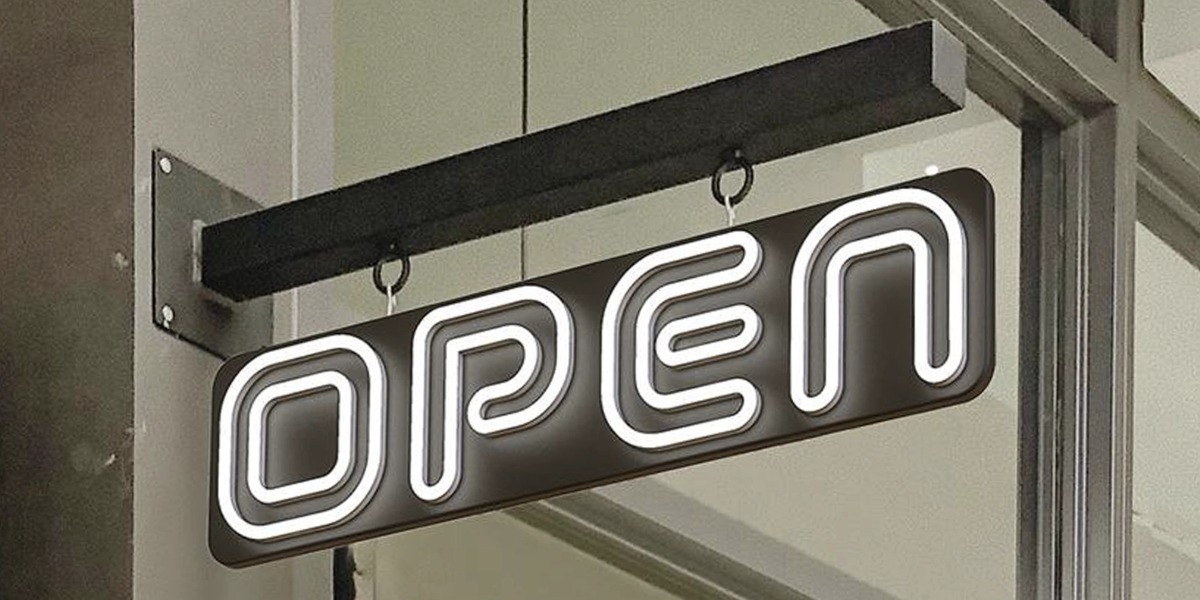
A hanging mount in practice sign suspended from a wall bracket via steel rings. Note the bracket is structurally fixed above; the sign itself carries no wall contact.
If you are still deciding on sign size, voltage, acrylic style, or mounting options, our Custom LED neon sign guide explains the differences before installation begins.
Waterproofing the Wiring: The Step Most People Get Wrong
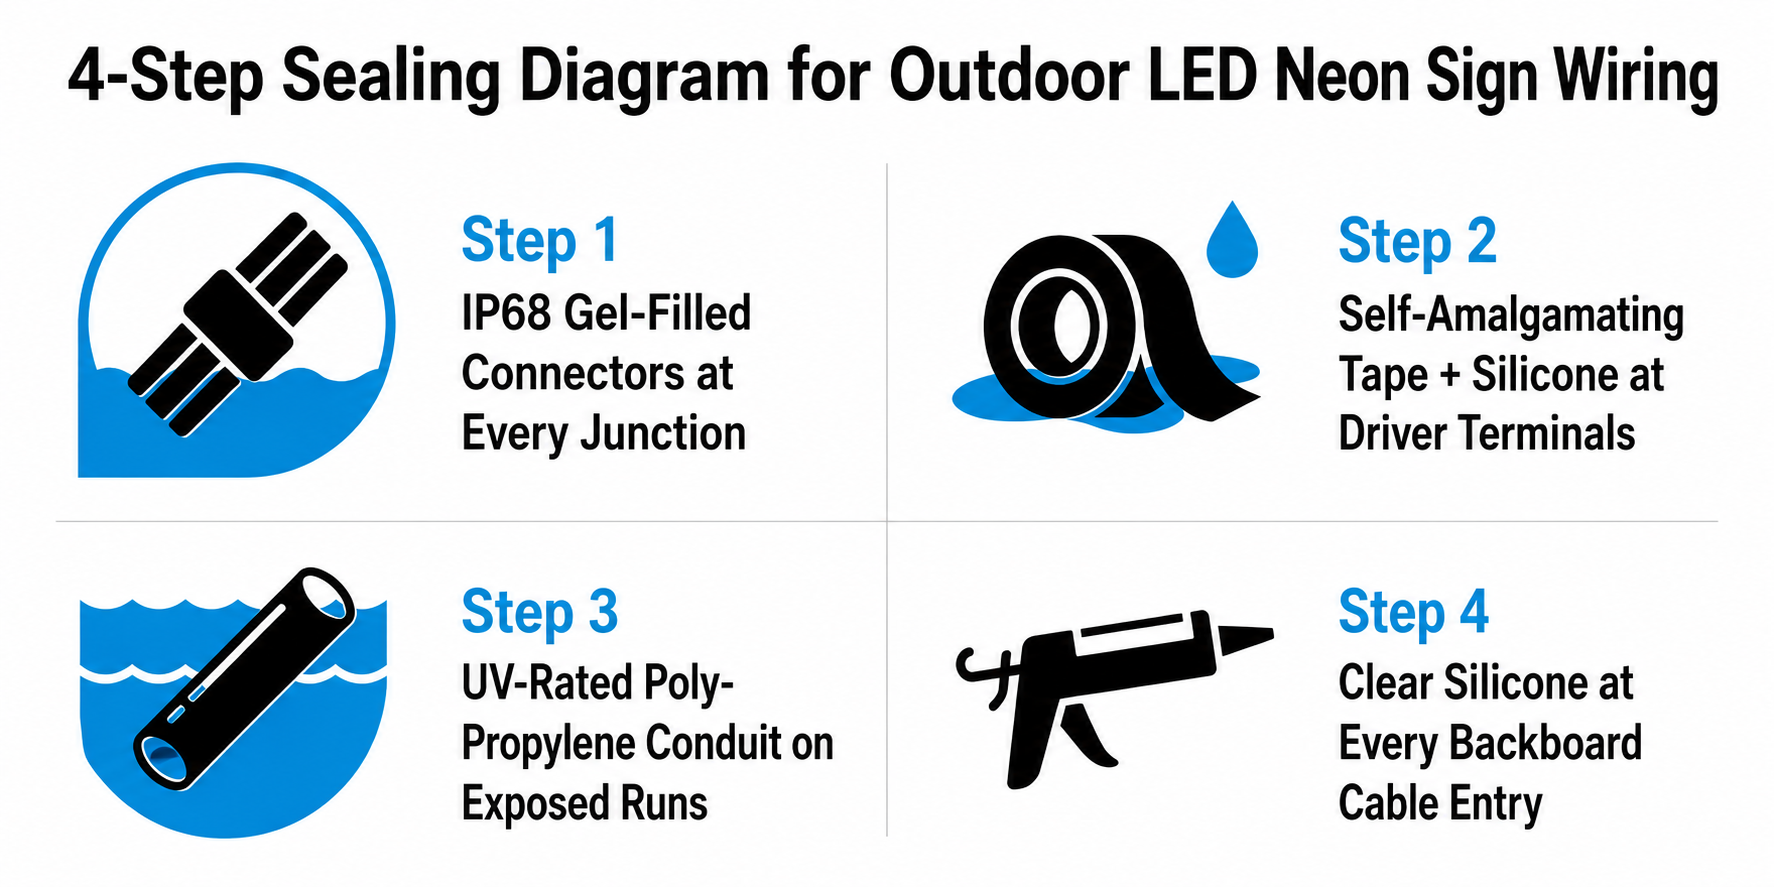
The silicone neon strip handles weather. Every junction, connector, and terminal point in the wiring does not — unless you seal each one correctly. This is where most outdoor installations fail within the first year.
If you are wondering how outdoor signs actually perform in heavy weather, read: Are LED Neon Signs Safe in Rain and Snow?
IP Rating Quick Reference
| IP Rating | What It Handles | Suitable for Outdoor Neon? |
| IP20 | Basic dust protection, no moisture resistance | Indoor only — fails in any outdoor position |
| IP44 | Splash-proof from any direction | Not rated for exposed exterior signage or rain |
| IP65 | Dust-tight, low-pressure water jet protection | Covered outdoor areas only — not direct rain |
| IP67 | Dust-tight, temporary submersion to 1m/30 min | Minimum standard for outdoor neon sign strips |
| IP68 | Dust-tight, continuous water contact rated | Best choice for all outdoor connectors and junctions |
Key rule: Your circuit is only as waterproof as its lowest-rated component. An IP67 strip connected with IP20 splice connectors is an IP20 installation.
Still comparing ratings? Our breakdown of Outdoor LED Neon Signs IP65 vs IP67 vs IP68 explains where each rating works and where it fails outdoors.
How to Seal Every Connection Point
IP68 Connectors at Every Junction Not an upgrade a requirement. Every open splice point outdoors becomes a water entry point in the first heavy rain. Gel-filled or heat-shrink connectors are the only types rated for permanent outdoor junctions.
Self-Amalgamating Tape + Silicone at Driver Terminals These two work together, not separately. Tape creates a watertight fused layer over the terminal block. Silicone then covers the transition edges that tape cannot fully conform to. Using only one leaves gaps.
UV-Rated Polypropylene Conduit on All Exposed Cable Runs Standard black PVC conduit hardens and develops surface cracks after 2–3 years of direct UV exposure. Once cracked, it protects nothing. Polypropylene holds its flexibility and integrity significantly longer outdoors.
Clear Outdoor Silicone at Every Backboard Cable Entry Water tracks down cable sheathing through capillary action — it does not need a gap to enter. Sealing every point where a cable passes through the acrylic backboard stops moisture from reaching the LED channels.
Where to Place the LED Driver (Power Supply)
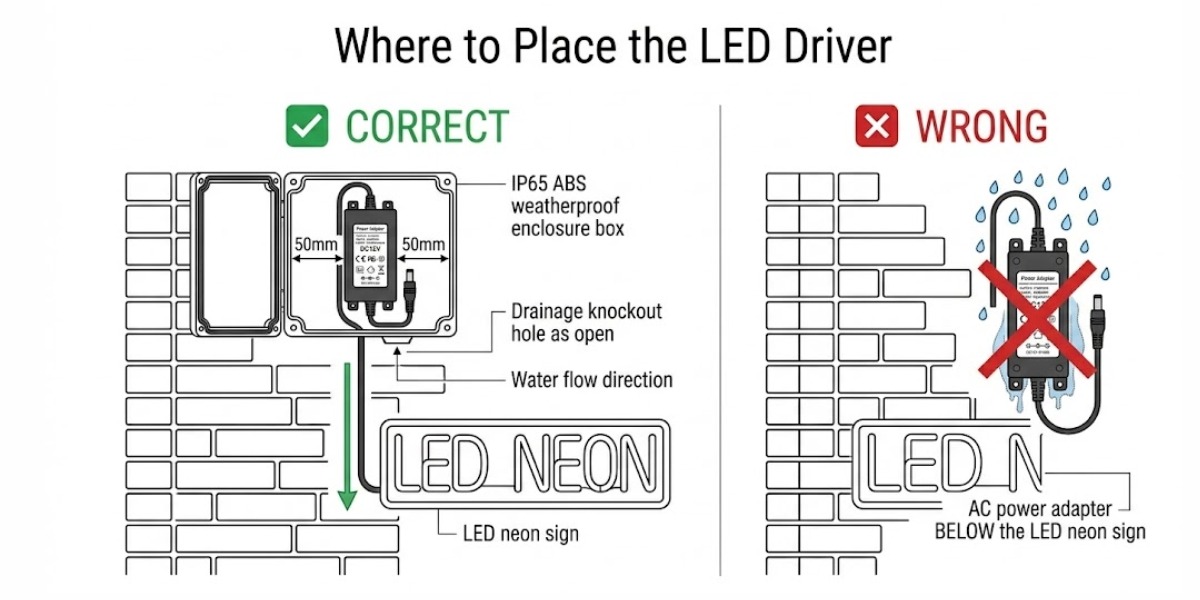
Most LED drivers are IP20 — they have no moisture protection at all. A driver sitting in an ungasketed box on an exterior wall will fail from condensation alone within a year, even if it never gets rained on directly.
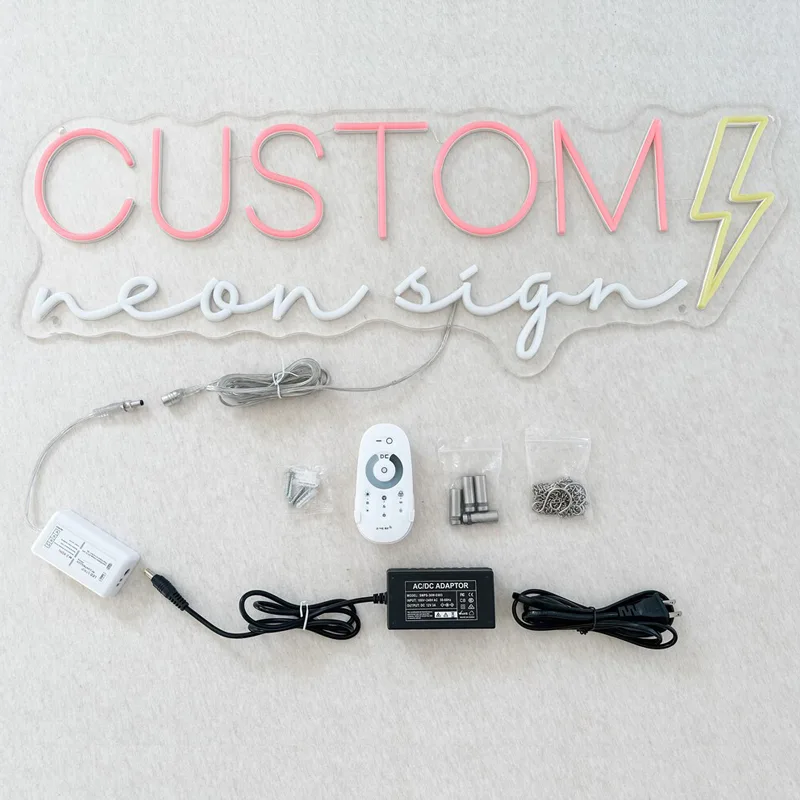
LED Adapter/LED Power Supply with DC Port (DC12V/24V)
- Input Voltage: AC100-240V
- Output Voltage: DC12V/DC24V
- Output Current: 3A/4A/5A/6A/8A/10A
- Watt: 72W/96W/120W
- Dimensions: 120x55x30mm
- Certification: US CE ROHS AU
- IP Grade: IP20
- Warranty: 2 years
Driver Placement — Do’s and Don’ts
| DO | DON’T |
| House driver in an IP65+ ABS enclosure with a rubber gasket lid | Leave driver on an open exterior wall without any enclosure |
| Position driver above the sign so water flows down and away | Mount driver directly below the sign where rain runoff collects |
| Leave 50mm clearance around driver inside the enclosure for airflow | Pack enclosure with excess cable — trapped heat shortens driver life |
| Rate driver at 120–150% of total sign wattage | Run driver at its maximum rated load continuously |
| Keep the enclosure base drainage knockout open | Seal drainage holes — condensation forms inside regardless of lid seal quality |
| Label the enclosure with total load wattage for future servicing | Leave enclosure undocumented — creates problems during any maintenance visit |
How Far Can the Driver Sit From the Sign?
This is where most people guess wrong. The logic is straightforward:
Higher wattage = more current drawn = more voltage drop per meter of cable = shorter safe run distance.
Most people assume a bigger driver can drive a longer cable. It is the opposite. A 30W driver at 12V can safely run 5 meters. A 100W driver at the same voltage should not exceed 2 meters on standard 1.5mm² wire.
| Driver Wattage | Max Run at 12V (1.5mm² wire) | Max Run at 24V (1.5mm² wire) |
| 30W | 5m | 10m |
| 60W | 3m | 6m |
| 100W | 2m | 4m |
| 150W+ | 1.5m — switch to 2.5mm² wire | 3m |
If the driver location is fixed and the cable run exceeds these distances, switch to a 24V system. It halves the current at the same wattage and cuts voltage drop proportionally.
Drainage & Ventilation: Why Flush Mounting Kills Signs Early
Flush-mounting a backboard directly against an exterior wall creates a sealed air pocket. Temperature drops at night cause moisture in that pocket to condense on the back of the acrylic and the mounting hardware. Over months, this corrodes screws, weakens anchor points, and finds its way into cable entry seals. Standoff mounting with open drainage solves this completely.
Standoff Gap & Drainage Specs by Sign Size
Under 50cm Standoff: 15mm — Bottom drainage: 8mm open gap — Top vent: 8mm open
50cm – 100cm Standoff: 20mm — Bottom drainage: 10mm open OR one 10mm weep hole per 30cm — Top vent: 10mm open
100cm – 150cm Standoff: 25mm — Bottom drainage: Two 10mm weep holes, evenly spaced — Top vent: 15mm open
Over 150cm Standoff: 30mm+ — Bottom drainage: Three or more weep holes or full open bottom channel — Top vent: 20mm open + side vents
Never silicone the bottom edge of the backboard to the wall. That gap is the condensation drain. Seal only the top edge and cable entry points — never the bottom.
Standoff Hardware Sizing
M6 barrel standoffs at 20–25mm cover most outdoor signs correctly and align with standard pre-drilled acrylic hole positions. Signs over 10kg on masonry surfaces need M8 standoffs with M8 rawl bolt anchors — the increased anchor diameter provides meaningfully better pull-out resistance under sustained wind load.
UV Protection & Long-Term Outdoor Maintenance
IP67 handles water. It does not stop silicone degrading under sustained UV exposure. On south-facing walls or fully unshaded positions, direct sunlight slowly breaks down the waterproofing layer and adhesive beneath it — creating micro-cracks that let moisture into a strip that still looks sealed from the outside. The damage is invisible until water reaches the LEDs.
UV Risk by Installation Position
North-Facing Wall Minimal UV exposure. Standard IP67 is sufficient — no additional action required.
Under Covered Patio or Awning Little to no direct sun. Standard IP67 handles this position without extra measures.
Ground-Level or Near Drainage Low UV but elevated moisture contact. Use IP68 connectors throughout and check drainage gaps every 6 months.
South-Facing Wall — Unshaded 6–8 hours of direct sun daily. Fit a UV-protective canopy or overhang above the sign and inspect the silicone layer annually for early cracking.
Fully Exposed Rooftop Signage Highest risk position. Specify UV-resistant silicone coating directly from the manufacturer at order stage — retrofitting is not effective. Annual professional inspection is non-negotiable here.
Annual Maintenance Schedule
Group your checks by how often they need to happen — not everything needs the same attention.
Every 3 Months
- Test the GFCI outlet — press the test button, it should trip and reset cleanly every time.
Every 6 Months
- Check standoff screws for rust — surface rust means replace hardware; structural rust means full remount.
- Clean the backboard surface with a soft cloth and mild soap — dirt accumulation blocks the ventilation gap behind the board.
Every 12 Months
- Inspect strip silicone condition — look for yellowing, surface cracks, or brittleness at bend points.
- Check conduit and cable entry seals — cracked conduit body or a shrinking silicone bead needs immediate resealing.
- Check driver enclosure gasket — a compressed or cracked gasket should be replaced before the next wet season, not after.
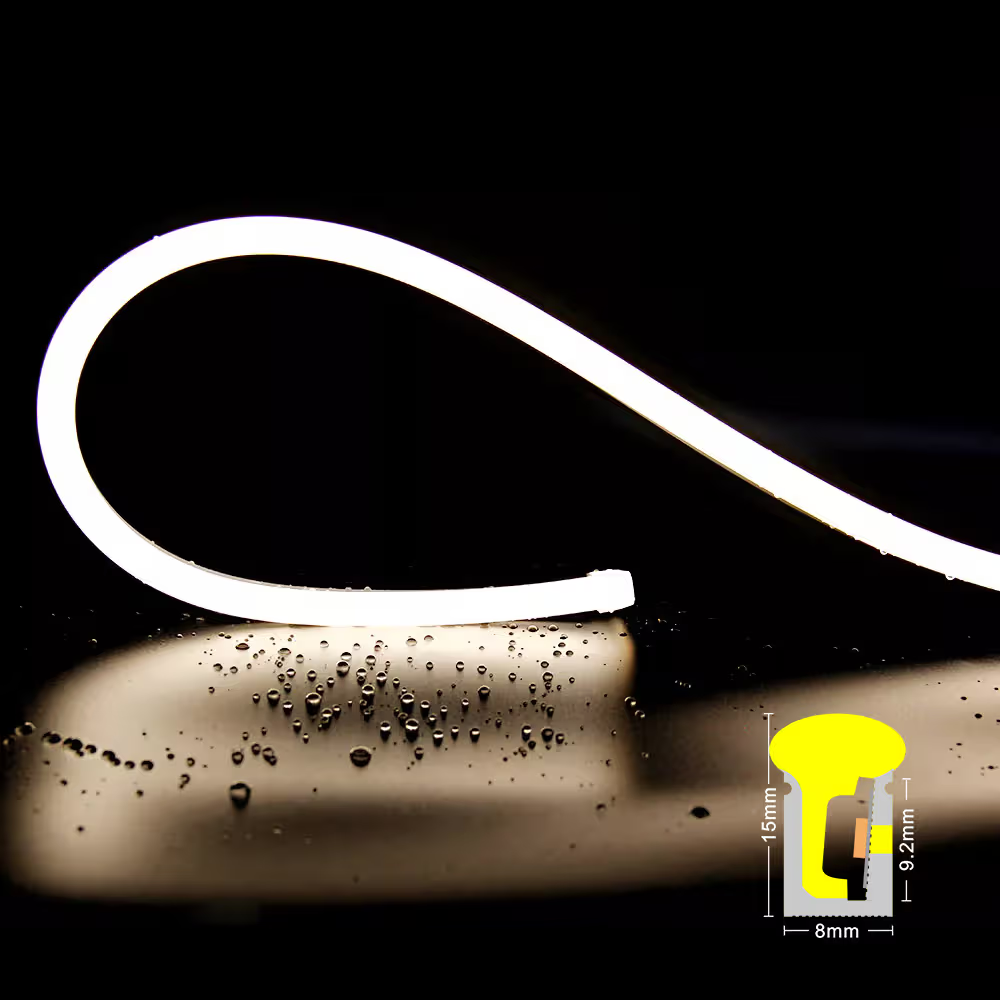
Side Bend S0815 Silicone LED Neon Flex Light
Common Installation Mistakes and How to Fix Them
Most outdoor LED neon sign failures are not product failures — they are installation failures. These are the nine most common ones.
- IP20 Connectors at Outdoor Junctions Water enters every unsealed splice point in the first wet season — sign flickers or sections die. → Fix: Replace with IP68 gel-filled or heat-shrink connectors at every outdoor junction.
- Driver in an Ungasketed Enclosure Condensation corrodes terminals from inside — usually within 6–12 months of installation. → Fix: Move to an IP65+ ABS enclosure with a rubber gasket lid and open drainage knockout.
- Cable Run Too Long at 12V Voltage drops over distance — visible dimming appears at the far end of the sign from day one. → Fix: Shorten the run or switch the full setup to a 24V driver and strip.
- Backboard Mounted Flush — No Standoffs No airflow behind the board means condensation stays trapped and hardware corrodes over months. → Fix: Reinstall with 20–25mm barrel standoffs and leave the bottom edge completely open.
- Non-GFCI Outdoor Outlet No ground fault protection in wet conditions — current leakage has no automatic cut-off. → Fix: Replace with a weather-rated GFCI outlet designed for outdoor use.
- Not Testing Before Mounting A loose terminal found after full installation means the sign comes back down again. → Fix: Run at ground level for 15–20 minutes before any mounting work begins.
- Bottom Backboard Edge Sealed With Silicone Blocks the only condensation drain — moisture pools permanently behind the acrylic. → Fix: Remove the lower seal. Only the top edge and cable entry points should be sealed.
- Standard Black PVC Conduit on Exposed Runs UV breaks down PVC outdoors — surface cracks appear within 2–3 years and wiring is left exposed. → Fix: Replace with UV-rated corrugated polypropylene conduit on every exposed run.
- Sign Powered From a Shared Extension Cord Sustained load on an unrated cord causes heat buildup at connectors or trips the circuit. → Fix: Dedicate a properly rated weather-protected outdoor outlet to the sign.
The 30,000-hour lifespan on a quality outdoor LED neon sign is only achievable if the installation underneath it holds. The LED strip rarely fails first — the driver enclosure, cable junctions, and drainage gaps do. Get those three right and the sign takes care of itself.
FAQ’s
Related Posts